
How To Install A Motorcycle Switch With A Battery Power Cable Without Rewiring Everything

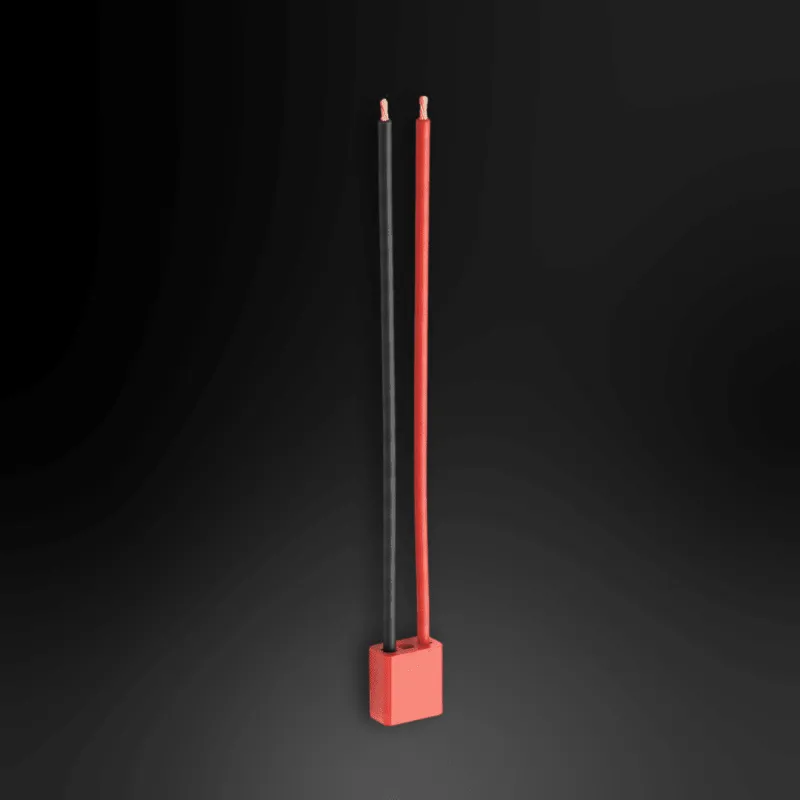
A Battery Power Cable lets you add a Motorcycle Switch without tearing into your whole harness, as long as you run a clean power feed from the battery to the accessory you actually want to control. For most riders, that means using a dedicated lead, an inline fuse near the battery, and careful routing instead of opening up every factory wire.
If you want the shortest path to a tidy install, start with the Battery Power Cable, plan where the switch will live, and only step up to a full harness if your bike already has damaged wiring. If you want current pricing or our store offer before you buy, check the latest price.
What you need before you start
A simple switched accessory install is mostly about having the right parts and not overcomplicating the job. The goal is to create one controlled power path, not rebuild the entire motorcycle electrical system.
You will usually want:
- A handlebar or panel-mounted Motorcycle Switch
- A dedicated Battery Power Cable for the power feed
- An inline fuse holder sized for the accessory you are powering
- Ring terminals that fit your battery posts
- Heat shrink or weather-resistant connectors
- Zip ties or loom for routing protection
- Basic hand tools and a multimeter
If the accessory sits far from the battery, a Motorcycle Extension Cable 6 Feet can save you from stretching a lead too tightly or routing it through a bad path. And if your current leads are brittle, corroded, or already hacked up, it may be smarter to grab the code and compare the extension option against a more complete repair.
For background on cable types and terminal styles, these references on Battery Terminal Charging Posts and Battery Cables & Pre-Assembled Cables are useful if you are matching ends or checking construction.
How a Battery Power Cable setup avoids full rewiring
The reason this works is simple. You are not replacing the bike's factory loom. You are adding one separate circuit that starts at the battery, passes through a fuse, runs to the switch, and then feeds the accessory.
That matters because many riders confuse an accessory add-on with a full electrical rebuild. A separate switched lead is much closer to adding one controlled branch than doing a complete battery terminal cables replacement or installing a full battery cable replacement kit.
In practice, the clean layout looks like this:
- Positive battery post to inline fuse
- Fuse to switch input
- Switch output to the accessory positive lead
- Accessory ground back to battery negative or a proven frame ground
This is also why generic advice about battery cables for car or battery cables positive and negative only partly applies. The core electrical idea is the same, but on a motorcycle you usually have tighter routing, more vibration, and less room to hide poor workmanship.
Step-by-step install for a clean switched power line
Start by disconnecting the battery negative terminal so you do not accidentally short anything while routing the new line.
1. Choose the switch location
Mount the switch where you can reach it with gloves on, but where it will not interfere with steering, throttle movement, or brake lines. A bad switch location creates more problems than the wiring itself.
2. Route power from the battery first
Run the positive lead from the battery toward the switch location. Keep it away from exhaust heat, sharp frame edges, and moving suspension parts. Leave enough slack for steering movement if the switch is bar-mounted.
3. Install the fuse close to the battery
This is the step riders skip most often. The fuse should protect the wire as early as possible, so place it near the battery, not near the accessory.
4. Connect the switch
Take the fused positive lead into the switch input terminal, then run a second lead from the switch output to your accessory. If the run is longer than expected, the Motorcycle Extension Cable 6 Feet is the cleaner solution than piecing together short scraps.
5. Make the ground solid
Your accessory still needs a good return path. Depending on the bike and accessory, that may be the battery negative terminal or a known clean chassis ground. This is where many intermittent issues start.
6. Protect and test
Before reconnecting the battery, cover exposed terminals, secure the wire with ties, and verify that the cable cannot rub during steering or vibration. Then reconnect the battery and test the switch with the engine off first.
If your existing wiring is already compromised, this is the point where a partial fix stops making sense. Instead of stacking repairs on old damage, compare it with the Vehicle Full Replacement Wiring Kit, and grab the code before you decide.
Extension cable or full wiring kit?
Most people do not need a total harness replacement just to add a switch. But some bikes clearly do. Here is the practical difference.
| Option | Best for | Not ideal when |
|---|---|---|
| Motorcycle Extension Cable 6 Feet | Your wiring is healthy but the accessory or switch sits farther from the battery than expected | The original wiring is cracked, corroded, or previously modified badly |
| Vehicle Full Replacement Wiring Kit | Multiple damaged sections, unreliable connections, or a bike with old electrical problems | You only need one new switched accessory circuit |
| Dedicated add-on lead with a switch | A clean install for lights, remotes, chargers, or a small add-on device | You are trying to power several high-draw accessories from one small branch |
If your only goal is to control one accessory, a separate switched line is usually faster, cleaner, and easier to troubleshoot later.
Wire size, routing, and protection matter more than brand names
A tidy install is less about fancy parts and more about matching the cable to the load and protecting it from the motorcycle environment.
Focus on these basics:
- Match wire thickness to the accessory draw and the run length
- Use terminals that fit the battery posts and switch tabs correctly
- Add strain relief near the switch and battery
- Protect the run with loom or wrap where it crosses brackets or frame tabs
- Keep the positive lead fused and isolated from abrasion
- Check for full left and right steering movement before final tightening
This is where some riders drift into overbuilding. You do not need to think in terms of full battery terminal cables replacement unless the existing system actually shows wear, heat damage, or corrosion. For a single accessory circuit, neat routing and proper protection usually matter more than replacing every original lead.
Who this setup suits, and when not to do it this way
This approach is best for riders who want to add one controlled accessory without cutting up the factory loom. It works especially well for small add-ons, basic remote power needs, and bikes where serviceability matters.
It is a good fit if:
- Your stock wiring is in decent condition
- You want a reversible install
- You need one simple on/off control
- You want easier troubleshooting later
It is not the right fit if:
- Your current harness has several failed sections
- You are chasing recurring charging or starting faults
- You are adding multiple accessories from one undersized feed
- Previous owners have already made unsafe splices everywhere
In those cases, a complete wiring refresh is often the more honest answer. If you are shopping parts now, check the latest price and compare the add-on route against the full-kit route based on the condition of your bike, not just the convenience of a quick install.
A separate switched circuit is the simplest way to add control without opening the whole harness. Use a proper fuse, route the cable carefully, and choose an extension or full replacement only when the bike's existing wiring condition truly calls for it.
Frequently asked questions
Can I install a Motorcycle Switch without cutting into the factory harness?
Yes. The cleanest method is to run a dedicated fused power lead from the battery to the switch and then to the accessory. That keeps the factory loom largely untouched and makes future troubleshooting easier.
When should I use the Battery Power Cable instead of a full wiring kit?
Use the dedicated cable when the bike's original wiring is still in good shape and you only need one switched accessory circuit. If the harness already has damaged, brittle, or unreliable sections, a full replacement kit may be the better long-term fix.
Do I need an inline fuse when adding a switch to the battery?
Yes. The fuse should sit close to the battery so it protects the wire run as early as possible. Skipping it leaves the new power lead exposed if the insulation gets damaged.
Is the Motorcycle Extension Cable 6 Feet better than splicing extra wire?
Usually, yes. A purpose-made extension helps you avoid stacked connectors, uneven splices, and awkward tension in the run. It is especially useful when the switch or accessory sits farther from the battery than planned.
Can this setup power more than one accessory?
It can, but only if the circuit, fuse, and wire size are chosen for the total load. For several accessories or a messy existing harness, it is often smarter to rethink the layout instead of feeding everything from one small switched line.