
Best Ways to Blend DELANCI 10-Color Palette for Beginners

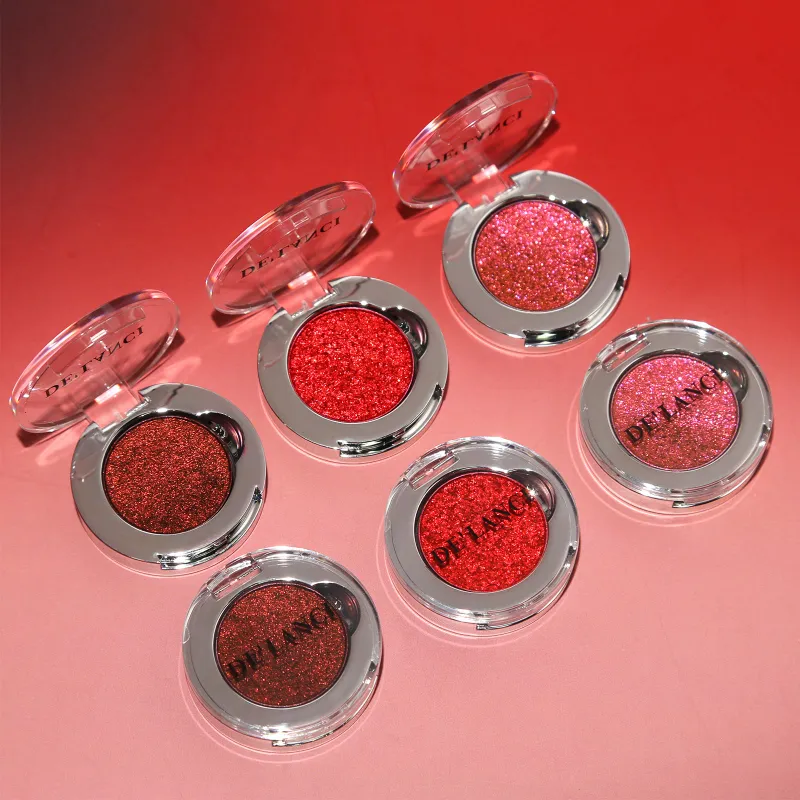
Why the Delance 10-Color Palette Is Perfect for Learning
The delance 10-Color palette delivers a balanced mix of mattes and shimmers that work together seamlessly, making it an ideal canvas for beginners. Its pigmentation is strong enough to show up on the lid without heavy application, and the powder texture remains forgiving during blending. We tested this palette over several weeks and found that the formula responds well to both synthetic and natural brushes, which removes much of the guesswork when you're still building your kit.
Most beginner palettes either skip essential transition shades or load up on glitter, but this one strikes a practical middle ground. You get warm neutrals, a few deeper tones for depth, and one or two accent shades to experiment with color placement.
Essential Brushes and Tools You Actually Need
You don't need a full brush roll to blend the delanci eyeshadow lineup effectively. Start with three core brushes:
- Fluffy blending brush – A dome-shaped brush with soft, slightly tapered bristles (around 10-12mm wide) works for diffusing edges and applying transition shades to the crease.
- Flat shader brush – A dense, flat paddle shape packs color onto the lid and mobile space with minimal fallout.
- Small pencil brush – A tapered, firm brush places darker shades along the lash line or outer V with precision.
We recommend synthetic brushes for shimmer shades because they pick up more product and lay it down evenly. Natural hair brushes work better for matte blending since they diffuse color without grabbing too much pigment at once. If you're starting from scratch, grab a midrange set from a beauty supply store and clean them after every few uses to maintain their shape.
One tool beginners often overlook is a clean, dry fluffy brush reserved solely for blending out edges. This "eraser" brush softens harsh lines without adding more color, and it's the fastest way to fix muddy transitions.
Step-by-Step Blending Technique That Works Every Time
Blending isn't about scrubbing color back and forth until it disappears. It's about layering shades in the right order and using the correct motion for each zone of the eye.
1. Prime and Set Your Base
Apply a thin layer of eyeshadow primer or concealer across the lid, then set it with a light neutral powder from the palette. This creates a smooth surface and prevents creasing, which makes blending ten times easier. Skip this step and you'll fight patchy color all day.
2. Start with a Transition Shade
Pick a matte shade that's one or two tones deeper than your skin tone. Using your fluffy blending brush, sweep it into the crease with small windshield-wiper motions. Keep the color above the crease fold and blend outward toward the brow bone. This shade acts as a buffer between your base and any darker colors you add later, so spend time building it up gradually rather than dumping pigment in one pass.
3. Add Depth to the Outer Corner
Choose a deeper matte shade (brown, plum, or charcoal depending on your look). Use your pencil brush to place it in the outer V, then blend inward toward the center of the crease with small circular motions. Tap off excess product before you touch the lid to avoid harsh lines. If the color looks too intense, grab your clean fluffy brush and feather the edges until the transition is smooth.
4. Pack Color on the Lid
Use your flat shader brush to press a shimmer or satin shade onto the center of the lid. Pat the color rather than swiping it to maximize payoff and minimize fallout. If you want more intensity, spritz your brush with setting spray before picking up the shadow, or apply it over a sticky base like concealer.
5. Highlight and Finish
Dab a light shimmer or matte highlight shade on the inner corner and just below the brow bone. Use your fingertip or a small brush for precise placement. Blend the edges with your fluffy brush so the highlight melts into the surrounding shades rather than sitting as a hard spot of light.
Check the latest price to see if our exclusive discount code is active before you stock up on brushes or backup palettes.
Common Mistakes That Create Muddy Color
Most blending problems stem from a few predictable errors, and once you know what to watch for, they're easy to avoid.
Using dirty brushes. Old shadow buildup mixes with fresh color and turns everything gray-brown. Clean your brushes weekly at minimum, and keep a dedicated brush for each shade family (warm, cool, dark) if you can.
Blending too late. If you let the shadow sit for several minutes before blending, the oils in the primer or your skin will set the pigment, making it harder to diffuse. Blend each shade immediately after application while the powder is still loose.
Layering in the wrong order. Always work from light to dark. If you apply a deep shade first and then try to blend a lighter transition shade over it, you'll drag dark pigment everywhere and lose definition. Build gradually and add depth only where you need it.
Skipping transition shades. Jumping straight from bare skin to a dark crease color creates a harsh line that's nearly impossible to soften later. Even a quick sweep of a neutral matte makes the next shade blend ten times easier.
The black and red eyeshadow palette from the same brand pairs well with the 10-color version if you want to experiment with bolder color combinations once you've nailed the basics.
How to Adjust Blending Techniques for Different Eye Shapes
Blending isn't one-size-fits-all. Your eye shape determines where you place color and how far you extend your blending.
| Eye Shape | Blending Adjustment |
|---|---|
| Hooded eyes | Focus transition shades above the hood so they show when the eye is open. Blend upward and outward rather than deep into the crease. |
| Deep-set eyes | Use lighter shades on the lid and keep darker tones minimal in the crease to bring the eye forward. Blend softly to avoid creating more shadow. |
| Protruding eyes | Apply deeper shades across the lid and crease to add dimension. Blend outward to elongate the eye rather than emphasizing roundness. |
| Almond eyes | Most techniques work as-is. You have room to blend vertically and horizontally without running into bone structure. |
If you're unsure which category you fall into, take a straight-on photo with your eyes open and relaxed, then compare it to reference images online. Once you know your shape, you can tweak your blending direction and shade placement to enhance your natural structure rather than fighting it.
Practice Drills to Build Muscle Memory
Blending is a motor skill, and like any skill, repetition builds confidence. Set aside ten minutes a few times a week to practice these drills without the pressure of a full look.
- Gradient drill – Pick three shades (light, medium, dark) and blend them in a smooth gradient across your arm or a blending mat. Focus on eliminating any visible lines between colors.
- Crease mapping – Apply a single transition shade to your crease, then blend it out completely. Repeat five times, trying to place the color in the exact same spot each time. This trains your hand to find the crease quickly and consistently.
- Layering test – Apply a light base shade, then layer progressively darker shades on top, blending after each addition. This teaches you how much pigment each layer adds and when to stop before the color turns muddy.
Grab the code before your next practice session if you want to pick up extra palettes or tools at a discount.
What to Do When Blending Goes Wrong
Even experienced users hit a snag mid-application. Here's how to rescue common blending disasters without starting over.
Patchy color. Spritz a clean brush with setting spray and gently tap it over the patchy area to reactivate the shadow. Then blend with a dry brush to smooth it out.
Too much pigment. Press translucent powder over the area with a damp sponge to lift excess color, then re-blend. You can also layer a lighter shade over the top to diffuse intensity.
Harsh edges. Use your clean fluffy brush and blend in small circles right at the edge where the color stops. Work outward in tiny increments rather than dragging the brush back and forth.
Fallout under the eyes. Place a piece of tape or a silicone shield under your eye before you start blending shimmer shades. If fallout already landed, sweep it away with a fan brush dipped in translucent powder rather than wiping it, which smears the pigment into your skin.
The more you practice with a consistent palette like the delance 10-Color, the faster you'll develop an intuitive sense for how much pressure, how many passes, and which brush delivers the result you want. Blending becomes automatic, and you'll spend less time fixing mistakes and more time experimenting with new combinations.
Frequently asked questions
What type of brush works best for blending the delance 10-Color palette?
A soft, dome-shaped fluffy brush with slightly tapered bristles (around 10-12mm wide) works best for blending matte transition shades, while a flat synthetic shader brush is ideal for packing shimmer shades onto the lid. Keep a clean, dry fluffy brush on hand solely for softening edges.
How do I prevent muddy eyeshadow when blending multiple colors?
Always layer colors from light to dark, blend each shade immediately after application, and use a clean brush for each new color family. Dirty brushes and skipping transition shades are the two most common causes of muddy blending.
Can I use the same blending technique for hooded eyes?
Not exactly. With hooded eyes, you should place transition shades above the hood and blend upward so the color is visible when your eyes are open. Focus less on blending deep into the crease and more on extending color outward and upward.
How often should I clean my eyeshadow brushes?
Clean your brushes at least once a week if you use them daily. Buildup from old shadow mixes with fresh color and creates muddy, unpredictable results. Spot-clean with a brush spray between deeper washes to keep bristles free of excess pigment.
What should I do if I apply too much eyeshadow?
Press translucent powder over the area with a damp sponge to lift excess pigment, then re-blend with a clean, dry brush. You can also layer a lighter neutral shade over the top to diffuse the intensity without removing everything.
Do I need primer before blending eyeshadow?
Yes. A thin layer of eyeshadow primer or concealer creates a smooth, even base that prevents creasing and helps shadow blend more easily. Set the primer with a light neutral powder before applying any color for the best results.