
Why Is My Sloosh Pool Lounger Deflating? Common Leaks and Fixes

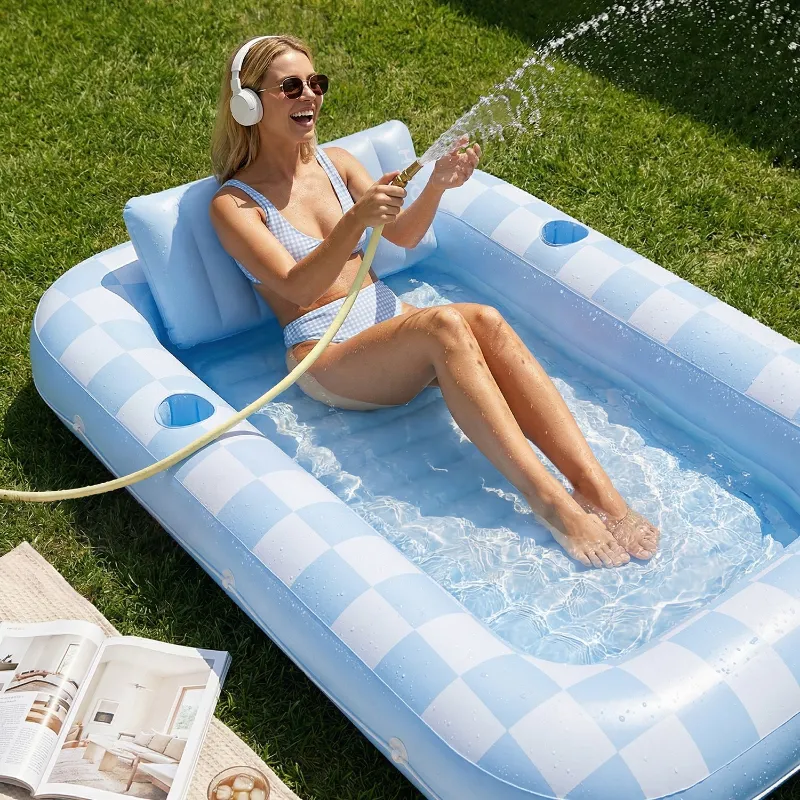
A tanning pool lounger usually deflates for one of three reasons: a real puncture, a loose or dirty air valve, or simple air pressure changes from heat and cooling water. Before you assume the worst, check the valve first, then run a soapy-water test over the seams. Most Sloosh lounger and tanning pool leaks are fixable at home in under 15 minutes with the patch kit that came in the box. Here is how to find the leak and fix it, plus how to prevent it from happening again.
Why Your Tanning Pool Lounger Looks Flat (Even When It Is Fine)
The most common "leak" is not a leak at all. Air expands in heat and contracts in cold, so a lounger pumped up firmly on a hot patio will feel soft once it sits in cool water for an hour. That is physics, not damage.
- Temperature drop: Water and evening air are cooler than the surface you inflated on. Top it up rather than hunting for a hole.
- Stretch on first use: New PVC relaxes and stretches the first few times it is inflated. Expect to add air on days one and two.
- Weight sag: A lounger supporting your body weight in water compresses air chambers. Some give is normal.
If your tanning pool lounger keeps losing firmness overnight on dry ground at a steady temperature, then you have a real leak worth finding.
Step 1: Check the Valve Before You Blame the Seam
Valve problems cause more slow deflation than punctures do.
- Press the valve inward and listen. A hiss you cannot stop means the one-way flap is stuck open or seated wrong.
- Look for grit, sand, or hair around the valve opening. Wipe it clean with a damp cloth and let it dry.
- Push the valve stem fully closed until it clicks or sits flush. A half-pressed stem leaks constantly.
- For screw valves, hand-tighten only. Overtightening cracks the housing.
If the valve area bubbles during the soapy test below, do not patch there. Reseat or replace the valve plug first.
Step 2: Find the Leak With Soapy Water
Mix a little dish soap with water in a spray bottle. Inflate the lounger firmly, then spray one section at a time.
- Bubbles growing from one spot mark the puncture. Circle it with a marker before it dries.
- Pay special attention to seams and the corners where panels meet. Seam leaks show as a line of tiny bubbles rather than one big cluster.
- For hard-to-spot slow leaks, press down on the lounger to push air out faster and watch for bubbling.
- A lounger submerged in a pool can work too: squeeze air through and watch for a stream of bubbles underwater.
Marking the spot is worth the extra ten seconds. Wet vinyl hides a leak the moment you stop looking at it.
Step 3: Patch It Right the First Time
Sloosh loungers, inflatable pool floats, and inflatable pool lounger models ship with a repair patch kit. Use it.
- Deflate fully and dry the area completely.
- Sand very lightly if your patch kit includes sandpaper. This helps adhesive grip.
- Cut the patch at least half an inch larger than the hole, with rounded corners. Square corners peel.
- Apply the adhesive or peel the backing, press the patch down hard from the center outward to push out air pockets.
- Wait the full cure time on the patch packaging before inflating. Rushing this is the number one reason patches fail.
- Reinflate and retest with soapy water.
For tiny pinholes, a drop of the kit adhesive under a small patch beats a big patch. Bigger is not better here.
Common Causes Compared
| Symptom | Likely cause | Fix |
|---|---|---|
| Soft after cooling, holds air overnight | Air contraction, not a leak | Top up air; no repair needed |
| Hiss at the valve, bubbles at valve base | Dirty or unseated valve stem | Clean and reseat the stem, tighten plug |
| Slow sink over hours, bubbles at a seam | Seam separation | Patch kit over the seam, full cure time |
| Fast deflation, visible hole | Puncture from deck, gravel, or pet claws | Patch kit, round the corners, full cure |
How to Prevent Future Leaks
Most punctures come from what is under and around the lounger, not from the lounger itself.
- Inflate on clean ground. Driveways and decks hide grit and nail heads. Grass or a mat is safer.
- Keep it off rough edges. Concrete pool coping, splintered wood, and pool cleaner hoses are the usual culprits.
- Rinse and dry before storing. Chlorine and sun slowly break down PVC. A quick rinse and full air-dry add seasons of life.
- Store loose, not compressed. Fold loosely in a cool, dry spot. Tight folding stresses seams into future leaks.
- Stay out of direct sun when not in use. UV is the silent killer of all inflatable tanning pool gear.
The same care applies across the whole lineup, from a sloosh inflatable tanning pool to a floating chair. Treated well, any of them lasts several summers.
When to Repair Versus Replace
Patch it if the hole is a single puncture on a flat panel. Consider replacing if you see seam splitting in multiple places, air leaking between chambers, or PVC that has gone brittle and faded from years of sun. At that point the material itself is failing, and a new patch will only hold for weeks.
If a replacement is on the table, check the current Sloosh price and grab the code before you buy. Sitewide savings can make upgrading to a bigger inflatable tanning pool or a two-person lounger cheaper than expected, and our Sloosh discount code page always lists the latest offer.
Quick Leak-Hunt Checklist
- Confirm it is not just cooling air: leave it overnight on dry ground.
- Inspect and reseat the valve.
- Spray soapy water section by section and mark the bubbles.
- Patch with the kit, rounded corners, full cure time.
- Retest, rinse, dry, and store away from sun.
Nine times out of ten, a "deflating" lounger comes back to a valve or a patchable pinhole. Work through the steps in order and you will be back on the water the same afternoon.
Frequently asked questions
How do I know if my tanning pool lounger has a real leak or is just losing air from the cold?
Leave it inflated overnight on dry ground at a steady room temperature. If it still feels soft in the morning, you have a real leak. If it only goes soft after sitting in cool water or evening air, it is normal air contraction and just needs a top-up.
Why does my Sloosh lounger deflate slowly even when I cannot find a hole?
Check the valve first. Grit in the valve or a half-pressed stem is the most common cause of slow deflation, and it is easier to fix than a puncture. Clean the valve, reseat the stem, and retest before hunting for holes.
How long should I wait after patching before I reinflate?
Wait for the full cure time listed on the patch packaging before inflating to full firmness. Most patches need several hours to bond properly, and inflating early is the main reason a patch peels off.
Can I patch a leak right next to the air valve?
No. Do not use the patch kit on or around the valve. If bubbles appear at the valve base, clean out any grit and make sure the stem is fully pressed closed and the plug is hand-tight. Valve leaks are fixed by reseating, not patching.
Does the Sloosh inflatable tanning pool come with a repair kit?
Sloosh loungers and tanning pools include a repair patch kit in the box. You will also want dish soap and water for finding the leak, a marker to circle it, and a clean dry cloth.
How can I stop my pool floats from getting punctures in the first place?
Inflate on clean ground away from grit and rough edges, rinse off chlorine after use, dry fully, and store loosely folded in a cool spot out of direct sun. Heat, UV, and abrasive surfaces cause nearly all preventable damage.