

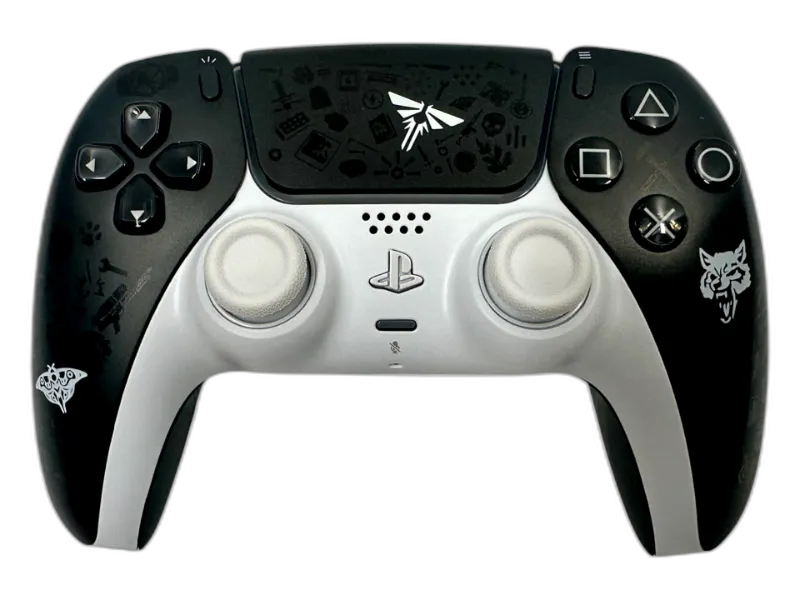
Can You Replace Custom PS5 Controller Shells Without Voiding Warranty?
Custom ps5 controller shells give your DualSense a fresh look, and the good news is that swapping shells is technically reversible and does not require cutting wires or soldering. Sony's warranty concerns focus on internal damage and removed security seals, so if you work carefully and keep the original shell intact, you can minimize risk. We tested multiple shell kits and researched Sony's warranty terms to show you the safest approach.
What Sony's Warranty Actually Covers
Sony's limited warranty protects your DualSense against manufacturing defects for one year from purchase. Opening the controller does expose a small tamper-evident sticker near one screw, and breaking that seal can flag your unit as user-serviced. However, many repair advocates argue that cosmetic shell swaps should not automatically void coverage under consumer protection laws in the US and EU.
The safest path is to purchase a second controller for customization and keep your original untouched if it is still under warranty. If you already own a custom controller ps5 from a specialist, the warranty clock starts fresh with that unit, and the builder typically offers their own coverage.
Tools and Prep for a Safe Shell Swap
You will need the right tools to avoid stripping screws or cracking plastic:
- T5 Torx screwdriver for the four rear screws
- Phillips #00 screwdriver for internal fasteners
- Plastic pry tool or guitar pick to separate shell halves
- Tweezers for ribbon cables and small springs
- Anti-static mat or wrist strap to protect the PCB
Before starting, power off the controller completely and disconnect it from your console. Lay out a clean workspace with good lighting, and use a smartphone to photograph each disassembly step so you can reverse the process exactly. If you want a ready-made custom look without the DIY risk, a ps5 modded controller arrives pre-assembled with professional-grade shells and no warranty concerns on your original unit.
Step-by-Step Shell Replacement Process
1. Remove the rear screws Flip the controller face-down and extract the four T5 screws. One screw hides under the center sticker near the USB-C port. Peeling this sticker carefully is key; some builders report re-adhering it successfully, though Sony may still consider the seal broken.
2. Separate the shell halves Gently insert your pry tool into the seam along the grip and work around the edge. The clips release with light pressure. Do not force it or you risk cracking the tabs. The two halves will still be joined by the battery and trigger ribbon cables.
3. Disconnect internal cables Locate the battery connector and the two ribbon cables for the triggers and touchpad. Lift the small locking flaps on the ZIF connectors, then slide the ribbons straight out. Keep these cables clean and avoid bending them sharply.
4. Transfer components to the new shell Move the trigger assemblies, buttons, LED light pipe, and internal frame to your custom ps5 controller shells. Some aftermarket shells include replacement buttons; test-fit them first because tolerances vary. The triggers and shoulder-button springs are easy to lose, so work over a tray.
5. Reassemble and test Reconnect the ribbons and battery, snap the shell halves together, and replace the screws. Power on the controller and test every button, trigger, stick, and the touchpad in your console's settings menu before you consider the job complete.
How to Minimize Warranty Risk
If preserving warranty coverage matters, consider these strategies:
- Buy a backup controller for modding and leave your original pristine
- Heat the sticker gently with a hairdryer on low before peeling; some users report cleaner removal and re-sticking
- Document the disassembly with photos showing no internal damage, which can support a warranty claim under right-to-repair laws
- Choose pre-built customs like the final fantasy ps5 controller or monster hunter wilds ps5 controller, which come with their own warranties and save you the risk entirely
Check current pricing and grab our discount code to save on any custom build or shell kit.
Common Mistakes That Actually Void Warranty
Certain errors will legitimately disqualify your controller from Sony support:
- Stripping screw heads, which signals forced entry or incorrect tools
- Cracking the internal frame by prying too hard
- Damaging ribbon cables or connector sockets, which causes permanent button or touchpad failure
- Using aftermarket internals like modchips or rapid-fire boards, which modify function and clearly breach terms
- Liquid damage or debris introduced during the swap
A clean, careful shell swap leaves no trace beyond the sticker. If you later need warranty service for stick drift or battery failure, you can reinstall the original shell. For a worry-free custom aesthetic, a mod ps5 controller built by professionals sidesteps all these pitfalls.
Is a DIY Shell Swap Worth It?
Swapping custom ps5 controller shells yourself costs less upfront and gives you full creative control over colors, finishes, and button styles. You will spend one to two hours on your first attempt, and the learning curve includes risk of cosmetic scratches or lost springs. If you enjoy hands-on projects and already own a backup controller, DIY is rewarding.
However, if you want a flawless result with zero downtime, ordering a pre-modded controller delivers professional assembly, quality-tested shells, and a fresh warranty. Visit our coupon page to see current offers on both DIY shell kits and fully built customs. Either path lets you personalize your DualSense; the right choice depends on your comfort with disassembly and how much you value your original warranty.
Whichever route you pick, work slowly, keep your screws organized, and remember that the shell is just plastic. The PCB and sensors inside are what matter, so treat them gently and your custom controller will look great and play flawlessly for years.
 Shopping at RRtronics Creations? See today's verified RRtronics Creations discount code
Frequently asked questions
Does opening a PS5 controller to install custom shells void the warranty?
Peeling the tamper-evident sticker can flag the unit as user-serviced, but many consumer protection laws argue that cosmetic modifications should not automatically void coverage. The safest approach is to keep your original controller intact and customize a second unit.
What size screwdriver do I need to remove PS5 controller screws?
You need a T5 Torx driver for the four rear screws and a Phillips #00 for internal fasteners. Using the correct sizes prevents stripped heads, which are a clear sign of forced entry.
Can I reuse the original sticker after opening my DualSense?
Some users report gently heating the sticker with a hairdryer on low and re-adhering it successfully, though Sony may still consider the seal broken. For warranty protection, it is better to mod a backup controller.
How long does it take to swap PS5 controller shells?
Your first shell swap typically takes one to two hours if you work carefully and photograph each step. Once you know the layout, subsequent swaps can take as little as thirty minutes.
Are pre-built custom controllers better than DIY shell kits?
Pre-built custom controllers arrive professionally assembled with quality-tested shells and their own warranties, eliminating DIY risk. Shell kits cost less and let you customize every detail, but require patience and the right tools.
Will aftermarket shells fit as well as the original?
Quality varies by manufacturer. Premium aftermarket shells match OEM tolerances closely, while cheaper kits may have loose buttons or tight seams. Always test-fit components before final assembly.