
How to Apply Ohora Nail Strips Without Bubbles or Lifting

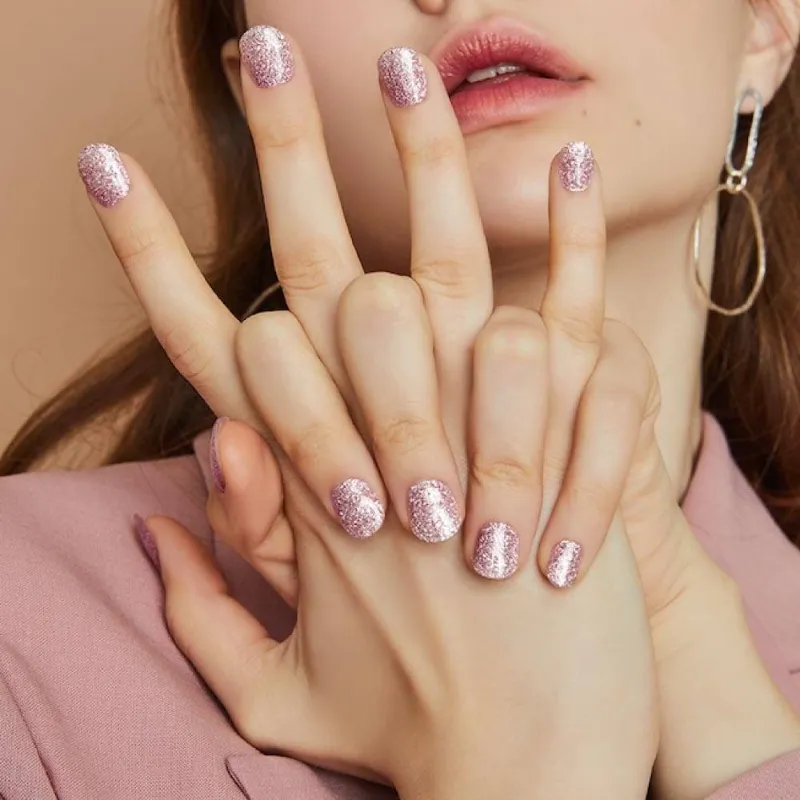
Ohora nail strips stay smooth and secure when you prep nails thoroughly, apply from cuticle to tip in one firm motion, and cure properly with a LED lamp. The semi-cured gel technology means you get salon-quality results at home, but only if you avoid the two most common mistakes: rushing the prep and trapping air during application.
We tested dozens of gel strip applications to identify the exact steps that prevent bubbles and lifting. The techniques below work whether you are new to ohora nails or troubleshooting a previous manicure that did not last.
Why Ohora Nail Strips Bubble or Lift
Bubbles form when air gets trapped between the strip and your nail plate during application. Lifting happens when oils, moisture, or debris prevent the adhesive from bonding properly. Both issues stem from three causes: skipping nail prep, using too much pressure too early, or under-curing the gel.
Natural nail oils are the biggest culprit. Even freshly washed hands leave a thin oil film that blocks adhesion. Dust from filing, lotion residue, and water trapped under the cuticle all create weak points where strips peel away within days.
The semi-cured gel in ohora strips needs heat and UV light to fully harden. If you skip the lamp or cure for less than the recommended time, the gel stays flexible and edges lift as you use your hands.
Nail Prep: The Non-Negotiable First Step
Proper prep takes five minutes and doubles wear time. Start by washing hands with dish soap (it cuts oil better than hand soap), then dry completely. Push back cuticles gently with a wood stick—do not cut them, as cuticle health affects nail strength.
Buff the nail surface lightly with a fine-grit buffer. You want to remove shine, not create grooves. This step is critical: smooth nails do not grip gel, but a lightly buffed surface creates texture for the adhesive to bond.
Wipe each nail with rubbing alcohol or the prep pad included in your kit. Let nails air-dry for 30 seconds. Do not touch them after this step—even a quick scratch transfers oil back to the nail.
Prep checklist:
- Wash with dish soap and dry thoroughly
- Push back cuticles without cutting
- Buff away shine with a fine buffer
- Wipe with alcohol and let dry completely
- Avoid touching nails until application
If you are working with ohora press on nails instead of strips, the same prep applies—adhesive tabs and glue both need clean, oil-free surfaces.
How to Apply Gel Strips Without Trapping Air
Peel the strip from its backing and hold it by the edges. Align the curved edge as close to your cuticle as possible without touching the skin—leave a hairline gap. This prevents lifting as your nail grows.
Press the cuticle edge down first with light pressure, then work toward the tip in one smooth motion. Do not press hard yet. Smooth from the center outward to guide air bubbles toward the sides, where they can escape.
Once the strip is positioned, press firmly from cuticle to tip using your thumb. Apply real pressure here—this is where the bond happens. If you see a bubble, lift the nearest edge slightly and re-smooth.
Fold the excess over your nail tip and file downward in one direction (sawing back and forth creates heat that weakens the gel). The strip should end flush with your nail edge.
Application sequence:
- Align strip at cuticle with a tiny gap
- Press cuticle edge lightly, then smooth to tip
- Push out air bubbles from center to sides
- Apply firm pressure over the entire nail
- Fold excess and file in one direction
We found that working one hand at a time prevents strips from warming up in your fingers, which makes them harder to position accurately. Check the latest price on full kits that include sizing guides for each finger.
Curing with a LED Lamp: Time and Technique
Ohora strips need a led nail lamp to fully cure. Standard UV lamps work but take longer. Cure each hand for 60 seconds under a LED lamp (or 120 seconds under UV). Do not cure individual nails—gel chemistry requires consistent exposure across all fingers simultaneously.
Position your hand flat inside the lamp so every nail receives direct light. Thumbs sometimes need a second 30-second cure if your lamp has a narrow opening. Under-cured gel feels tacky and peels within days, especially at the tips where nails flex most.
After curing, the gel may have a sticky residue (called the inhibition layer). Wipe it off with alcohol. This step is optional for wear time but makes nails feel smooth immediately.
Curing guidelines:
| Lamp Type | Cure Time | Notes |
|---|---|---|
| LED | 60 seconds | Recommended for semi-cured gel |
| UV | 120 seconds | Works but slower |
If you are also using traditional polish like cherry red nail polish or champagne nail polish for nail art over strips, cure the strips first, add polish, then cure again. The instructional guide on proper nail painting shows brush technique that prevents streaking.
Troubleshooting Common Application Problems
Bubbles that appear after curing: You trapped air during application. Next time, smooth more slowly from center to edges and press harder before curing.
Lifting at cuticles within 24 hours: Oil or moisture was present during prep, or you placed the strip too close to skin. Re-do prep with extra attention to the alcohol wipe, and leave a slightly larger gap at the cuticle.
Tips peeling after a few days: Under-cured or filed incorrectly. Cure for the full 60 seconds and file in one direction only. Wrapping the strip slightly under the nail tip (called capping) also helps.
Strips won't stick at all: Nails are too oily or damp. Wash again, buff more thoroughly, and wait longer after the alcohol wipe. Some users need a dedicated dehydrator product if they have naturally oily nails.
For additional application insights, this detailed ohora review covers real-world wear testing across different nail types.
Maintaining Your Gel Strip Manicure
Gel strips last 10 to 14 days with proper care. Wear gloves for wet work (dishes, cleaning) during the first 24 hours while the adhesive fully sets. After that, gloves are optional but extend wear time.
Apply cuticle oil daily. This seems counterintuitive, but hydrated cuticles do not push against the strip edge and cause lifting. Keep oil on the skin, not the gel surface.
If an edge starts to lift, do not peel it. Trim the loose section with nail scissors and file smooth, or grab the code for a fresh set. Peeling damages your natural nail plate.
Avoid acetone-based removers on other nails while wearing gel strips—the fumes can weaken the adhesive. When you are ready to remove strips, soak in acetone for 10 minutes, then gently push off with a wood stick.
Care tips:
- Wear gloves for wet work in the first 24 hours
- Apply cuticle oil daily to skin, not gel
- Trim lifted edges instead of peeling
- Remove with acetone soak after 10 to 14 days
Between manicures, some users apply a strengthener to prep for the next set, though ohora nail strips themselves do not require additional base products.
Who Should Use Gel Strips vs. Traditional Polish
Gel strips suit anyone who wants gel durability without the lamp time of traditional gel polish. We recommend them for people with active lifestyles, frequent travelers (no bottle spills), and anyone whose hands are in water often.
They work well on short to medium natural nails. Very long nails or extreme shapes may need custom sizing. If you prefer the look of press-ons with extra thickness, ohora press on nails offer more structure and length options.
Skip gel strips if you have active nail infections, severely damaged nail plates, or allergies to acrylates (the gel base). Traditional polish like deep cherry nail polish is a safer choice while nails heal.
Gel strips also appeal to users who want to avoid UV exposure entirely—though LED lamps emit minimal UV, those with photosensitivity may prefer standard polish that air-dries.
The technique above prevents almost all application issues when followed exactly. The difference between a manicure that lasts two days and one that lasts two weeks comes down to those first five minutes of prep and the patience to smooth each strip properly before curing with your gel lamp.
Frequently asked questions
How long do ohora nail strips last without lifting?
Properly applied ohora strips last 10 to 14 days without lifting. The key is thorough nail prep with alcohol and firm pressure during application to eliminate air pockets.
Can I use a regular UV lamp to cure gel nail strips?
Yes, but UV lamps require 120 seconds instead of the 60 seconds needed for LED lamps. LED lamps cure semi-cured gel more evenly and are recommended for best results.
What causes bubbles under gel strips after curing?
Bubbles form when air gets trapped during application. Smooth strips from center to edges slowly, and press firmly before curing to push air out the sides.
Do I need to buff my nails before applying gel strips?
Yes, light buffing removes the natural shine and creates texture for the adhesive to bond. Skip this step and strips will lift within days, especially at the tips.
Can I reuse ohora strips if I mess up the application?
No, once a strip touches your nail the adhesive begins bonding and cannot be reused. If you make a mistake, peel it off immediately and use a fresh strip.
How do I remove gel nail strips without damaging my nails?
Soak nails in pure acetone for 10 minutes until the gel softens, then gently push strips off with a wood stick. Never peel them off dry, as this removes layers of your natural nail.