

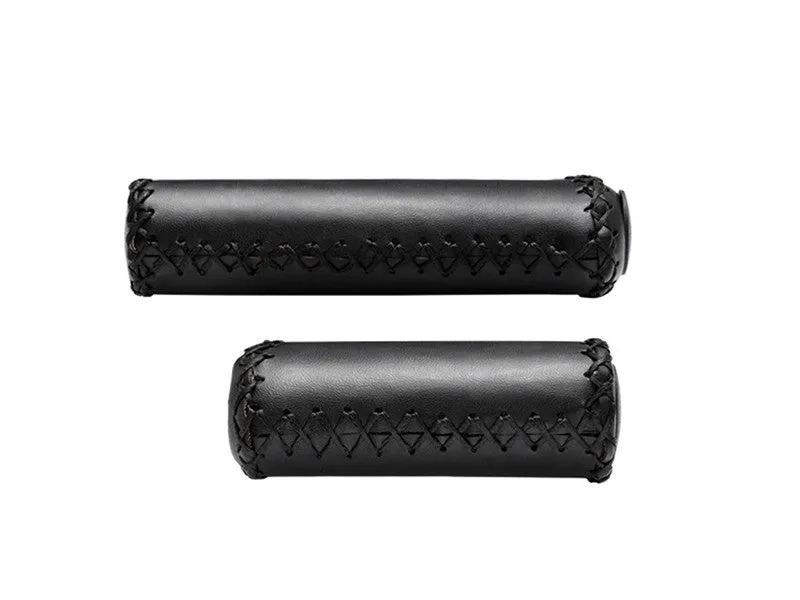
Handlebar grips are one of the few contact points between you and your Magicycle e-bike, so a sloppy install is never just a minor annoyance. Get it right the first time and you will have a secure, comfortable hold for thousands of kilometres. This guide walks you through every step, from pulling the old grips off to torquing the lock collar, so nothing slips or rotates under load.
Why Handlebar Grips Slip in the First Place
Slippage almost always comes down to one of three things: a dirty bar surface, the wrong installation method, or grips that are simply worn out. Understanding the root cause saves you from repeating the same mistake after a fresh install.
- Oil and dirt on the bar. Even a thin film of chain lube or hand cream acts as a lubricant and lets grips rotate freely.
- No lock-on collar tightened properly. Lock-on handlebar grips have an internal clamp ring. If the hex bolt is only finger-tight, the grip will walk outward on rough terrain.
- Stretching grips over a dry bar. Rubber grips need a brief assist to slide on, but if you use a permanent lubricant instead of a temporary one, they will never bond.
- Worn rubber. Rubber hardens and shrinks with age, breaking the friction seal against the bar.
What You Need Before You Start
Gather everything before you touch the bike. Stopping mid-install to hunt for tools is how grips end up half-on and permanently crooked.
- 3 mm and 4 mm hex keys (for lock collars and stem bolts)
- Isopropyl alcohol (90 % or higher) and clean rags
- Hair spray or rubbing alcohol as a temporary installation lubricant
- A pick or thin flathead screwdriver to lever off old grips
- The new Magicycle handlebar grips with their lock rings
If your grips arrived alongside a bike bell, install the bell clamp first so you can position both components without having to redo anything.
Step-by-Step Installation Guide
1. Remove the Old Grips
Loosen the lock-on collar bolts with a 3 mm hex key. Slide the collar off the end of the bar, then work the grip off with a gentle twisting motion. If it resists, insert a thin flathead screwdriver and puff a little compressed air inside to break the seal. Never cut a grip off unless it is completely destroyed, because you lose a useful reference for sizing the replacement.
2. Clean the Handlebar Thoroughly
Wipe the entire grip zone with isopropyl alcohol. Let it dry completely. Run your finger along the bar; if you feel any stickiness or see any residue, wipe again. A perfectly clean bar is the single biggest factor in a grip that stays put.
3. Apply a Temporary Lubricant
Spray a light coat of hairspray inside the new grip and on the bar end. Hairspray goes on wet (so the grip slides easily) and dries to a tacky film in roughly 30 seconds (so the grip locks in place). Do not use dish soap or WD-40 here; both stay slippery far too long.
4. Slide and Position
Push the grip onto the bar with a firm, single motion rather than a slow, hesitant one. Rotate it to your preferred angle before the hairspray sets. Magicycle grips often have an ergonomic wing, so align that wing so it supports your palm at the angle you naturally rest your hand.
5. Torque the Lock Collar
Slide the collar over the grip flange and thread the hex bolt finger-tight first to ensure it seats squarely. Then torque it to roughly 2 to 3 N·m, which is snug but not so tight that you strip the threads. Give the grip a firm twist and tug to confirm it does not rotate or pull outward.
6. Final Check
Squeeze the brake lever, apply full handlebar input, and simulate the torque a bump would create. If anything moves, loosen the collar, reposition, and re-torque. It is far better to find the problem in your driveway than on a trail descent.
Handlebar Grips Comfort and Fit: Choosing the Right Style
Not all grips suit every rider. Here is a quick comparison of the main types you will encounter:
| Type | Best For | Key Benefit | Watch Out For |
|---|---|---|---|
| Lock-on single clamp | General e-bike use | Easy install, secure | One clamp can let the outer end pivot |
| Lock-on dual clamp | Aggressive or trail riding | Maximum security | Slightly heavier |
| Ergonomic winged | Long-distance commuting | Reduces wrist fatigue | Position must be set precisely |
| Foam slide-on | Budget or casual use | Lightweight | No mechanical lock, relies on friction alone |
Magicycle's own handlebar grips fall into the ergonomic lock-on category, making them a good match for the longer rides that e-bikes encourage. If you are shopping for a broader upgrade at the same time, grab the discount code before you check out.
Pairing Your Grips With the Right Accessories
A grip install is a natural moment to audit everything else on your bars. A loose bike bell will rattle against a fresh grip and slowly abrade the rubber, so check that its collar clamp is fully torqued after you finish. If you are also managing tyre pressure on the same session, a portable electric pump makes it easy to dial in the exact PSI your Magicycle requires without hunting for a floor pump.
For riders who carry cargo or children, a trailer with wheels adds rear load that changes how much steering torque you apply, which is another reason a mechanically locked grip matters more than riders expect.
Keeping Grips in Good Shape Long Term
Good installation buys you a secure grip, but routine care keeps it that way.
- Wipe grips down with a damp cloth after muddy or sweaty rides; grit acts as sandpaper on rubber.
- Inspect the lock collar bolt quarterly and re-torque if it has backed off even slightly.
- Store your bike away from direct sunlight when possible. UV degrades rubber faster than almost anything else.
- Replace grips when the texture is visibly worn smooth or when the rubber feels hard and unyielding, regardless of how they look.
If you are picking up replacement grips along with other Magicycle Bikes accessories, check the latest discount to see the current offer before you add everything to your cart.
 Shopping at Magicycle Bikes? See today's verified Magicycle Bikes discount code
Frequently asked questions
Can I install Magicycle handlebar grips without hairspray?
Yes. Rubbing alcohol works as an alternative temporary lubricant because it evaporates quickly and leaves no slippery residue. Avoid dish soap or WD-40, which stay wet long enough to prevent the grip from ever bonding properly to the bar.
How tight should the lock collar bolt be on handlebar grips?
Aim for 2 to 3 N·m, which feels firmly snug by hand with a short hex key. Overtightening can crack the collar or strip the bolt threads, so stop as soon as you feel solid resistance and the grip no longer rotates under a firm twist.
How do I know when it is time to replace my grips?
Replace them when the surface texture is worn smooth, when the rubber feels hard or brittle, or when the grip rotates even after the collar bolt is fully torqued. Worn grips reduce control and increase hand fatigue, particularly on longer e-bike rides.
Will the Magicycle bike bell fit on the same bar section as the grips?
Yes, but install the bell clamp before you slide the grips on so you can set the final position of both without having to redo the grip install. Leave enough clearance between the bell collar and the grip flange so neither component is forced out of position.
Is there a Magicycle Bikes discount code for accessories like grips and pumps?
Magicycle Bikes does run discount offers that apply across their accessory range. Check the current code and savings amount on our Magicycle Bikes coupon page before you check out.
Do ergonomic handlebar grips really reduce wrist fatigue on e-bikes?
Ergonomic grips with a palm-support wing redistribute pressure away from the ulnar nerve, which is the main cause of numbness on longer rides. The benefit is most noticeable on rides over 30 minutes where your hands stay in a fixed position.