
What Is Nail Foil Transfer Gel and How Do You Use It?

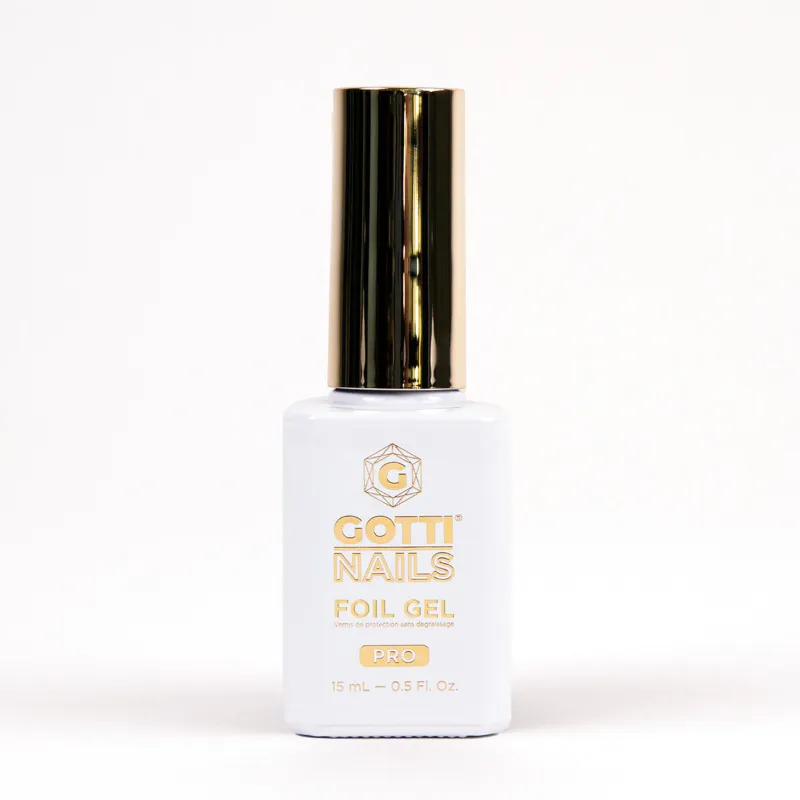
Nail foil transfer gel is a specialized adhesive layer that stays tacky after curing, allowing metallic foil sheets to bond to your nails for mirror-finish designs. Unlike regular gel polish that cures smooth, transfer gel creates the sticky surface foil needs to grab onto and release its color.
We've tested dozens of nail art methods, and foil transfer gel delivers some of the most dramatic results with minimal skill required. If you're ready to move beyond basic gel manicures and want that chrome or holographic look without the salon price tag, this guide walks you through exactly what transfer gel does, how to use it, and which products work best.
What Makes Nail Foil Transfer Gel Different
Transfer gel sits between your base color and the foil. Regular gel polish cures to a glossy or smooth finish under a UV or LED lamp, but nail foil transfer gel remains tacky even after curing. That sticky residue is intentional—it's what grips the foil and pulls the metallic layer off the backing sheet.
You'll also see it called nail foil transfer glue or foil adhesive. The formula is typically a clear or slightly milky gel that you apply in a thin, even layer. Once cured, you press foil onto the tacky surface, peel away the sheet, and seal everything with a top coat. The result is a flawless metallic or holographic finish that looks airbrushed.
Key differences from regular gel:
- Stays tacky post-cure instead of hardening smooth
- Designed specifically for foil adhesion
- Cures under UV/LED but retains grab
- Works with nail foil transfer sheets in any pattern or color
If you skip transfer gel and try pressing foil directly onto regular gel polish, you'll get patchy, incomplete coverage because there's no adhesive layer to hold it.
How to Use Nail Foils With Gel
Applying foil over transfer gel is straightforward once you understand the layering order. We recommend following this sequence for clean, long-lasting results.
Step-by-step application:
- Prep and base coat – Buff nails lightly, push back cuticles, apply a thin base coat, and cure.
- Apply your color – Use gel polish in your chosen shade (we love cotton candy gel polish or beach babe nude as foil bases), cure completely.
- Apply transfer gel – Brush a thin, even layer of transfer gel foil over the area where you want foil, cure under your lamp for the time specified (usually 30–60 seconds).
- Press the foil – Place the foil sheet matte-side up over the tacky gel, press firmly with your finger or a silicone tool, then peel away quickly in one smooth motion.
- Seal with top coat – Apply a no-wipe top coat (or wipe the inhibition layer first if your top coat requires it) and cure. For a flat, modern finish, try a matte top coat for nails.
The tacky layer loses its grab over time, so work nail by nail or in small batches. If the surface dries out, you can apply another thin layer of transfer gel and cure again. For more detailed techniques, this step-by-step guide covers advanced patterns and troubleshooting.
Best Nail Foil Transfer Gel and Alternatives
Not all transfer gels perform equally. We've found that consistency and cure time matter—thick, gloopy formulas create uneven foil transfer, while overly thin gels don't stay tacky long enough.
Gotti Nails offers a reliable nail foil transfer gel that works with both UV and LED lamps and maintains tackiness for several minutes after curing, giving you plenty of working time. You can grab the code for 10% off your order if you're stocking up on supplies.
Transfer gel alternatives:
- Base coat (some brands) – A few base coats leave a tacky inhibition layer, but results are inconsistent and the foil rarely transfers fully.
- Nail glue – Traditional nail glue works in a pinch for small accent nails, but it dries fast and won't integrate into your gel system, leading to peeling.
- DIY mixtures – Mixing clear gel with other products is unreliable and can cause lifting or allergic reactions.
We don't recommend substitutes if you want professional results. Purpose-made transfer gel is inexpensive, lasts dozens of manicures, and ensures the foil actually sticks where you want it.
Pairing Transfer Gel With Gel Strips and Top Coats
Transfer gel works beautifully over both traditional gel polish and gel nail strips. If you're using strips like cat green eyes, green cats eye, or gotti john gotti, you can apply transfer gel over the cured strip, press foil into just the tips or accent areas, and create custom hybrid looks.
Combining products for unique finishes:
| Base Layer | Transfer Gel Use | Final Top Coat |
|---|---|---|
| Solid gel polish | Full-nail foil | Glossy or matte nail top coat |
| Gel nail strips | Accent foil (tips, half-moon) | Glossy for contrast |
| Nude or sheer base | Foil stamping or stencil | Top coat matte gel for texture |
A matte finish over metallic foil creates a brushed-metal effect that's especially striking on bold designs like leah gotti naked strips with foil details. Glossy top coats amplify the mirror shine but can sometimes dull holographic foils, so test your combination first.
Troubleshooting Common Transfer Gel Issues
Even with the right products, foil application can go sideways. Here's how we fix the most common problems.
Foil won't stick:
- Transfer gel wasn't fully cured—add 10–15 seconds under the lamp
- Surface contamination from oils or lotion—cleanse nails with alcohol before starting
- Foil pressed matte-side down—always place the colored side against your nail, not the shiny backing
Patchy or incomplete transfer:
- Transfer gel applied too thick—use a thin, even coat
- Not enough pressure when pressing foil—use firm, consistent pressure across the entire nail
- Foil sheet lifted too slowly—peel in one quick, confident motion
Foil peels off after top coat:
- Top coat applied too thick, flooding edges—cap the free edge and avoid pooling
- Didn't cure transfer gel long enough—follow manufacturer times exactly
- Used a peel-off or incompatible top coat—stick to traditional cure top coats
If you're still troubleshooting or want to compare current prices on transfer gel and accessories, check the latest deals before you order.
Who Should Use Nail Foil Transfer Gel
Transfer gel suits anyone comfortable with basic gel application who wants to add metallic or holographic accents without airbrushing, stamping plates, or hand-painting. It's especially useful for:
- DIY enthusiasts who want salon-level chrome nails at home
- Gel strip users looking to customize pre-made designs like cotton candy gel nail polish strips with foil details
- Nail artists creating ombré foil fades, geometric patterns, or negative-space designs
- Anyone short on time—foil application takes seconds per nail once you've practiced the press-and-peel motion
You don't need advanced skills, but you do need patience for prep work. Clean, properly buffed nails and thin, even gel layers make the difference between a flawless mirror finish and a patchy mess. If you already cure gel polish at home and own a UV or LED lamp, adding transfer gel to your kit unlocks dozens of new design possibilities with minimal investment.
Frequently asked questions
Can I use regular gel polish instead of nail foil transfer gel?
No. Regular gel polish cures to a smooth or glossy finish without the tacky adhesive layer foil needs to bond. Transfer gel is specifically formulated to stay sticky after curing so the foil can grab and release its metallic layer onto your nail.
How long does foil stay on nails with transfer gel?
When sealed properly with a gel top coat, foil applied over transfer gel lasts as long as your gel manicure—typically two to three weeks. Make sure to cap the free edge and avoid flooding the cuticle area to prevent lifting.
Do I need special foil sheets for transfer gel?
You need nail foil transfer sheets designed for nails, which have a thin metallic layer that releases from the backing when pressed onto tacky transfer gel. Craft or kitchen foil won't work because it lacks the adhesive-reactive coating.
Can I apply foil over gel nail strips?
Yes. Cure your gel nail strips completely, then apply a thin layer of transfer gel over the area where you want foil, cure again, press the foil, and seal with a top coat. This technique works great for accent tips or geometric patterns.
What's the difference between transfer gel and nail foil glue?
Transfer gel is a UV- or LED-cured gel that integrates into your gel manicure system and stays flexible. Nail foil glue is typically an air-dry adhesive that works with regular polish but can be brittle and doesn't bond as well in a gel system.
Why does my foil look patchy after I apply it?
Patchy foil usually means your transfer gel layer was too thick, wasn't fully cured, or you didn't press the foil firmly enough. Apply transfer gel in a thin, even coat, cure for the full recommended time, and use consistent pressure across the entire nail when pressing the foil sheet.