
How to Set Up the Sihoo Doro C300 Pro V2 for Lower Back Pain Relief

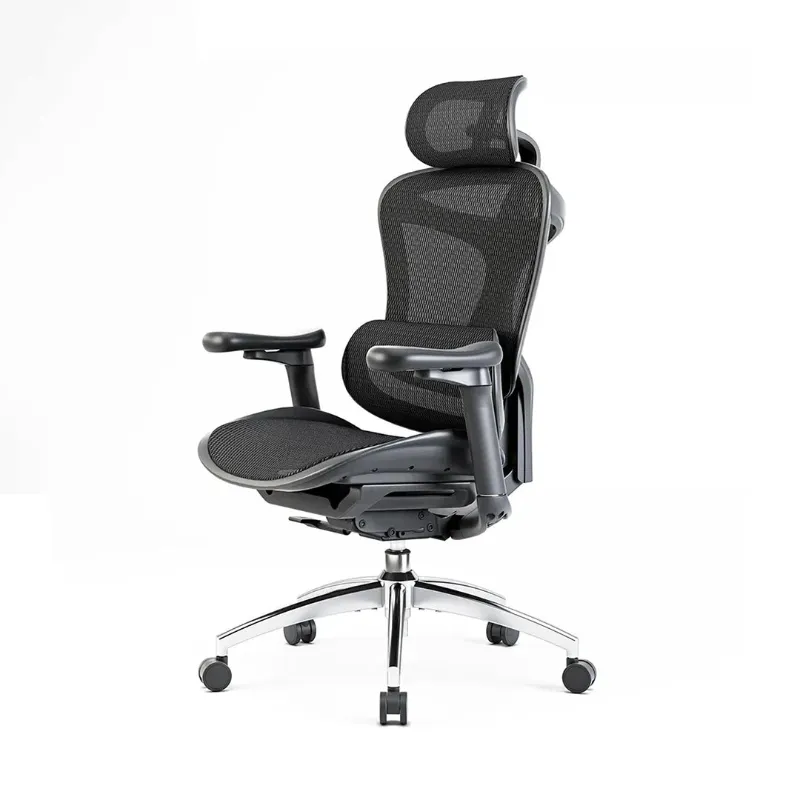
# How to Set Up the Sihoo Doro C300 Pro V2 for Lower Back Pain Relief
If you spend eight or more hours a day at a desk, your chair is probably the single biggest factor in whether your lower back feels fine at 5 p.m. — or whether you're hobbling away from your computer like you're 30 years older than you are. The sihoo doro c300 pro v2 is one of the most talked-about ergonomic chairs in the mid-premium range right now, and the good news is that it's packed with adjustability. The bad news? Out of the box, almost none of it is configured for *your* body.
This guide walks you through a complete, step-by-step setup of the sihoo doro c300 pro v2 so it actually delivers lower back pain relief — not just a nicer-looking seat. If you haven't bought one yet, you can check the current office chair for lower back pain listing or grab the current 6% off sitewide deal on our Sihoo discount code page.
Why the C300 Pro V2 Is Good for Lower Back Pain (and Why Setup Matters)
The C300 Pro V2's headline feature is its dynamic lumbar support system — a flexible lumbar zone that tracks your back as you move and recline, instead of sitting there like a plastic bump. Reviewers have highlighted exactly this: the Sihoo Doro C300 Pro V2 Ergonomic Office Chair review calls it a rare combination of adjustability and value, and the Sihoo Doro C300 and C300 Pro V2 office chair reviews praise it as genuinely affordable ergonomics rather than a spec sheet with a price tag.
But here's the thing — a dynamic lumbar system only works if it's positioned at the right height and pressure for *your* spine. Most back pain complaints with ergonomic chairs come down to a 10-minute setup that was skipped. Let's fix that.
Step 1: Set Your Seat Height First
Sit down with your feet flat on the floor. Adjust the gas lift until:
- Your thighs are roughly parallel to the floor
- Your knees are at about a 90–100° angle
- Your feet rest fully flat (no tiptoeing, no dangling)
If you're on the shorter side and your feet don't reach the floor even at the lowest setting, use a footrest — the sihoo doro c300 pro v2 with footrest configuration is a popular pick for exactly this reason. Floating feet pull your pelvis out of neutral and transfer strain straight into your lumbar discs.
Step 2: Position the Dynamic Lumbar Support
This is the most important step for lower back pain relief.
- Sit all the way back in the seat so your pelvis touches the backrest.
- Locate the lumbar adjustment on the back of the chair.
- Slide the lumbar support up or down until the pad presses into the natural curve of your lower back — roughly at belt-buckle height or slightly above.
- Fine-tune the depth/support level. You want firm contact, not a shove. If you feel pressure pushing you forward, dial it back one notch.
A common mistake: setting the lumbar pad too high. That pushes into your mid-back and actually flattens your natural lumbar curve. If the support feels like it's in your ribcage, it's too high.
Step 3: Adjust the Backrest Recline and Tension
The C300 Pro V2 reclines smoothly with the backrest. For lower back pain:
- Start with a slight recline of about 100–110° — research consistently shows a small recline unloads spinal discs compared to bolt-upright sitting.
- Set the recline tension so that leaning back requires light effort, not a wrestling match.
- If your model supports it, enable the dynamic/follow mode so the backrest moves with you rather than locking you in one static position — static postures are a major contributor to back stiffness.
If you like the "laid-back" feel, a desk chair zero gravity style recline position can be great for breaks. Some users even pair their C300 Pro V2 with a dedicated zero gravity desk chair for reading and recovery time — but for active work, keep the recline modest.
Step 4: Set the Armrests
Adjust the 4D or 5D armrests so:
- Your elbows rest at roughly 90–100°
- Your shoulders stay relaxed and down — no shrugging
- Your forearms are supported while typing, not while slouching
Shoulder tension and lower back pain are more connected than most people realize. Rounded, raised shoulders pull your upper spine forward, and your lower back compensates. If you find the headrest useful for leaning back during calls or breaks, note that a desk chair with headrest setup like this one lets you rest your neck without losing lumbar contact.
Step 5: Calibrate Your Sitting Posture
With the chair dialed in:
- Sit fully back — your pelvis against the backrest, not perched on the seat edge
- Keep your screen at eye level so your head stacks over your shoulders
- Take a 2–3 minute stand-up break every 30–45 minutes
No chair, however good, replaces movement. The C300 Pro V2's dynamic support is designed to encourage micro-movement — let it.
Sihoo Doro C300 Pro V2 vs V1: Does the Upgrade Matter for Back Pain?
If you're comparing the sihoo doro c300 pro v2 vs v1, the V2's refinements — softer yet more supportive materials, smoother recline mechanics, and improved lumbar tuning — do meaningfully help anyone buying specifically for back pain. The Sihoo C300 Pro V2 Review—The Most Ergonomic Chair I' ... goes deep on the comfort differences if you want the full breakdown.
Price, Manual, and Where to Buy
- Sihoo doro c300 pro v2 price: It typically lands well below the big-name ergonomic flagships while matching much of their adjustability. Our Sihoo discount code page currently has 6% OFF sitewide.
- Sihoo doro c300 pro v2 manual: The printed quick-start guide covers assembly; the full manual is available on Sihoo's support site if you lose it. Assembly takes about 20–30 minutes.
- Sihoo doro c300 pro v2 amazon vs. direct: Amazon shipping is fast, but buying direct often pairs better with coupon codes and warranty support.
- Sihoo doro c300 pro v2 reddit: Threads on r/OfficeChairs and r/Ergonomics are largely positive, with the recurring theme being that setup quality determines satisfaction — which is exactly why you're reading this guide.
Quick Setup Checklist
- [ ] Seat height: thighs parallel to floor, feet flat
- [ ] Lumbar: at belt-buckle height, firm but not forceful contact
- [ ] Recline: 100–110° with dynamic/follow mode on
- [ ] Armrests: elbows at 90–100°, shoulders relaxed
- [ ] Monitor at eye level
- [ ] Stand up every 30–45 minutes
Get these five adjustments right and the sihoo doro c300 pro v2 goes from "nice chair" to an actual tool for lower back pain relief. Your spine will thank you by Friday afternoon.
Frequently asked questions
How do I adjust the lumbar support on the Sihoo Doro C300 Pro V2?
For lower back pain, position the lumbar pad at roughly belt-buckle height so it presses into the natural curve of your lower back. Set the support level to firm contact without pushing you forward, and sit fully back so your pelvis touches the backrest.
What recline angle is best for lower back pain?
A slight recline of about 100–110° with dynamic/follow mode enabled is ideal. This unloads pressure on your spinal discs compared to sitting bolt upright and encourages healthy micro-movement throughout the day.
Where can I find the Sihoo Doro C300 Pro V2 manual and reviews?
Check the manual on Sihoo's support site or read reviews on Neowin, Tech Advisor, and Insider Gaming, which cover the V2's lumbar system, build quality, and comfort upgrades over the V1.
Do I need a footrest with the C300 Pro V2?
Your feet should rest flat on the floor with knees at about 90–100°. If they don't reach at the lowest seat height, use a footrest — the footrest configuration of the C300 Pro V2 is a popular choice for shorter users.
Is there a discount code for the Sihoo Doro C300 Pro V2?
Our Sihoo discount code page currently has 6% OFF sitewide, which applies to the C300 Pro V2 and other Sihoo products.