
How to Stop Heel Pain in High Heels: Silicone Heel Cups vs. Gel Insoles

Why Gel Insoles for High Heels and Silicone Heel Cups Work
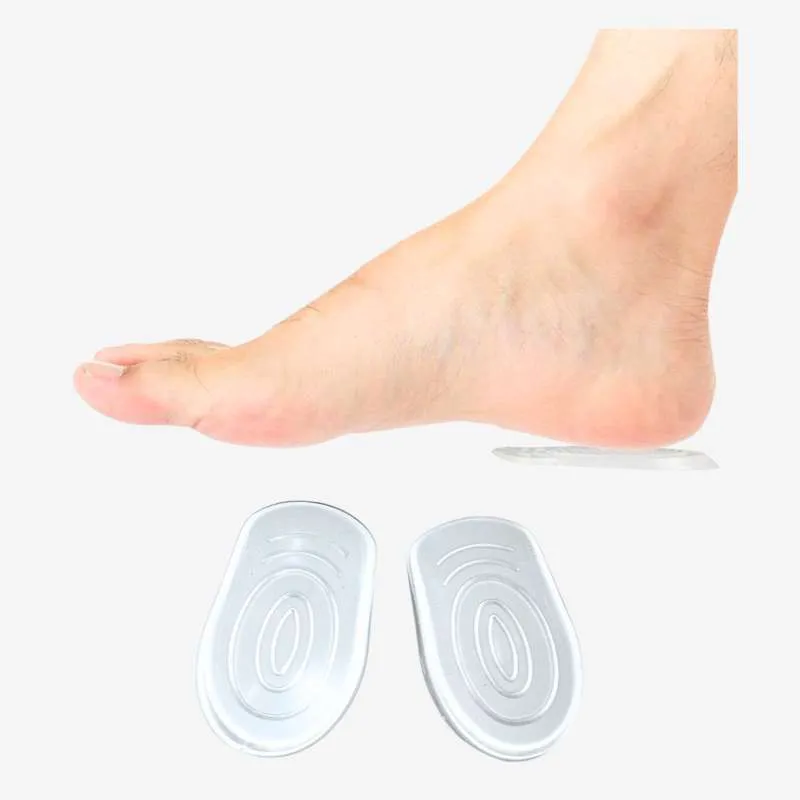
Gel insoles for high heels cushion the ball of your foot where pressure peaks, while silicone heel cups cradle your heel to prevent slipping and blisters. Both reduce pain, but they target different pressure points. If your metatarsals ache after an hour in pumps, gel insoles redistribute weight forward. If your heels rub raw or feel unstable, a heel cup grips the back of your shoe and absorbs shock.
We tested both across stilettos, block heels, and platforms to see which delivers lasting relief without adding bulk. Below, we break down materials, fit, and when to layer both for all-day comfort.
How Gel Insoles for High Heels Relieve Ball-of-Foot Pain
The best gel insoles for high heels sit under the metatarsal heads — the bony ridge behind your toes — where your body weight concentrates in heels above three inches. Medical-grade gel spreads pressure across a wider surface, so no single spot bears the load. Look for a teardrop or pad shape that tucks under the ball without creeping forward into the toe box.
Key features that matter:
- Thickness: 3–5 mm gel layers cushion without lifting your foot out of the shoe
- Adhesive backing: keeps the insert in place through a full day; repositionable adhesive lets you move it if the first placement feels off
- Beveled edges: thin borders prevent that "lump under the foot" feeling and blend into the shoe's contour
Weight-shifting insoles for high heels use a denser gel at the ball and softer gel at the arch, guiding your foot into a more neutral position. This design works especially well in pumps with a steep pitch. Check the latest price and grab our code to save 10% on orders.
When Silicone Heel Cups Outperform Gel Insoles
Silicone heel cups solve a different problem: heel slippage, rubbing, and the shock that travels up your Achilles with every step. A well-designed silicon heel pad wraps the back and sides of your heel like a second skin, raising your foot just enough to lock it into the heel counter. This prevents blisters and the forward slide that jams your toes.
When to choose a heel cup over a gel insole:
- Your heel lifts out of the shoe when you walk
- You develop blisters along the Achilles or back of the ankle
- The shoe fits everywhere except the heel (common in mules and slingbacks)
- You want shock absorption without adding bulk to the forefoot
Silicone stays grippy against both skin and leather, and medical-grade versions resist flattening for months. If you need inserts for heels that disappear under stockings or bare feet, silicone heel cups deliver invisible support. Pair them with padded heel socks for double protection during break-in periods.
Comparing Materials: Gel vs. Silicone vs. Foam
| Material | Best For | Durability | Washability |
|---|---|---|---|
| Medical-grade gel | Ball-of-foot cushioning, pressure redistribution | 6–9 months with daily wear | Wipe with damp cloth; air-dry |
| Silicone | Heel grip, blister prevention, shock absorption | 9–12 months; resists compression | Hand-wash with mild soap; dries fast |
| Memory foam | Arch support in lower heels (under 3 inches) | 3–6 months; flattens quickly in stilettos | Not washable; replace when compressed |
Gel and silicone both outperform foam in high heels because they don't compress under concentrated weight. Foam works in sneakers and flats where pressure spreads evenly, but in a stiletto the entire load falls on a tiny surface. We've seen foam inserts flatten in two weeks of daily wear, while gel and silicone maintain their cushioning for months.
For broader foot care products, brands now offer hybrid designs that combine a gel forefoot pad with a silicone heel cup in one seamless insert. These all-in-one options suit closed-toe pumps where you want head-to-toe relief without layering multiple pieces.
How to Layer Heel Cups and Gel Insoles for Maximum Comfort
If your heels cause pain in both the ball and heel, layering a gel insole with a silicone heel cup gives you targeted relief at every pressure point. Start with the heel cup first — it sits deepest in the shoe and anchors your foot. Then place the gel pad under the ball, making sure the two don't overlap or create a ridge.
Step-by-step layering:
- Clean the shoe's insole with rubbing alcohol to remove oils
- Press the silicone heel cup into the back, aligning the top edge just below the shoe's heel counter
- Place the gel insole under the metatarsal heads, about one inch behind where your toes start
- Walk for five minutes to check for bunching or sliding; reposition if needed
This combination works best in pumps and ankle-strap heels with a closed toe and at least a half-inch of depth. Open-toe sandals and mules rarely have room for both, so choose the insert that addresses your primary pain point. Visit our discount page to see current offers on full feet care products Heel Cup bundles.
Who Should Choose Gel Insoles vs. Heel Cups
Choose gel insoles for high heels if:
- Pain radiates across the ball of your foot after 30 minutes in heels
- You wear heels three inches or higher regularly
- Your toes feel numb or tingly by midday
- You need relief that works in peep-toes and sandals (visible heel cups show)
Choose silicone heel cups if:
- Your heel slips out when you walk, even in well-fitted shoes
- Blisters form along the Achilles or back of the ankle
- You have narrow heels and standard shoes gap at the back
- You want shock absorption without bulk under the toes
Layer both if:
- You stand or walk in heels for more than four hours straight
- Previous single inserts only solved half the problem
- You're breaking in new designer heels with steep arches and firm soles
According to podiatrists who study heel pain, targeted cushioning at the exact pressure point outperforms full-length insoles in high heels because it preserves the shoe's intended fit and doesn't crowd the toe box.
Sizing and Fit: What to Check Before You Buy
Most gel insoles and silicone heel cups come in S/M/L sizing based on shoe size, but thickness matters more than length. A 5 mm gel pad feels plush in a roomy pump but overstuffs a narrow stiletto. Measure the depth of your shoe's insole from the footbed to the top edge — you need at least 6 mm of clearance to add a gel insert without your foot spilling over.
Quick fit test:
- Slide your hand inside the shoe and press down where the ball of your foot lands; if your knuckles hit the top of the shoe, the insert is too thick
- Heel cups should raise your heel no more than 8 mm, or your ankle alignment shifts and creates new strain
- Adhesive-backed inserts hold better than non-adhesive, but they must be repositionable for the first placement
Padded socks offer an alternative if your shoes are already snug and won't accommodate inserts. These have built-in gel or foam at the ball and heel, adding cushioning without taking up shoe space. For dressier looks, lace socks or white lace socks pair cushioning with a feminine edge that shows just above the shoe line.
Caring for Your Inserts to Extend Their Life
Gel and silicone attract dust and oils, which degrade adhesive and reduce grip. Wipe gel insoles for high heels weekly with a damp microfiber cloth and let them air-dry for an hour before reinserting. Silicone heel cups can be hand-washed with dish soap and water every two weeks — scrub gently to preserve the adhesive layer.
Maintenance tips:
- Store inserts in their original plastic case or a clean zip bag to prevent dust buildup
- Replace adhesive-backed gel pads every six months, or when they no longer stick after cleaning
- Rotate between two pairs if you wear heels daily, so each set fully dries between uses
- Avoid leaving inserts in direct sunlight or hot cars; heat breaks down gel and silicone faster
When the cushioning compresses to half its original thickness or the silicone loses its grip, it's time to replace. Worn inserts shift underfoot and create new pressure points, defeating their purpose. Grab our 10% discount code to stock up on replacements before your current set wears out.
Final Verdict: Which Insert Fits Your Heel Pain
Gel insoles for high heels deliver unmatched cushioning for metatarsal pain and work invisibly in open-toe styles, while silicone heel cups stop slippage and blisters in closed-back shoes. If you experience both issues, layering the two gives you head-to-toe relief without compromising fit. Test each in your most-worn heels for a full day before committing to multiples — comfort is personal, and what works in a block heel may feel different in a stiletto.
Frequently asked questions
Can I use gel insoles for high heels in open-toe shoes?
Yes, most gel insoles for high heels are thin and clear, so they stay hidden under the ball of your foot even in peep-toes and sandals. Choose adhesive-backed pads to prevent shifting.
Do silicone heel cups work in mules and slingbacks?
Silicone heel cups excel in mules and slingbacks because they grip your heel and prevent the forward slide that jams your toes. Look for low-profile designs that don't show above the shoe line.
How long do gel insoles and silicone heel cups last?
Gel insoles typically last six to nine months with daily wear, while silicone heel cups can go nine to twelve months before losing their cushioning or grip. Replace them when they compress to half their original thickness.
Can I layer a gel insole with a silicone heel cup?
Yes, layering works well in pumps with enough depth. Place the silicone heel cup first, then add the gel insole under the ball of your foot. Make sure they don't overlap or create a ridge.
Are padded socks better than inserts for tight-fitting heels?
Padded socks add cushioning without taking up shoe space, making them ideal for snug heels that can't accommodate inserts. They're also easier to swap between multiple pairs of shoes.
What's the difference between gel and silicone for heel pain?
Gel cushions and redistributes pressure, making it best for ball-of-foot pain. Silicone grips and absorbs shock, making it ideal for heel slippage and Achilles protection. Choose based on where your pain concentrates.