
How to Assemble the Lori Whitlock Mini Mailbox Paper Craft Template

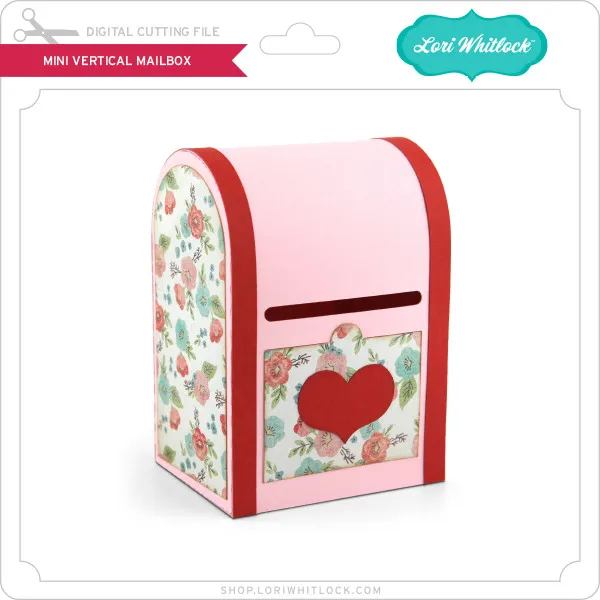
The mini mailbox paper craft template assembles in under 15 minutes with basic cutting tools and adhesive, creating a charming holder for cards, treats, or small gifts. We tested this Lori Whitlock design alongside other box templates like the candy box 2 and frog box, and found the mailbox shape offers the most versatile presentation for weddings, parties, and everyday crafting.
What You Need to Assemble a Mini Mailbox for Crafts
Before you start, gather your materials. The template works with cardstock weight between 65 lb and 110 lb, though we recommend 80 lb for the best balance of sturdiness and ease of folding. You will also need a cutting machine compatible with SVG files (Cricut, Silhouette, or similar), a scoring tool or bone folder, and strong adhesive such as tacky glue or double-sided tape.
The mini mailbox for cards design includes pre-marked score lines and a flag detail that adds authentic charm. If you are checking the latest pricing, note that Lori Whitlock currently offers 10% off all orders, which applies to this template and complementary designs like the mini notebook and lace border die cut.
Step-by-Step Assembly Instructions
1. Cut and score the template
Load your cardstock into your cutting machine and import the SVG file. Set your machine to cut the outer lines and score the fold lines. After cutting, remove the piece from the mat and gently separate any small tabs or details. The mailbox flag should remain attached at the hinge point.
2. Fold along all score lines
Use a bone folder or the edge of a ruler to crease each scored line firmly. Fold the base flaps inward first, then work your way up the sides. The front panel with the arched opening folds last. Proper scoring prevents cracking and gives your mini mailbox diy project a professional finish.
3. Assemble the base
Apply adhesive to the bottom tabs and press them together to form the mailbox floor. Hold for 10 to 15 seconds until the glue sets. This base supports the weight of cards or small treats, so ensure a tight bond. If you are making multiple mailboxes for a wedding or event, assembly-line this step to save time.
4. Attach the sides and back
Fold up the side panels and secure them to the back panel using adhesive on the tabs. The mailbox should now have a three-dimensional shape with an open front. Check that all corners align before the glue dries.
5. Secure the arched front and flag
Fold the arched front panel down and glue the small tabs on either side to the interior walls. The flag attaches at the side and pivots on the scored hinge. You can leave it as-is or add a small brad or eyelet for extra movement.
Mini Mailbox for Wedding Cards and Party Favors
The mini mailbox for wedding cards has become a popular alternative to traditional favor boxes because guests immediately recognize the shape and know to tuck a card or note inside. We have seen crafters personalize the design with names, dates, or monograms using vinyl or printed overlays.
For parties, fill the mailbox with wrapped candies, small toys, or gift cards. The rainbow birdie pairs well with spring or birthday themes, while the frog box works for kids' events. If you need a simpler box shape, the candy box 2 template assembles even faster and holds more volume.
Physical mini mailboxes like these tinplate versions offer a sturdier option for reuse, but paper craft templates give you unlimited color and pattern choices at a fraction of the cost.
Customization Tips for Mini Mailbox Business and Bulk Orders
If you are running a mini mailbox business or fulfilling bulk orders, batch your workflow by cutting all pieces at once, then scoring, folding, and gluing in stages. Template designs like this one scale well because the SVG file nests efficiently on 12x12 cardstock sheets.
For professional results, use patterned cardstock on the exterior and solid color on the interior, or reverse the colors for contrast when the mailbox opens. Add a lace border die cut around the arched opening for a vintage or shabby-chic look.
We also tested adhesive options across dozens of boxes. Hot glue works fastest but can show strings and bumps. Liquid tacky glue gives the cleanest finish, while double-sided tape offers the most control for beginners. Whichever you choose, grab the code to save on your template purchase and stock up on coordinating designs.
Troubleshooting Common Assembly Issues
Cardstock cracking at folds: Your paper is too thick or you skipped the scoring step. Reduce cardstock weight to 80 lb or score more firmly before folding.
Weak base or collapsing sides: Insufficient adhesive or pressing time. Use a stronger glue and hold each joint for at least 15 seconds. Consider adding a second strip of tape inside the base for reinforcement.
Flag won't pivot: The score line was cut instead of scored, or the cardstock is too thick. Check your machine settings and run a test cut on scrap paper. For a fixed flag, simply glue it in the raised position.
Misaligned panels: Fold and crease all score lines before applying any adhesive. Dry-fit the box first to identify problem areas, then glue one section at a time.
Pairing the Mini Mailbox With Other Lori Whitlock Templates
The mini mailbox works beautifully as part of a coordinated gift set. Pair it with the mini notebook for a stationery bundle, or use the best ass paper craft for humorous party favors alongside the mailbox as a gift card holder.
For holiday themes, the trick or treat smell my feet design complements Halloween mailboxes filled with candy, while seasonal cardstock turns the same template into a Christmas card box similar to these tin versions.
Template collecting becomes addictive once you see how quickly projects come together. Most Lori Whitlock designs share the same construction logic, so your skills transfer from one project to the next. After mastering this mini mailbox, the frog box and candy box 2 take half the time.
Frequently asked questions
How long does it take to assemble the mini mailbox template?
Assembly takes 10 to 15 minutes per mailbox once you have cut and scored the template. Batch-processing multiple mailboxes by completing each step across all pieces at once cuts the per-unit time in half.
What cardstock weight works best for mini mailbox crafts?
We recommend 80 lb cardstock for the best balance of sturdiness and easy folding. You can use 65 lb for lightweight projects or 110 lb for extra durability, but thicker stock requires firmer scoring to prevent cracking.
Can I use the mini mailbox for wedding cards?
Yes, the mini mailbox is ideal for wedding card holders at each place setting or as a card box alternative at the gift table. Personalize with names, dates, or colors that match your theme.
Do I need a cutting machine to make the Lori Whitlock mini mailbox?
A cutting machine like Cricut or Silhouette makes the process faster and more precise, but you can print the template and hand-cut it with scissors or a craft knife if you score the fold lines carefully.
What adhesive works best for paper mailbox assembly?
Liquid tacky glue gives the cleanest finish and strongest bond. Double-sided tape offers more control for beginners, while hot glue works fastest but may leave visible strings.
Can I make the mailbox larger or smaller?
Yes, scale the SVG file in your cutting software to any size. Keep proportions locked to maintain the mailbox shape, and test with scrap cardstock first to ensure tabs still align properly.