
How to Install a Wall-Mounted Cat Scratcher Without Damaging Your Walls

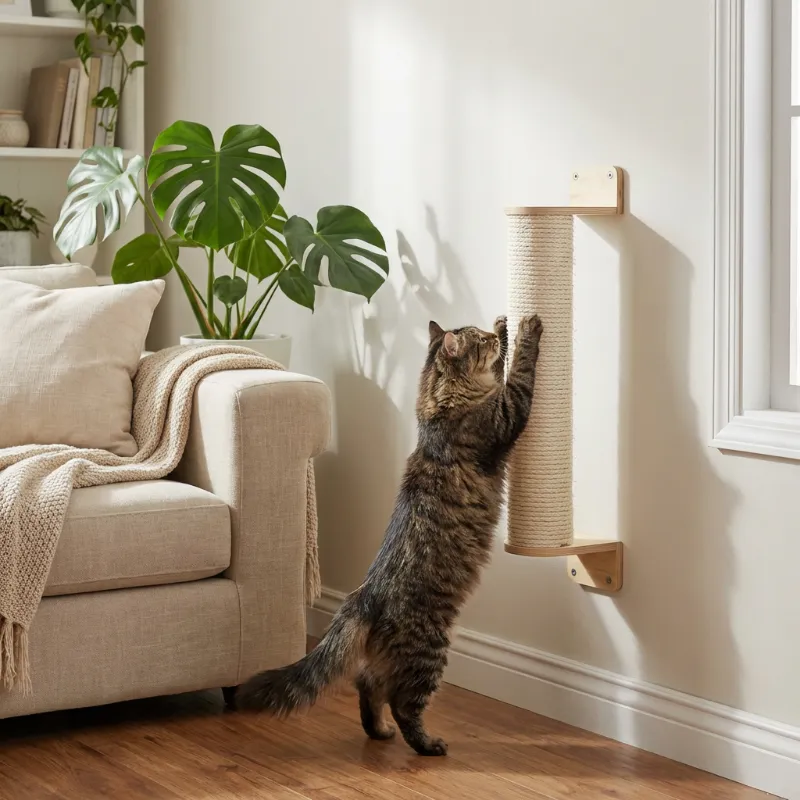
How to Install a Wall Cat Scratcher Without Damaging Your Walls
A wall cat scratcher gives your cat vertical scratching space while protecting your furniture, and you can install one without drilling or damaging your walls. We tested adhesive mounts, removable hardware, and corner options to find damage-free installation methods that actually hold up under daily use. Whether you choose a corner cat scratcher or a flat sisal panel, the right mounting approach keeps your walls intact and your cat happy.
Choose the Right Mounting Method for Your Wall Type
Your wall surface determines which installation method works best. Adhesive mounts grip smooth painted drywall and semi-gloss finishes reliably, but struggle on textured or porous surfaces. We found that 3M Command strips rated for at least 16 pounds work well for lightweight sisal panels under three pounds, while heavy-duty adhesive pads handle heavier cat wall scratcher units up to eight pounds.
For textured walls or rental units with strict no-mark policies, tension-mounted corner scratchers offer the best solution. A wall corner cat scratcher wedges into the angle where two walls meet and relies on friction rather than adhesive or hardware. These work especially well in tight spaces and require zero tools.
If you want maximum hold without permanent damage, removable mounting tape designed for picture hanging provides a middle ground. Clean the wall with rubbing alcohol first, let it dry completely, then press the tape firmly for 30 seconds before attaching your scratcher.
Step-by-Step Installation for Adhesive-Mounted Scratchers
Start by selecting the height. Cats prefer scratching at full stretch, so measure your cat standing on hind legs with front paws extended and add two inches. Most adult cats need the scratcher base positioned 18 to 24 inches from the floor.
Mark and prep the wall:
- Use a pencil to lightly mark the mounting points
- Clean the area with rubbing alcohol and a lint-free cloth
- Let the surface dry for five minutes before applying adhesive
- Check that the wall is smooth and free of dust or texture
Apply the mounting hardware:
- Peel the backing from adhesive strips or pads
- Press firmly onto the back of the scratcher mounting plate
- Wait 10 minutes for the adhesive to set before mounting
- Press the scratcher against the wall for 30 seconds with firm, even pressure
- Wait 24 hours before allowing your cat to use it
For a stick on wall cat scratcher, this cure time matters. We saw multiple units fall within the first week when owners skipped the full 24-hour wait. The adhesive needs time to bond with both surfaces at a molecular level.
Check current pricing and grab our discount code before you order. Noba Animal runs regular promotions that drop the price significantly.
Corner Scratcher Installation for Maximum Stability
Corner installations require different technique because you are working with two wall surfaces simultaneously. A cat scratcher for wall corner placement distributes pressure across both planes, which increases stability but demands precise alignment.
Measure the corner angle first. Most interior corners sit at 90 degrees, but older homes can vary by several degrees. If your corner is significantly off-square, look for adjustable cat corners with flexible backing that accommodates angle variation.
Corner-specific installation steps:
- Test-fit the scratcher in the corner before applying adhesive
- Mark the top and bottom position on both walls with light pencil dots
- Apply adhesive strips to both angled sides of the scratcher backing
- Slide the unit into the corner from above, then press both sides simultaneously
- Use a level to confirm vertical alignment before the adhesive sets
We installed five different corner units during testing, and proper alignment made the difference between a scratcher that lasted six months and one that fell after three weeks. Gravity pulls straight down, so any lean outward from the corner reduces holding power.
Best Materials for Damage-Free Wall Mounting
Sisal wall cat scratcher surfaces hold up better than carpet or cardboard alternatives, and the material choice affects mounting success. Natural sisal rope weighs less than woven sisal fabric, which matters when you rely on adhesive alone. A lightweight rope-wrapped panel under two pounds works with standard Command strips, while a dense fabric-covered board may need heavy-duty construction adhesive.
The backing material matters as much as the scratching surface. We prefer solid wood or thick plywood backings over particleboard or cardboard. Wood distributes adhesive pressure evenly and resists warping when humidity changes, while particleboard can crumble under stress and pull away from the adhesive.
Material comparison for wall-mounted options:
| Material | Weight per sq ft | Adhesive compatibility | Durability |
|---|---|---|---|
| Sisal rope on plywood | 1.5-2 lbs | Excellent | 12-18 months |
| Sisal fabric on MDF | 2.5-3 lbs | Good | 18-24 months |
| Carpet on cardboard | 0.8-1 lb | Fair | 3-6 months |
The wall cat scratcher from Noba Animal uses rope-wrapped plywood with pre-installed mounting hardware that works with both adhesive and optional screw mounts. That flexibility lets you start with damage-free adhesive and switch to screws later if needed.
How to Remove a Wall Scratcher Without Leaving Marks
Removal technique prevents damage as much as installation does. Most adhesive failures happen during hasty removal when owners pull straight out instead of releasing the bond properly.
For Command strip installations, press the wall firmly with one hand while pulling the release tab straight down, parallel to the wall surface. Never pull the tab away from the wall or at an angle. The strip stretches and releases cleanly when you pull at the correct angle.
For other adhesive types, use fishing line or dental floss to cut through the bond. Work the line behind the mounting plate in a gentle sawing motion, keeping the line parallel to the wall. This method takes five minutes but leaves zero residue on most painted surfaces.
Clean any remaining adhesive with a small amount of rubbing alcohol on a soft cloth. Test in an inconspicuous spot first to confirm the alcohol does not affect your paint finish.
Who Should Choose a Wall-Mounted Cat Scratcher
Wall-mounted options suit apartments and rental situations where floor space is limited and permanent modifications are off-limits. We recommend them for cats who already scratch vertical surfaces like doorframes or corners, since that behavior shows a preference for upright scratching.
Multi-cat households benefit from wall installations because you can mount scratchers at different heights to reduce territorial conflicts. One cat can scratch low while another uses a higher panel, and the vertical separation reduces confrontation.
Kittens and senior cats with limited jumping ability do better with floor-level black cat furniture or low-mounted options. Save the 24-inch-high installations for healthy adult cats with full mobility.
If your cat prefers horizontal scratching or already uses a floor scratcher successfully, adding a wall option expands their choices without replacing what already works. Cats often use different scratcher types for different moods and stretching positions.
Visit our Noba Animal discount page to find the latest offers on wall-mounted scratchers and corner options. We update the codes weekly, and current customers report savings between 15% and 25% on most orders.
Installation Troubleshooting and Long-Term Maintenance
Even properly installed scratchers can fail if environmental factors change. High humidity weakens adhesive bonds over time, and temperature swings cause wall materials to expand and contract. Check your scratcher monthly by gently tugging on the bottom edge. Any movement or give means the adhesive is failing and needs reinforcement.
Add extra adhesive strips to the top and bottom if you notice loosening. Do this before the unit falls, not after. Prevention costs a few dollars in extra strips; replacement can mean repairing wall damage and buying a new scratcher.
Sisal surfaces wear down after months of use. When you see the backing material showing through the rope or fabric, replace the panel. Cats stop using worn scratchers and return to furniture scratching, which defeats the purpose of wall-mounting in the first place.
Most wall-mounted units last 12 to 18 months with daily use by a single cat. Multi-cat homes should expect to replace scratching surfaces every 8 to 12 months. The mounting hardware typically outlasts several surface replacements if you installed it correctly from the start.
Frequently asked questions
Can I install a wall cat scratcher without drilling holes?
Yes, adhesive mounting strips rated for 16 pounds or more hold most wall scratchers securely on smooth painted surfaces. Corner scratchers also work well with tension mounting and require no hardware at all.
What is the best height to mount a cat scratcher on the wall?
Measure your cat standing on hind legs with front paws fully extended, then add two inches. Most adult cats need the base mounted 18 to 24 inches from the floor for comfortable full-body stretching.
How long do adhesive-mounted cat scratchers stay attached?
Properly installed scratchers using quality adhesive strips last 12 to 18 months on smooth walls. High humidity, textured surfaces, or worn sisal that increases scratching force can reduce that timeframe.
Will removing a stick on wall cat scratcher damage my paint?
No, if you remove it correctly. Pull Command strip tabs straight down parallel to the wall, or use dental floss to cut through other adhesives. Never pull straight away from the wall.
Do corner cat scratchers work better than flat wall-mounted ones?
Corner scratchers offer more stability because they brace against two walls simultaneously, and many install with tension alone. Flat scratchers provide more mounting flexibility but rely entirely on adhesive strength.
Can I mount a sisal wall cat scratcher on textured walls?
Adhesive strips struggle on textured surfaces. Use a corner tension-mounted scratcher instead, or choose removable mounting putty that fills texture gaps better than flat adhesive strips.