

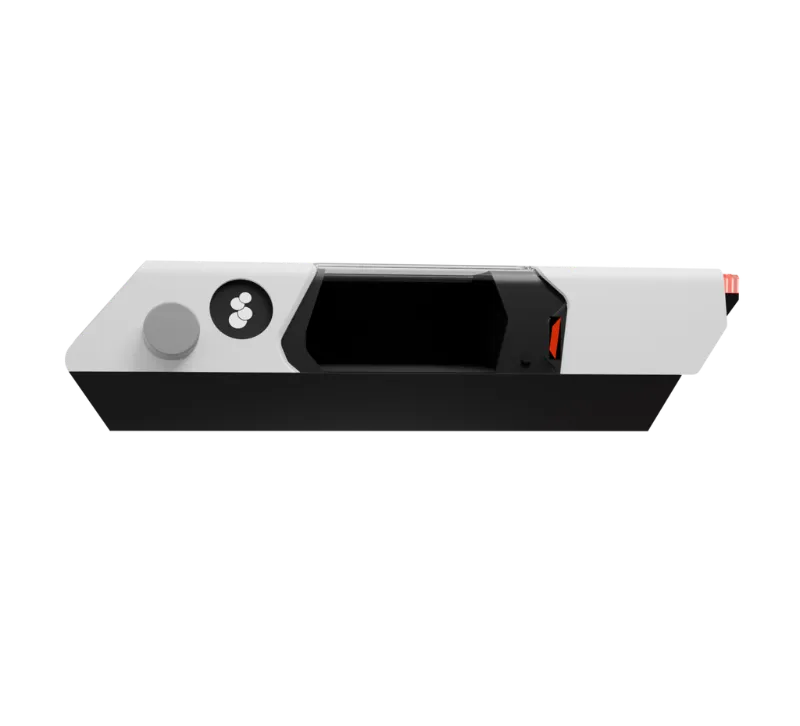
# How to Set Up and Use a Desktop Wind Tunnel for Product Testing
A desktop wind tunnel sounds like something reserved for university labs and aerospace engineers, but compact, affordable units have changed that completely. Today, product designers, engineers, students, and hobbyists can run real aerodynamic tests right on their desk — no lab, no booking, no six-figure budget. If you've been curious about testing airflow, visualizing turbulence, or validating a design before prototyping at scale, this guide walks you through everything you need to know, from unboxing your first desktop wind tunnel to running repeatable, meaningful tests.
---
What Is a Desktop Wind Tunnel?
A desktop wind tunnel is a miniature version of the testing tunnels used in professional aerodynamics. It's a enclosed channel with a fan that pushes controlled airflow past a test section, where you place scale models — drone frames, car bodies, bike components, RC aircraft, or even 3D-printed prototypes. Sensors or smoke visualization let you observe:
- Drag and lift characteristics of a model
- Airflow separation and turbulence zones
- How design tweaks affect aerodynamic performance
- Smoke or fog streamlines for visual flow analysis
Devices like the windsible desktop wind tunnel have made this technology genuinely desk-sized, with built-in airflow control and observation windows that make testing both practical and surprisingly fun to watch.
> Quick tip: A desktop unit won't match the precision of a full-scale lab tunnel, but for comparative testing — "does design A outperform design B?" — it's remarkably effective.
---
Why Set One Up at Your Desk?
Whether you're a solo inventor, an engineering student, a drone racer, or a content creator documenting experiments, a compact desktop windtunnel earns its place on your desk by:
- Shortening the design loop — test an idea in minutes instead of waiting for external testing facilities.
- Saving money on prototypes — catch aerodynamic flaws before spending on production runs.
- Providing visual proof — smoke flow tests make for compelling demo videos and presentations.
- Teaching aerodynamics hands-on — nothing beats watching airflow in real time.
And because modern setups integrate neatly with a tech-heavy workspace — pairing naturally with multiport charging stations to power your sensors, cameras, and accessories — the wind tunnel becomes part of a complete testing and content-creation station rather than a standalone curiosity.
---
Step 1: Choose the Right Location on Your Desk
Before unboxing, pick a spot thoughtfully:
- Stable surface: The fan creates vibration. Place the tunnel on a solid desk — ideally a sturdy workstation like a creator desk built to support equipment, monitors, and testing gear without wobbling.
- Away from drafts: Air conditioning vents, open windows, and nearby fans will skew your readings. A still room is a reliable room.
- Power access: You'll want outlets nearby for the tunnel, any smoke generator, lighting, and a camera if you're recording results.
- Good lighting: Flow visualization looks dramatically better with strong, even lighting across the test section.
---
Step 2: Unbox and Assemble
Most desktop wind tunnels arrive in a few main components:
- The main tunnel body (test section + airflow channel)
- The fan/motor unit
- A control module or app connection for adjusting wind speed
- Test accessories — model mounts, smoke or fog sources, sometimes scale vehicles or aircraft
Assembly typically takes 10–20 minutes. Follow these universal rules:
- Seat the fan unit firmly — a loose fan causes inconsistent airflow.
- Level the test section — use a small spirit level; even a slight tilt changes results.
- Check the observation window — clean it with a microfiber cloth; dust ruins smoke visualization.
- Cable manage everything — run power and data cables away from the intake side, where they can disturb incoming airflow.
---
Step 3: Calibrate and Establish a Baseline
Calibration separates casual toy use from genuine product testing:
- Run the tunnel empty at each speed setting and note the behavior. This is your control condition.
- Mount a reference model (many tunnels include a standard test object) and record results at consistent speeds.
- Repeat each run 2–3 times to confirm the readings are consistent. If results vary wildly, check for loose parts or external drafts.
- Log your conditions — speed setting, model position, room temperature. Consistency makes your comparative data meaningful.
---
Step 4: Run Your First Real Test
Here's a simple workflow for testing a product or prototype:
- Define the question: "Does the new winglet reduce drag?" or "Where does airflow separate on this car body?"
- Mount the model in the test section, centered and secure.
- Start at low speed and gradually increase to your target test speed.
- Introduce smoke or fog (if your unit supports visualization) and observe the streamlines.
- Record results — photos, video, or numeric readings depending on your model.
- Change one variable at a time — this is the golden rule of testing. Adjust one design element per run.
- Repeat and compare against your baseline.
For repetitive testing sessions, ergonomics matter. Sitting at a comfortable height with everything within reach — which is exactly what a well-designed smart table setup enables, with adjustable positioning and integrated power — means you can run longer sessions without fatigue.
---
Step 5: Visualize Airflow Like a Pro
Flow visualization is where desktop wind tunnels shine. Common methods:
- Smoke wands / fog generators: Produce clean streamlines showing laminar vs. turbulent flow.
- Yarn or tufts attached to the model: Show local flow direction and separation points.
- Ink or oil flow: Reveals surface flow patterns on the model itself.
Pro tips:
- Use a dark backdrop behind the test section for maximum smoke contrast.
- Light the smoke from the side, not the front.
- Record at 60fps or higher to capture flow transitions in slow motion.
---
Building the Ideal Wind Tunnel Workspace
A desktop wind tunnel is rarely used alone. Here's how to build a complete testing station:
The desk
A stable, spacious surface is non-negotiable. A creator desk gives you room for the tunnel, monitor, camera, and notes, and is designed for exactly this kind of equipment-heavy work.
Power management
Between the tunnel, smoke machine, lighting, camera, and laptop, you'll run out of outlets fast. Multiport charging stations keep everything powered from a single wall connection while reducing cable clutter near your intake airflow.
Comfort during long sessions
Testing sessions involve waiting, repeating runs, and analyzing footage. A sit-stand smart table lets you switch positions during marathon testing days.
Keep refreshments within reach
Here's where it gets interesting: a fridge in coffee table or a refrigerator coffee table placed beside your testing area keeps drinks and snacks cool without breaking your workflow. For smaller spaces or bedroom studios, a nightstand fridge serves the same purpose right beside your desk.
It sounds indulgent, but maintaining focus through multi-hour test sessions is easier when you're not making constant trips to the kitchen.
---
Common Mistakes to Avoid
- Testing near moving air — HVAC drafts are the #1 cause of inconsistent results.
- Changing multiple variables at once — you won't know which change caused the improvement.
- Overinterpreting absolute numbers — desktop tunnels are best for *comparative* results, not absolute drag coefficients.
- Ignoring vibration — mount everything firmly; vibration blurs both readings and smoke visualization.
- Skipping the empty-tunnel baseline — always know what "no model" looks like first.
---
Maintenance and Care
- Clean the observation window before each visualization session.
- Dust the fan blades monthly — balance matters for smooth airflow.
- Check seals and joints — air leaks reduce test section velocity.
- Store accessories in labeled bins so your model mounts don't wander off mid-project.
---
Who Should Buy One?
- Product designers validating shapes and housings
- Drone and RC hobbyists optimizing frames and wings
- Engineering students working on coursework and competitions
- Cyclists and gear makers testing helmets, bottles, and accessories
- Content creators producing engaging, educational test videos
- Educators bringing aerodynamics to life in the classroom
For most people, a quality unit like the windsible desktop wind tunnel or a comparable desktop windtunnel hits the sweet spot of price, size, and capability.
---
Final Thoughts
Setting up a desktop wind tunnel takes an afternoon; learning to use it well takes a few sessions. Start with simple comparative tests, keep your conditions consistent, and build up to more sophisticated visualization work. Pair it with a stable desktop wind tunnel workstation, solid power management, and a comfortable environment, and you'll have a legitimate aerodynamic testing lab that fits in your spare room.
Ready to start testing? Check the current pricing and grab the latest Livtab discount code — $100 OFF sitewide — before you order your wind tunnel and workspace upgrades.
---
*Affiliate disclosure: Some links in this post are affiliate links. If you purchase through them, we may earn a commission at no extra cost to you.*
 Shopping at Livtab? See today's verified Livtab discount code
Frequently asked questions
Is a desktop wind tunnel accurate enough for real product testing?
Most quality desktop wind tunnels are designed for comparative testing rather than absolute measurement. They excel at showing relative differences between designs — which model has less drag, where flow separates — making them ideal for iteration, education, and proof-of-concept work.
What can I test in a desktop wind tunnel?
Common test subjects include drone and RC aircraft components, scale car bodies, bike accessories, 3D-printed prototypes, and product housings. Anything that fits the test section and can be securely mounted is fair game.
How do I get consistent results from my wind tunnel?
Ensure your desk is stable and vibration-free, place the tunnel away from HVAC vents and open windows, calibrate with a baseline empty-tunnel run, and repeat each test two or three times to confirm consistency.
What else should I pair with a desktop wind tunnel?
You'll need a stable desk or workstation, nearby power for the tunnel and accessories, good lighting for flow visualization, and ideally a multiport charging station to manage power for cameras, sensors, and lighting without cable clutter.
Where can I get a discount on a desktop wind tunnel?
You can typically find the best price through the current Livtab promotion — check the Livtab discount code page for a $100 OFF sitewide offer before ordering.