
How to Test Brake Fluid Condition Without a Tester (And Why You Should)

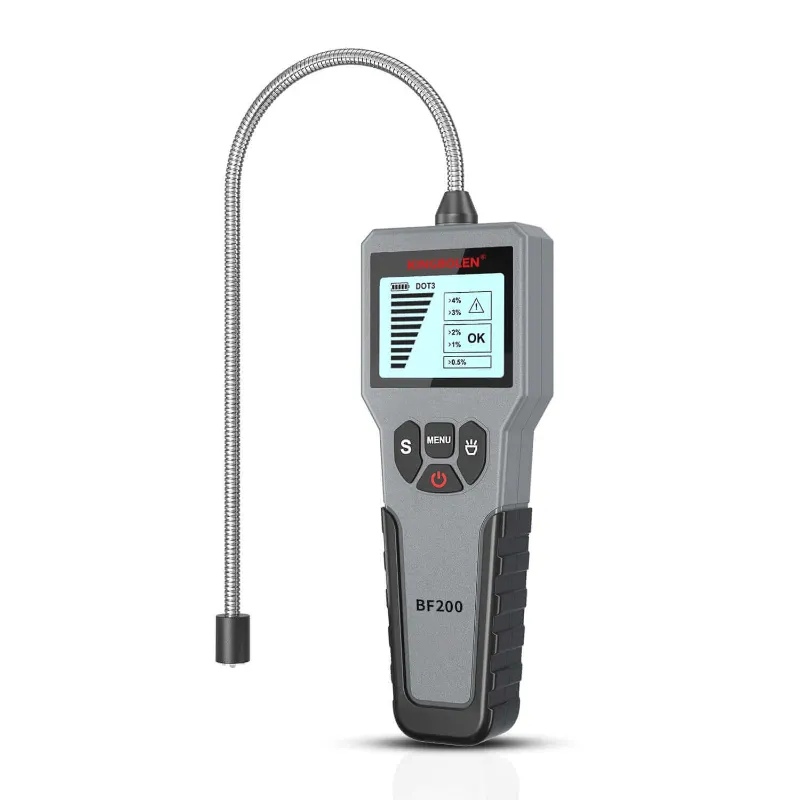
How to Test Brake Fluid Condition Without a Tester (And Why You Should)
You can check brake fluid condition without a brake fluid tester by inspecting its color, clarity, and texture, though these methods lack the precision of electronic or chemical test tools. While visual inspection catches obvious contamination, a dedicated brake fluid tester measures moisture content accurately and tells you when the fluid has absorbed enough water to compromise braking performance.
We've tested brake systems on dozens of vehicles, and we've learned that moisture is brake fluid's worst enemy. Fresh DOT 3 and DOT 4 fluid absorbs water from the air over time, lowering the boiling point and risking vapor lock under hard braking. That's why knowing how to evaluate your fluid matters, whether you're between service intervals or deciding if a flush is overdue.
Visual Inspection: The First Line of Defense
The simplest way to assess brake fluid without a tool is to check the reservoir under your hood. Remove the cap and observe the fluid's appearance.
- Fresh fluid: Light amber or golden color, clear and transparent
- Slightly aged: Darker amber or light brown, still relatively clear
- Contaminated: Dark brown or black, cloudy, or opaque
If your fluid looks like coffee or motor oil, it's absorbed moisture and accumulated debris. Dark, murky fluid should be replaced immediately. Even if you can't measure exact moisture percentage, color change signals oxidation and water absorption.
Check for sediment or particles floating in the reservoir. Rubber seals shed tiny bits as they age, and corrosion flakes from metal components settle into the fluid. Any visible debris means contamination has progressed beyond acceptable limits.
The Boiling Point Test: DIY Moisture Detection
Brake fluid's boiling point drops as it absorbs water. DOT 4 starts around 446°F (230°C) when dry, but can fall below 311°F (155°C) with just 3.7% water content. You can't safely boil brake fluid at home, but you can infer moisture by how the pedal feels under repeated hard stops.
If your brake pedal goes soft or spongy after several firm applications (like descending a mountain road), moisture has likely lowered the boiling point enough to create vapor bubbles in the lines. This tactile test won't give you numbers, but it reveals a dangerous condition that demands immediate attention.
For quantifiable data, a brake fluid tester pen or electronic meter measures moisture directly. We recommend checking annually, especially in humid climates where fluid degrades faster.
Why a Brake Fluid Tester Is Worth the Investment
Visual methods catch extreme cases, but a proper tester reveals hidden moisture before it compromises safety. Electronic testers use conductivity to measure water content as a percentage, while brake fluid test strips change color based on boiling point.
Most manufacturers recommend replacement when moisture hits 3% to 3.5%. At that threshold, the fluid still looks acceptable but has lost enough protection to risk brake fade. You won't see that decline without a tester.
Best brake fluid tester features to look for:
- LED indicators showing safe, marginal, and replace zones
- DOT 3, DOT 4, and DOT 5.1 compatibility
- Probe design that reaches into tight reservoirs
- Auto-shutoff to preserve battery life
For professional-grade diagnostics beyond fluid testing, tools like the Kingbolen K7 and 431X Launch scanner offer comprehensive vehicle health monitoring. While they don't test brake fluid directly, they read ABS fault codes that can indicate hydraulic system issues related to contaminated fluid.
How Brake Fluid Testers Work
Electronic testers measure electrical conductivity. Pure brake fluid is a poor conductor, but water increases conductivity dramatically. When you dip the probe into your reservoir, the meter reads resistance and converts it to a moisture percentage or boiling point estimate.
Brake fluid test strips work differently: they contain reactive chemicals that change color based on the fluid's boiling point. You dip the strip for a few seconds, then compare the result to a chart. Strips cost less but lack the precision of electronic meters.
Both methods beat guessing. We've seen fluid that looked perfectly clean register 4% moisture, well past the safe threshold. That's why serious DIYers and shops rely on testers rather than eyeballing alone.
Maintenance Schedule: When to Test and Replace
Test your brake fluid at least once a year, or every 12,000 miles. If you drive in humid environments, tow heavy loads, or make frequent mountain descents, check every six months.
| Condition | Action | Timeframe |
|---|---|---|
| Fresh fluid (< 2% moisture) | Monitor | Recheck in 12 months |
| Borderline (2-3% moisture) | Plan replacement | Within 3-6 months |
| Contaminated (> 3% moisture) | Replace immediately | ASAP |
Most manufacturers specify a flush interval of two to three years regardless of appearance. Brake fluid is hygroscopic, meaning it pulls moisture from the air even in a sealed system. Time degrades it whether you drive daily or let your car sit.
Don't wait for a spongy pedal or warning light. Preventive testing catches problems early. Grab our Kingbolen discount code to save on diagnostic tools that help you stay ahead of maintenance.
Comparing DIY Methods to Professional Tools
Visual inspection and pedal feel give you rough indicators, but they can't quantify moisture or predict failure. A tester provides objective data that removes guesswork.
DIY visual inspection:
- Cost: Free
- Accuracy: Catches extreme cases only
- Speed: 2 minutes
- Best for: Quick checks between services
Electronic brake fluid tester:
- Cost: Moderate investment
- Accuracy: ±0.5% moisture reading
- Speed: 30 seconds per test
- Best for: Annual maintenance and pre-trip inspections
Professional lab analysis:
- Cost: Typically included in brake service
- Accuracy: Highest precision
- Speed: Sent to lab, results in days
- Best for: Forensic analysis after brake failure
For home mechanics, an electronic tester strikes the best balance. One-time cost pays for itself if it prevents a single unnecessary flush or catches a problem before it becomes dangerous.
If you're already investing in diagnostic equipment, consider a full-featured scanner like the Launch X431 Pro or ThinkDiag 2 for broader vehicle troubleshooting. These tools handle everything from ABS codes to emissions readiness, though you'll still need a dedicated moisture tester for brake fluid analysis.
Practical Tips for Testing Brake Fluid
Always test cold fluid. Heat from recent driving can skew electronic readings. Pop the hood, locate the master cylinder reservoir (usually near the firewall on the driver's side), and wipe the cap clean before opening.
Insert the tester probe straight down into the fluid without touching the sides or bottom of the reservoir. Contaminants cling to walls and settled debris gives false readings. You want a sample from the middle of the reservoir where fluid circulates.
Record your results and date in your maintenance log. Tracking moisture percentage over time shows how quickly your fluid degrades and helps you predict replacement intervals. If readings jump suddenly, look for a leak or damaged reservoir seal letting in excess humidity.
Never mix DOT types. DOT 3 and DOT 4 are compatible but have different boiling points, which confuses tester readings. DOT 5 (silicone-based) is completely incompatible with glycol-based fluids and will damage seals if mixed.
Check current pricing on brake fluid testers and compare features before buying. Even a basic LED pen-style tester beats guessing, and the peace of mind is worth the modest investment.
When to Skip Testing and Just Replace
If your fluid is more than three years old, skip testing and flush the system. Moisture isn't the only contaminant. Brake fluid also breaks down chemically, losing its corrosion inhibitors even if it hasn't absorbed much water.
Replace immediately if you see:
- Black or opaque fluid
- Visible particles or sediment
- Separation or layering in the reservoir
- A spongy or fading brake pedal
Don't test fluid that's obviously bad. The time spent measuring is better spent flushing the system and filling it with fresh fluid.
Testing makes sense for newer fluid or when you're trying to extend intervals safely. It's a diagnostic tool, not a reason to delay necessary maintenance. When in doubt, replace. Brake fluid is cheap compared to the consequences of brake failure.
Frequently asked questions
How accurate are brake fluid testers compared to lab analysis?
Quality electronic brake fluid testers measure moisture within ±0.5% of lab results, which is accurate enough for maintenance decisions. Test strips are less precise but still catch dangerous contamination that visual inspection misses.
Can I test brake fluid without removing it from the reservoir?
Yes, both electronic testers and test strips work by dipping a probe or strip directly into the master cylinder reservoir. You don't need to extract fluid, just ensure the probe reaches clean fluid in the middle of the reservoir.
What moisture percentage means I need to replace brake fluid?
Most manufacturers recommend replacement at 3% to 3.5% moisture content. At that level, the boiling point has dropped enough to risk vapor lock under hard braking, even though the fluid may still look acceptable.
Do brake fluid testers work on DOT 5 silicone fluid?
Most electronic testers are calibrated for glycol-based DOT 3, DOT 4, and DOT 5.1 fluids. DOT 5 silicone fluid doesn't absorb water the same way, so moisture testers give inaccurate readings. Always check your tester's specifications.
How often should I test my brake fluid with a tester?
Test at least once a year or every 12,000 miles. If you drive in humid climates, tow heavy loads, or make frequent mountain descents, test every six months to catch moisture buildup early.
Is a brake fluid tester pen as accurate as a digital meter?
Pen-style LED testers are slightly less precise than digital meters but still provide reliable go/no-go readings for maintenance. They're more durable and don't require calibration, making them ideal for home mechanics who test occasionally.