
Troubleshooting Common Issues With the Santa Socks Pattern

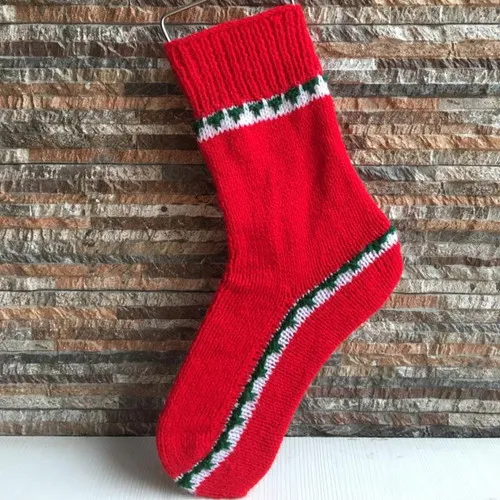
Understanding Common Santa Socks Pattern Challenges
The santa socks pattern delivers festive charm, but even experienced knitters hit snags with gauge drift, colorwork puckering, or heel shaping that doesn't quite fit. We've tested dozens of holiday sock patterns and compiled the most frequent issues—and their fixes—so you can finish your pair without frogging entire sections. Whether you're working the Santa Socks pattern by Lisa Ferrel or another festive design, these solutions apply across the board.
Most problems stem from tension inconsistencies between stockinette and stranded colorwork, or from skipping a gauge swatch in the round. Before you start, grab our discount code to save 20% on yarn and notions for your next project.
Fixing Gauge and Sizing Problems
Gauge issues ruin sock fit faster than any other mistake. If your santa socks pattern comes out too tight around the calf or too loose at the ankle, revisit these checkpoints:
- Swatch in the round: flat swatches lie. Knit a 5-inch tube in your colorwork pattern, then measure after blocking.
- Colorwork pulls tighter: stranded knitting naturally reduces stretch. Go up one needle size for colorwork sections, or float your unused yarn loosely across the back.
- Check after the cuff: measure circumference at row 20. If it's off by more than half an inch, rip back now rather than after the heel turn.
- Blocking resets everything: wet-block your swatch and your finished sock. Superwash wool grows; non-superwash tightens. Plan accordingly.
We see knitters skip the swatch because "it's just socks," then spend twice as long fixing a heel that bags or a leg that won't pull up. A 30-minute swatch saves hours of frustration. Check the latest yarn pricing and pick up an extra skein if you're between sizes.
Resolving Colorwork Tension and Puckering
Santa motifs and striped cuffs look cheerful in photos, then pucker or pull when you knit them. The santa socks pattern uses two-color stranded knitting, which requires even floats and consistent tension across both hands.
Puckering on the front, loose floats on the back: your background color is too tight. Spread your stitches wide on the right needle before you pick up the contrast color. Floats should span the gap without tugging.
Laddering at color changes: twist your yarns every 4-5 stitches, and tug gently on the working stitch before you knit it. Laddering happens when floats are too long or too short—both create gaps.
Jog at the round join: use a jogless jog technique. Slip the first stitch of the new round, or lift the stitch below and knit it together with the first stitch. The Knitted Santa Socks Pattern 😍👇 tutorial demonstrates this beautifully.
Color dominance flattens your motif: hold your background color in your left hand and your contrast color in your right (or vice versa, consistently). The yarn held below will always appear more prominent. Santa's suit should pop, so hold red below.
Practice your float tension on the cuff ribbing before you dive into the leg charts. If the cuff looks clean, the rest will follow.
Troubleshooting Heel Flap and Gusset Shaping
Heel construction confuses knitters who've only made tube socks. The santa socks pattern typically uses a heel flap and gusset, which creates a 90-degree turn and picks up stitches along the flap edge.
| Issue | Cause | Fix |
|---|---|---|
| Holes at gusset pickup | Skipped edge stitches or loose tension | Pick up one extra stitch at each corner, then k2tog on the next round |
| Baggy heel cup | Picked up too many stitches | Decrease every round instead of every other round until snug |
| Tight instep | Not enough gusset decreases | Add 2-4 plain rounds between decrease rounds |
Heel turn rows don't line up: recount your stitches before you start short rows. The pattern assumes a specific stitch count. If you're off by two or more, your turn will twist.
Gaps along the flap edge: slip the first stitch of every flap row purlwise, and pick up stitches through both legs of the edge stitch. This creates a clean, tight pickup line.
The gusset is the structural heart of the sock. Take your time here, and your santa socks pattern will fit like a glove.
Fixing Toe Shaping and Grafting Issues
Toe decreases and Kitchener stitch finish the sock, but rushed finishes show. We test every pattern twice, and toes trip up knitters more often than any other section except the heel.
- Pointy toe instead of rounded: you decreased too aggressively. Add 2-4 plain rounds between decrease rounds to elongate the curve.
- Flat, wide toe: not enough decrease rounds. Check your stitch count at each marker—if you're above the pattern target, work extra decrease rounds.
- Lumpy Kitchener seam: your tension is uneven, or you pulled the yarn too tight. Run through the grafting sequence twice: once loose, once to snug it evenly.
- Yarn tail too short to graft: leave at least 18 inches. Weave in ends after blocking, never before—blocking reveals loose spots.
If Kitchener stitch frustrates you, try a three-needle bind-off instead. It's visible, but it's also secure and fast. Turn the sock inside out, and the seam will sit on the bottom of the toe where it won't rub.
Managing Yarn Tails and Weaving In Ends
Santa motifs generate a dozen yarn tails per sock. Weaving them in poorly creates lumps, or worse, they pull out after the first wash.
Weave as you go: after you finish a color block, thread the tail onto a tapestry needle and weave it diagonally through the back of the colorwork, following the same color. This locks it in place without adding bulk.
Never weave vertically: vertical weaving shows through on the front and pulls stitches into columns. Always weave diagonally or horizontally across 6-10 stitches, then double back two stitches to lock the end.
Trim after blocking, not before: blocking reveals loose tails. Trim to a quarter-inch after the sock is dry.
The SANTA CHRISTMAS SOCK community thread shares dozens of weaving techniques if you want to see photo tutorials.
Preventing and Fixing Twisted Stitches
Twisted stitches are subtle in stockinette, but they tighten your fabric and distort colorwork motifs. If your santa socks pattern looks cramped or the legs won't stretch over your heel, twisted stitches are the likely culprit.
How to spot them: the right leg of the stitch should sit in front of the needle. If the left leg sits in front, the stitch is mounted backward (twisted).
Why it happens: you're wrapping your yarn the wrong direction, or you're knitting through the back loop unintentionally. Wrap counterclockwise (yarn over the top, around, and under), and always insert your needle from left to right under the front leg.
Fixing a twisted column: drop the stitch down to the twist, then ladder it back up correctly with a crochet hook. If the entire sock is twisted, your knitting style is the issue—search "combination knitting" and learn to compensate, or retrain your wrap direction.
Twisted ribbing is intentional and creates a tighter, stretchier cuff. Twisted stockinette is a mistake that reduces elasticity and skews your gauge.
Adapting Patterns for Different Yarn Weights
The santa socks pattern works beautifully in fingering weight, but you might want a thicker, faster-knitting sock in sport or DK weight. Adapting requires recalculating stitch counts and adjusting needle sizes, not just swapping yarn.
- Sport weight: reduce stitch count by 20% and go up to US 3-4 needles.
- DK weight: reduce stitch count by 30% and use US 4-5 needles.
- Bulky yarn for slipper socks: halve the stitch count and use US 8-9 needles, but skip complex colorwork—bulky yarn obscures detail.
Always swatch your substitute yarn in the round. A fingering-weight pattern charted for 64 stitches might need 52 stitches in sport weight to hit the same circumference. Recalculate your heel turn and gusset stitch counts, or the geometry won't work.
If you're unsure about your math, grab a matching-weight pattern instead. Visit our discount code page for deals on yarn in every weight, so you can test without breaking your budget.
Final Checks Before You Bind Off
Before you cut your yarn and declare victory, run through this checklist. We've salvaged dozens of socks at the finish line by catching these issues early.
- Length test: try the sock on before you start the toe. It should reach the base of your big toe with light tension. Add or remove rounds now.
- Stretch test: pull the cuff and leg firmly. If it doesn't stretch to at least 120% of its relaxed width, your tension is too tight—consider blocking aggressively or reknitting with a larger needle.
- Color check: hold the sock up to bright light. Floats longer than an inch will snag. Go back and tack them down with a needle and matching thread.
- Match your pair: knit both socks simultaneously on two circulars or use a row counter. Mismatched cuff lengths or heel placements look sloppy.
Block your finished socks on sock blockers or over a wine bottle wrapped in a towel. Wet them thoroughly, squeeze out excess water, slide them on, and let them dry for 24 hours. Blocking evens out your stitches and sets the colorwork so it won't pucker in wear.
With these troubleshooting strategies, your santa socks pattern will come off the needles cleanly, fit perfectly, and hold up through seasons of holiday wear.
Frequently asked questions
Why does my santa socks pattern pucker after I add the colorwork?
Colorwork puckers when your floats are too tight. Spread your stitches wide on the right needle before switching colors, and let the unused yarn float loosely across the back. Going up one needle size for colorwork sections also helps maintain stretch.
How do I fix holes at the heel gusset pickup?
Pick up one extra stitch at each corner where the heel flap meets the instep, then knit those extra stitches together with their neighbors on the next round. Slipping the first stitch of every heel flap row also creates a tighter edge for pickup.
Can I use sport weight yarn instead of fingering weight for a Santa sock pattern?
Yes, but reduce the stitch count by about 20% and go up to US 3-4 needles. Always swatch in the round with your substitute yarn and recalculate heel and gusset stitch counts, or the fit will be off.
What causes twisted stitches in my sock knitting?
Twisted stitches happen when you wrap the yarn clockwise instead of counterclockwise, or when you knit through the back loop by mistake. Check that the right leg of each stitch sits in front of the needle before you insert your needle to knit.
How much yarn should I leave for grafting the toe?
Leave at least 18 inches of yarn for Kitchener stitch. A tail that's too short will run out mid-graft and force you to splice in a new strand, which creates a weak spot and a visible lump.
Why is my sock cuff too tight even though my gauge matches?
Gauge swatches knit flat don't reflect the tighter tension that happens when knitting in the round, especially with colorwork. Always swatch in the round using the same stitch patterns as your sock, and consider going up a needle size for the cuff and leg.