
Why Your 3D Prints Are Failing: Troubleshooting with a BL Touch on QIDI Printers

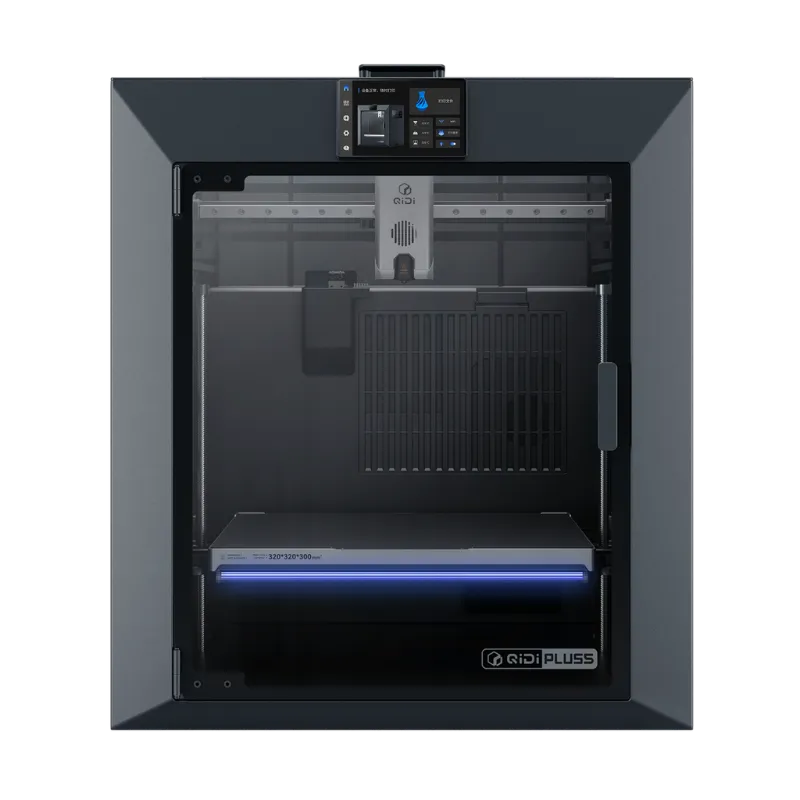
A BL Touch sensor on your QIDI printer catches bed leveling issues before they ruin your prints. Most 3D print failures trace back to uneven first layers, and automatic bed leveling eliminates the guesswork. If your prints peel off mid-job or fail to stick at all, this guide walks you through why that happens and how to fix it.
What Is BL Touch and Why Does Your QIDI Printer Need It
The BL Touch is an automated bed leveling probe that uses a small spring-loaded pin to tap your print bed and measure its height at multiple points. Unlike manual leveling, which requires guesswork and constant adjustment, a BL Touch communicates with your printer's firmware to create an accurate height map. On QIDI printers like the QIDI Plus 4 and QIDI Plus4, this probe prevents the two most common failures: nozzle crashes into the bed and prints lifting mid-print.
Manual leveling works for a handful of prints, but as your bed shifts from heat cycles, gravity, or vibration, you'll see failures spike. A BL Touch handles that drift automatically on every print start.
BL Touch Installation on QIDI Printers
Installing a BL Touch on QIDI hardware is straightforward if you follow the steps in order. Most QIDI models support the probe with minimal modification.
- Mount the probe bracket to your print head using the manufacturer's screws (usually M3 x 8mm). Ensure the probe sits directly under the nozzle, about 2-4mm away.
- Connect the servo cable (red, brown, orange wires) to your control board's servo port. Check your QIDI motherboard manual for the exact pin layout.
- Plug the Z-probe cable (black, white, yellow wires) into the dedicated Z-probe input on the board. A BL Touch cable carries both ground and signal; loose connections cause erratic readings.
- Update your printer's firmware to enable BL Touch support. Download the latest QIDI firmware from their support site and flash it via USB or SD card.
- Run a bed leveling probe from the printer menu. This creates a mesh of the bed surface and stores it in memory.
If your BL Touch triggers constantly or not at all, reseat both connectors. A loose BL Touch cable is the most common reason for probe errors.
Diagnosing First-Layer Print Failures
Before you blame the probe, verify the actual failure mode. Different symptoms point to different fixes.
- Nozzle crashes into the bed at print start: The probe is not triggering, or firmware is not using the height map. Re-test the probe from the menu and check that bed mesh is enabled in your start gcode.
- Prints lift at corners or edges: Your bed is warped or the probe sample points are too sparse. Run a full mesh (9x9 or 16x16 points) instead of a quick 3x3 scan.
- First layer prints but second layer fails: Nozzle height is correct, but your bed may be too hot or your filament is not sticking well. Reduce bed heat by 5°C or check if your filament is dry (use a filament dryer box to store spools between prints).
- Random adhesion loss on large prints: Thermal expansion of the bed is shifting the mesh. Rehome and remesh halfway through a long print, or let the bed stabilize for 2-3 minutes before starting.
Materials and BL Touch Compatibility
The probe works with every filament type, but some materials demand specific bed temperatures that interact with adhesion in different ways.
| Material | Bed Temp | Notes |
|---|---|---|
| PLA-CF | 50-60°C | Low-temp carbon fiber blend; fast to calibrate. |
| PETG-CF | 60-80°C | Higher heat required; allow extra warm-up time. |
| ASA 3D Filament | 80-100°C | Thick adhesion; run BL Touch calibration at final temperature. |
| PA12-CF | 70-90°C | Warps easily; full mesh (16x16) prevents corner failures. |
| PPS-CF | 80-110°C | Highest temp; smallest margin for error. Test small prints first. |
The BL Touch reads nozzle distance at room temperature and then again when the bed is hot; that thermal shift is real and normal. If your mesh looks good at room temp but prints fail, rehome after the bed reaches final temperature.
Setup for QIDI Plus 4 and Plus4 Models
The QIDI Plus 4 and QIDI Plus4 come with built-in leveling support in firmware. If you're adding a BL Touch retrofit, follow these specifics.
- The Z-probe port on both models is labeled clearly on the motherboard. Use the exact connector layout in the official QIDI docs.
- Enable "Adaptive Leveling Mesh" in the printer settings if your firmware version supports it. This recalculates the mesh for each print without requiring manual restart.
- Store your PLA-CF or other daily filament in a filament dryer box to prevent moisture from affecting first-layer bonding. Dry filament prints cleaner and sticks better.
- Test your BL Touch after every firmware update, as boot routines may reset probe offsets.
Grab the latest QIDI Tech discount code when you order your probe and accessories; current offers include 5% off sitewide.
When to Recalibrate Your BL Touch
Recalibrating the probe is not a one-time task. Recalibrate whenever you swap nozzles, replace the bed sheet, or notice bed leveling creeping out of spec.
- After nozzle change: The new nozzle height is slightly different. Run a quick three-point calibration and update the Z-probe offset.
- After bed sheet replacement: If you swap to a textured or PEI sheet, the surface height changes. Regenerate the full mesh.
- Monthly or after 100 prints: Gradual drift happens from vibration and wear. A fresh mesh takes 2 minutes and saves failed prints.
- When switching between materials: If you use different bed temperatures (e.g., switching from PLA-CF at 60°C to ASA 3D Filament at 100°C), rehome and remesh at the target temperature before printing.
Upgrading from Manual Leveling
If you're still using manual leveling springs or clips, a BL Touch eliminates hours of tweaking. Set it once, and your QIDI printer handles the rest. For kids using a kids 3d printer or students learning FDM 3D printing, automatic leveling removes one huge barrier to success.
Check the BLTouch V2 official specs and the BL-Touch Klipper documentation for advanced firmware configs. The All3DP BLTouch Sensor guide also covers comparison with alternatives like CR Touch.
Store your probe in the QIDI Box or a dry case to protect the pin from dust and impacts. A bent pin is the only true reason to replace the probe.
Visit the QIDI Tech store to check current pricing and apply your 5% discount code at checkout.
Frequently asked questions
Does a BL Touch work with all QIDI printers?
Most QIDI printers support BL Touch with a firmware update, but compatibility depends on your control board. Check your motherboard manual or contact QIDI support with your model number before purchasing. The QIDI Plus 4 and Plus4 are fully compatible out of the box.
How often should I recalibrate my BL Touch?
Recalibrate after any nozzle change, bed sheet swap, or major temperature shift between materials. For regular printing, a fresh mesh every 50-100 prints keeps adhesion stable. Most failures happen weeks after setup when drift has accumulated.
What's the difference between BL Touch and CR Touch?
Both sensors do the same job, but BL Touch uses a spring-loaded pin while CR Touch uses electromagnetic induction. BL Touch is more widely supported and easier to troubleshoot. CR Touch has no moving parts, so it may last longer, but either works well on QIDI hardware with the right firmware.
Why does my BL Touch probe trigger at the wrong height?
A loose BL Touch cable or bent pin is the most common cause. Reseat both connectors firmly and inspect the pin for damage. If the pin is straight and connections are tight, the issue is usually a firmware offset that needs adjustment in your printer menu.
Should I use a BL Touch with wet filament?
No. Wet filament sticks poorly no matter how perfect your leveling is. Store spools in a filament dryer box between prints, especially materials like PLA-CF and PETG-CF that absorb moisture quickly. A BL Touch fixes height, not material condition.
Can I install a BL Touch on a kids 3d printer?
It depends on the model and whether firmware support exists. Simpler kids printers may not have the control board capability. Check your manual or reach out to the manufacturer. If supported, automatic leveling makes the printer much more forgiving for young users.