
How to Prevent Filament Moisture: Does a Filament Dryer Box Really Work?

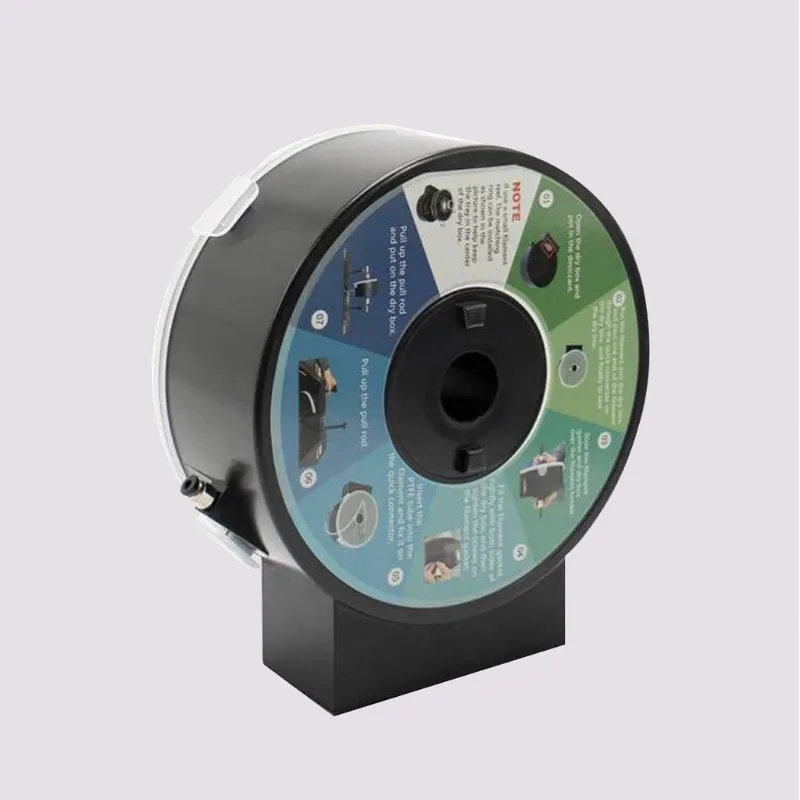
A filament dryer box works by removing the moisture that ruins prints, and yes, it really makes a difference if you use hygroscopic materials like nylon or carbon-fiber composites. Moisture absorption is one of the biggest invisible threats to print quality, especially when you're running demanding materials through an fdm 3d printing setup. We've tested several approaches and found that active drying, not just storage, is what separates failed prints from professional results.
Why moisture matters in FDM 3D printing
Filament pulls water from the air like a sponge. When you heat wet filament, that moisture turns to steam inside the nozzle, creating bubbles, weak layer bonds, and surface defects that no amount of calibration fixes. The problem gets worse with materials like pa12-cf, petg-cf, and pps-cf, which are engineered for strength but absorb moisture aggressively. Even pla-cf, often sold as beginner-friendly, will degrade noticeably if left exposed for more than a few hours after the seal is broken.
Standard dry boxes (sealed containers with desiccant) slow moisture intake but do not actively remove water already in the filament. That is where a filament dryer box with heating and airflow becomes essential. The best filament dryer box models use low heat (around 45–50°C) to gently drive out absorbed moisture without degrading the polymer structure.
How a filament dryer box actually works
A filament dryer box operates on a simple principle: warmth plus airflow equals moisture escape. Most units combine a heating element, a fan, and a sealed chamber. Filament spools sit on a spindle inside, and warm air circulates around them for 2–4 hours, drawing out water that has migrated into the material.
The key difference from a cheap storage box is active circulation. A sealed container with silica gel keeps filament dry over weeks, but it cannot undo damage that has already occurred. A filament dryer box actively reverses moisture absorption, restoring filament to near-factory dryness before each print session.
Temperature control matters. Too hot and you risk crystallization or brittleness. Too cool and drying is slow. Most commercial units hold 45–55°C, which is effective without risk. Some models let you dial in exact temperatures, which is useful if you are cycling expensive materials like asa 3d filament multiple times a day.
Best filament dryer box options for QIDI users
If you own a qidi plus 4 or qidi plus4, pairing it with the right drying solution is practical. The qidi box is designed to integrate seamlessly with QIDI printers and supports direct printing in some setups, meaning your filament dries and feeds straight to the nozzle without reabsorbing moisture.
For flexibility, a standalone filament dryer box gives you more control over drying time and temperature. The Best Filament Dryers and DIY Solutions 2026 covers commercial and DIY builds in detail if you want to compare options beyond QIDI's ecosystem.
| Option | Best for | Setup |
|---|---|---|
| QIDI Box | Integrated workflow | Attaches to printer |
| Standalone dryer | Multiple materials | Independent heating unit |
| DIY box | Budget projects | Oven or heating element |
Budget-conscious makers often explore DIY approaches. 3D Printer Filament Dry Box: 5 Steps (with Pictures) walks through building one with basic hardware, though commercial units are more reliable if you print regularly.
When you actually need a filament dryer box
Not every filament type demands active drying. Standard PLA in a dry climate can sit sealed for weeks. But if you live in high humidity, work with carbon-fiber or nylon materials like pa12-cf, or print multiple jobs in succession, a filament dryer box becomes a practical investment.
Carbon-fiber composites and PA variants are the clearest case. These materials absorb water so quickly that they can degrade between the moment you open the bag and when you load them into the printer. A quick drying cycle before use is not optional, it is maintenance.
Even casual users of asa 3d filament benefit from occasional drying, since ASA is moderately hygroscopic. If you notice stringing, weak layer adhesion, or surface bubbling, moisture is usually the culprit, and a filament dryer box session often fixes it without reprinting.
For kids 3d printer owners, a small drying box teaches good practice early and prevents the frustration of failed prints due to material prep.
Storage and drying best practices
A filament dryer box works best as part of a routine. After printing, reseal your filament immediately. Before your next session, run a drying cycle if you are using any composite or nylon material. This rhythm prevents the moisture trap that happens when filament sits open for hours.
Store sealed filament in a cool, dark place. Silica packets help during storage, but they are maintenance, not a cure. Once filament absorbs moisture, only heat and airflow remove it. Check the latest price on QIDI's dedicated solutions and grab the code for 5% off sitewide to offset the cost of proper drying equipment.
Many users miss the step of re-drying older spools. Even filament sealed in a bag can pick up moisture if stored in a humid garage or workshop. Before using any spool older than a few weeks, a quick drying cycle is a smart checkpoint.
DIY filament dryer box vs. commercial units
Building a DIY filament dryer box saves money upfront but adds maintenance and risk. A homemade box might use a food dehydrator, a cheap heat lamp, or an oven set to low, all of which lack precise temperature control. The payoff is cost, but the trade-off is consistency and safety.
Commercial units like the qidi box offer reliability, warranty, and integration with your printer ecosystem. If you print frequently or work with finicky materials, that peace of mind is worth the upfront cost. If you are experimenting or printing once a month, a DIY box or even a sealed container with fresh desiccant may be enough.
What is your favorite drybox that you can direct print from is a popular discussion in the 3D printing community, showing that many users eventually settle on active drying once they print professionally or with demanding materials.
The bottom line: a filament dryer box really does work, and it eliminates one of the most common and invisible causes of failed prints. Whether you choose a commercial unit or build your own, active drying is the difference between guessing why prints fail and knowing your material is ready.
Frequently asked questions
How long should I dry filament in a filament dryer box?
Most materials need 2–4 hours at 45–55°C to remove absorbed moisture. Carbon-fiber composites like [pa12-cf](/go/p/6541) may need the full 4 hours, while standard PLA can dry in 2 hours. Your specific model will have guidance based on chamber size and heating power.
Can I dry any type of filament in a filament dryer box?
Yes, but temperature matters. Standard PLA and ABS are forgiving, but TPU and flexible materials need lower heat. Nylon and composites like [petg-cf](/go/p/6542) and [pps-cf](/go/p/6544) are where drying boxes shine because those materials absorb moisture so aggressively.
Does a filament dryer box work better than storage alone?
Absolutely. A sealed container with desiccant slows moisture intake but does not remove water already in the filament. A [filament dryer box](/go/p/6539) with heat and airflow actively reverses moisture absorption, restoring filament to near-factory condition.
Is the QIDI Box worth it for the QIDI Plus 4?
If you print regularly with composites or nylon, yes. The [qidi box](/go/p/6545) integrates with your [qidi plus 4](/go/p/6546) or [qidi plus4](/go/p/6547) and supports direct printing in some workflows, eliminating reabsorption between drying and printing.
What happens if I print with wet filament?
Moisture turns to steam inside the hot nozzle, causing bubbles, weak layer bonds, and surface defects. You will likely see stringing, poor adhesion between layers, and rough surfaces that no recalibration can fix.
Can I make a filament dryer box at home?
Yes, many makers build DIY boxes using food dehydrators or heating elements. It saves money but requires careful temperature control and lacks the reliability of commercial units. [3D Printer Filament Dry Box: 5 Steps](https://www.instructables.com/3D-Printer-Filament-Dry-Box/) is a solid starting point if you want to try.