
How to Install a Tesla Wall Charger at Home: What You Need to Know

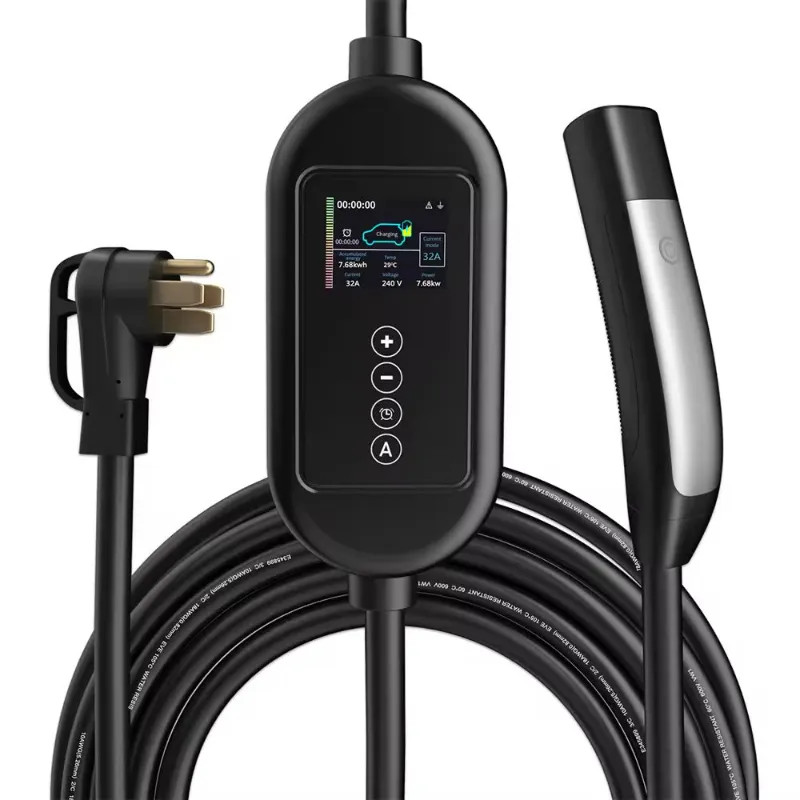
How to Install a Tesla Wall Charger at Home: What You Need to Know
Installing a tesla charger at home delivers faster charging speeds and eliminates the daily hunt for public stations. Most Tesla owners can charge overnight on a dedicated 240V circuit, waking up to a full battery every morning. Before you drill into drywall or call an electrician, you need to understand electrical capacity, permit requirements, and the right placement for your setup.
We tested home charging solutions across different garage layouts and electrical panels, and we'll walk you through the decisions that matter. Whether you're installing Tesla's Wall Connector or evaluating third-party options, this guide covers the essentials.
Electrical Requirements for a Tesla Charger Station
Your home's electrical panel determines what's possible. A 240V tesla charger typically requires a dedicated 60-amp circuit, though you can install lower-amperage options if your panel lacks capacity. Most homes built after 1990 have 200-amp service, which usually supports a Wall Connector without a panel upgrade.
Here's what you need to confirm before installation:
- Panel capacity – Add up existing breaker amperage and leave 20% headroom for safety. If your panel is near capacity, you may need a load-management device or an upgrade.
- Circuit amperage – A 60-amp circuit delivers up to 44 miles of range per hour for a Model 3. A 40-amp circuit (more common in older homes) still provides around 30 miles per hour, which works fine for overnight charging.
- Wire gauge – 60-amp circuits require 6-gauge copper wire; 40-amp circuits use 8-gauge. Longer wire runs need thicker gauges to prevent voltage drop.
- Grounding – All installations must include proper grounding per National Electrical Code standards.
Tesla's official Home Charging page lists technical specs for each vehicle model. We recommend having a licensed electrician evaluate your panel before ordering equipment—labor typically costs $500 to $1,500 depending on wire run length and whether you need a panel upgrade. Check the latest price on compatible chargers and accessories before budgeting your project.
Choosing Between a Wall Connector and a Mobile Charger
Tesla sells two primary charging solutions: the Wall Connector (a hardwired or plug-in wall unit) and the Mobile Connector (a portable cable that plugs into standard outlets). Your decision hinges on charging speed, budget, and whether you need portability.
| Feature | Wall Connector | Mobile Charger |
|---|---|---|
| Max charging speed | Up to 44 mi/hr (60A circuit) | Up to 30 mi/hr (NEMA 14-50) |
| Installation cost | $500–$1,500 (electrician) | $0–$500 (outlet only) |
| Portability | Fixed location | Travel-friendly |
The Wall Connector makes sense if you drive more than 150 miles daily or want the fastest home charging. The Mobile Connector works for most owners who drive under 40 miles per day and can charge overnight. We've found the Mobile Connector paired with a NEMA 14-50 outlet covers 80% of typical use cases at half the installation cost.
If you already own a J1772-equipped EV or plan to add one, a j1772 adapter bridges compatibility. For Tesla owners who occasionally use universal public chargers, a tesla charger adapter ensures you're never stranded.
Permits, Inspections, and Code Compliance
Most jurisdictions require an electrical permit for 240V circuit installation. Your electrician typically pulls the permit, but you're responsible for ensuring the work passes inspection. Permit costs range from $50 to $200, and inspections usually happen within a week of completion.
Key compliance points inspectors check:
- Correct wire gauge for the circuit amperage and run length
- Proper breaker rating (must match wire capacity)
- GFCI protection if required by local code (common in garages)
- Secure conduit or cable protection if exposed
Some cities have streamlined EV charger permits, reducing wait times to 24–48 hours. Check your local building department's website or ask your electrician about expedited processing. In our experience, homeowners who skip permits risk fines, insurance claim denials, and complications during home sales.
The Tesla Home Charger: EV Charging Station Buyers Guide from U.S. News covers regional differences in permit requirements and offers a helpful checklist for first-time installers.
Placement and Mounting Considerations
Where you mount your tesla charger cable affects usability and aesthetics. We recommend placing the unit within five feet of your vehicle's charge port, leaving enough slack for the cable to reach comfortably without stretching.
Ideal mounting locations:
- Garage wall near the charge port – The most common setup. Mount 18 inches above the floor to prevent cable tangling. If you park nose-in, mount on the side wall; if you back in, mount on the rear wall.
- Outdoor post or pillar – Works for uncovered parking areas. Use a NEMA 3R or 4-rated enclosure for weather protection. Check local code for underground conduit requirements.
- Between two parking spots – If you own multiple EVs, center the charger to serve both. Tesla's 24-foot cable reaches most dual-car garages.
Avoid mounting behind the car where you might back into the unit or near walkways where someone could trip over the cable. We tested a starlink wall mount bracket system that adapts to uneven surfaces and found it useful for garages with irregular stud spacing.
For renters or owners who want minimal wall damage, a portable charging station on a weighted stand offers flexibility. Pair it with the Mobile Connector and a NEMA 14-50 outlet for a semi-permanent solution that moves with you.
Cost Breakdown and Ways to Save
Total installation cost depends on wire run length, panel upgrades, and local labor rates. Here's what we see most often:
- Wall Connector hardware – Visit the Tesery discount code page for current pricing; Tesla's official unit typically retails around $400–$500.
- Electrician labor – $500–$1,500 for a straightforward installation with a 50-foot wire run. Add $1,000–$2,500 if you need a panel upgrade.
- Permit and inspection – $50–$200 depending on jurisdiction.
- Total – Budget $1,000–$2,000 for most installs; up to $4,000 if major electrical work is required.
Federal and state EV charger rebates can offset 30–50% of costs. The federal Alternative Fuel Infrastructure Tax Credit covers 30% of installation costs (up to $1,000 for residential). Many utilities offer additional rebates—check your provider's website or Database of State Incentives for Renewables & Efficiency (DSIRE).
Grab the code for 5% off sitewide at Tesery, which applies to compatible charging accessories and adapters. We also recommend getting three electrician quotes before committing; prices vary widely even within the same city.
Universal Chargers and Third-Party Options
While Tesla's Wall Connector integrates seamlessly with your vehicle, universal Level 2 chargers work equally well and often cost less. Any tesla charger universal option with a J1772 plug will charge your Tesla via the included adapter (or a standalone tesla charger adapter).
Popular third-party brands include ChargePoint, JuiceBox, and Grizzl-E. We've tested several against the Wall Connector and found charging speeds identical when both are on the same circuit amperage. The main trade-offs are app features, warranty length, and whether you want Tesla branding.
Third-party chargers shine if you own multiple EV brands or plan to sell your home to a non-Tesla buyer. The complete guide to Tesla charging at home from Plugless Power compares Wall Connector performance to universal options across different vehicle models.
If you frequently road-trip, keep the Mobile Connector in your trunk alongside a tesla charger adapter for public stations. At home, the hardwired Wall Connector stays mounted and ready.
Maintenance and Troubleshooting
Once installed, a 240V tesla charger requires almost no maintenance. We recommend inspecting the cable for damage every few months and ensuring the wall mount stays secure. If charging speed drops unexpectedly, check for:
- Tripped breakers or loose connections at the panel
- Damaged cable insulation (replace immediately if found)
- Software updates needed for the Wall Connector (check the Tesla app)
- Charge limit settings in your vehicle (default is often 80% for battery longevity)
Most charging issues trace back to settings rather than hardware. If your Wall Connector won't power on, verify the circuit breaker is on and the unit's LED displays normally. Tesla's support line walks through diagnostics, and most electricians can troubleshoot wiring problems within an hour.
For renters or temporary setups, a mobile charger paired with a standard 120V outlet delivers 3–4 miles of range per hour—slow but functional for emergency top-ups. Upgrade to a 240V outlet when possible for practical daily charging.
Frequently asked questions
Do I need an electrician to install a tesla charger at home?
Yes, installing a 240V circuit requires a licensed electrician in most jurisdictions. While the charger itself mounts easily, running new wiring and connecting it to your electrical panel must meet code and pass inspection. Expect to pay $500 to $1,500 for professional installation depending on wire run length.
Can I use a regular outlet to charge my Tesla?
You can charge from a standard 120V outlet using the Mobile Connector, but it only adds 3–4 miles of range per hour. For daily driving, a 240V outlet or Wall Connector is far more practical, delivering 30–44 miles per hour depending on circuit amperage.
How long does it take to install a Wall Connector?
A straightforward installation takes 2–4 hours if your electrical panel has capacity and the wire run is under 50 feet. If you need a panel upgrade or long conduit runs, plan for a full day of work plus permit and inspection time.
Will a tesla charger work with other EV brands?
Tesla's Wall Connector is designed for Tesla vehicles, but universal Level 2 chargers with J1772 plugs work with all EVs including Teslas (via the included adapter). If you own multiple EV brands or plan to sell your home, a universal charger offers broader compatibility.
What size breaker do I need for a Tesla Wall Connector?
Most Wall Connector installations use a 60-amp breaker, which requires 6-gauge copper wire. If your panel lacks capacity, you can install a 40-amp or 50-amp breaker instead, which still provides 30–37 miles of range per hour for overnight charging.
Are there rebates for installing a home EV charger?
Yes, the federal Alternative Fuel Infrastructure Tax Credit covers 30% of installation costs up to $1,000 for residential setups. Many states and utilities offer additional rebates—check your local utility website or DSIRE for current incentives in your area.