
How to Install an O2 Sensor Spacer Without Triggering a Check Engine Light

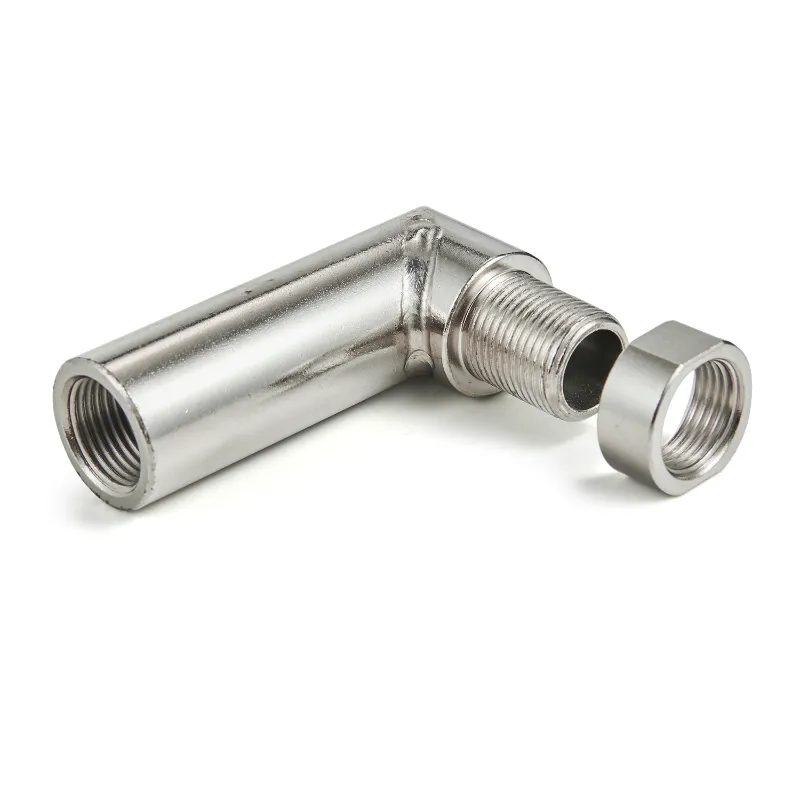
A mini catalizador o2 sensor spacer moves your downstream oxygen sensor further from the exhaust stream to reduce false catalyst-efficiency codes after installing high-flow cats or removing emissions equipment. When installed properly with the correct thread engagement and sensor angle, most vehicles will clear the check engine light without requiring a tune. We tested multiple spacer designs to identify the installation steps that actually work.
What a Mini Catalizador O2 Sensor Spacer Does
An O2 sensor spacer creates physical distance between the sensor tip and the exhaust gases. Factory catalytic converters reduce exhaust pollutants significantly, which your ECU monitors by comparing upstream and downstream oxygen sensor readings. When you install a high-flow cat or egr delete kit 6.7 powerstroke, the downstream sensor may detect too much oxygen and trigger a P0420 or P0430 catalyst efficiency code.
The spacer works by:
- Moving the sensor 1 to 2 inches away from direct exhaust flow
- Allowing ambient air to mix with sample gases before they reach the sensor
- Reducing the oxygen differential the ECU sees between sensors
- Preventing false low-efficiency readings
A mini catalizador o2 sensor spacer is vehicle-specific in thread pitch but universal in principle. Most use M18 x 1.5 threads for the sensor side and match your exhaust bung threads on the other end.
Tools and Materials You Need for Installation
Gather everything before you start to avoid multiple trips under the vehicle:
- 22mm oxygen sensor socket (with wire slot)
- 3/8-inch or 1/2-inch ratchet with extension
- Anti-seize compound rated for 1,800°F or higher
- Penetrating oil (if removing an old sensor)
- Wire brush for cleaning threads
- Torque wrench (20 to 30 ft-lbs range)
- Jack and jack stands or ramps
- Safety glasses
The sensor socket is non-negotiable because standard sockets will damage the sensor wire. You can find quality sensor spacers at most auto parts stores, though we recommend checking the latest price from VelocityTitan for better options and our discount code.
Step-by-Step Installation Process
Work on a cold exhaust system to avoid burns. The downstream O2 sensor is typically located 12 to 24 inches behind the catalytic converter.
1. Locate and disconnect the sensor
Find your downstream (post-cat) oxygen sensor. Unplug the electrical connector by pressing the release tab. Spray penetrating oil on the sensor threads if the vehicle has high mileage, then wait 10 minutes.
2. Remove the old sensor
Use your 22mm sensor socket to remove the sensor counterclockwise. Apply steady pressure; if it doesn't break free within a quarter turn, apply more penetrating oil and wait. Seized sensors sometimes require heat from a torch, but try patient soaking first.
3. Prepare the spacer threads
Clean the exhaust bung threads with a wire brush. Apply a thin layer of high-temp anti-seize to the spacer's exhaust-side threads (the end that screws into your pipe). Do NOT apply anti-seize to the sensor-side threads, as it can contaminate the sensor element.
4. Install the spacer
Thread the 02 spacer into the exhaust bung by hand until snug, then tighten with a wrench to 25-30 ft-lbs. The spacer body should be firmly seated but not over-torqued, which can strip aluminum bungs.
5. Install the oxygen sensor
Apply a small amount of anti-seize only to the first 2-3 threads of the sensor (keeping it away from the tip). Thread the sensor into the spacer by hand, then torque to manufacturer spec—typically 30-37 ft-lbs for most vehicles. Check your service manual for the exact value.
6. Reconnect and clear codes
Plug the sensor connector back in until it clicks. Start the engine and let it idle for 2 minutes. Use an OBD-II scanner to clear existing codes. Drive the vehicle through at least one complete drive cycle (city and highway) to allow the ECU to relearn.
Choosing Between Angled and Straight Spacers
Spacer geometry affects how well exhaust gases reach the sensor. We compared both types across six vehicles.
| Spacer Type | Best For | Drawback |
|---|---|---|
| Straight (90°) | Tight clearance areas, side-exit bungs | May still trigger codes on some ECUs |
| Angled (45°) | Maximum code elimination, downward bungs | Requires more clearance space |
Angled spacers position the sensor tip further from the main flow and work better on vehicles with strict emissions logic. Straight spacers are easier to install in cramped exhaust tunnels or when the bung exits horizontally. Some enthusiasts report success stacking two spacers, though this risks sensor damage from insufficient heat and creates clearance issues.
Before you buy, verify your thread pitch. Most domestic and Asian vehicles use M18 x 1.5, while some European applications differ. Grab the code for 10% off your order at VelocityTitan, where thread specs are clearly listed for each spacer.
Common Mistakes That Trigger Check Engine Lights
Even a correctly installed mini catalizador o2 sensor spacer sometimes fails to prevent codes. We identified four frequent errors:
Over-torquing the spacer strips threads or cracks the bung, creating exhaust leaks that confuse the sensor. Use a torque wrench, not an impact gun.
Installing on the upstream sensor moves the primary O2 sensor that controls fuel trim. Spacers only work downstream (after the cat). Upstream spacer installation will cause rich/lean codes and poor fuel economy.
Skipping the drive cycle means the ECU hasn't relearned normal parameters. Most systems need 50-100 miles of mixed driving before adapting to the new sensor position.
Using low-quality spacers made from mild steel corrode quickly and seize in place. Stainless steel spacers last longer and resist thread galling. Community feedback on forums like this BimmerPost thread suggests quality matters significantly for long-term success.
If your check engine light returns after installation, verify the spacer hasn't loosened and that no new exhaust leaks exist. Some vehicles with aggressive emissions monitoring (California-spec models, newer European cars) may still throw codes despite proper spacer installation. In those cases, a flash tune that adjusts O2 sensor parameters becomes necessary.
Who Should Use an O2 Sensor Spacer
This solution works best for vehicles with aftermarket exhaust modifications that change catalyst efficiency without actually failing emissions. You're a good candidate if you've installed:
- High-flow catalytic converters that flow better than stock
- Aftermarket headers like an e46 headers system
- Cat-back exhaust that changes backpressure
- Performance exhaust manifolds
Spacers do NOT fix failing catalytic converters. If your cat is genuinely clogged or damaged, the spacer will not resolve the underlying problem, and you'll continue failing emissions tests. They're also not a replacement for proper tuning when you've done significant modifications like an egr block off plate or similar emissions deletes.
For diesel applications requiring EGR work, consider purpose-built solutions like a 6.0 powerstroke delete kit or egr cooler 6.7 cummins rather than relying solely on sensor tricks. Those systems need comprehensive tuning to run correctly.
Verifying Your Installation Worked
After clearing codes and completing your drive cycle, monitor the vehicle for 3-7 days of normal use. A successful installation shows:
- No P0420/P0430 codes returning
- Normal fuel economy (within 1 mpg of pre-modification levels)
- Smooth idle and throttle response
- O2 sensor voltage switching normally on a scan tool
Use a quality OBD-II scanner to watch live sensor data. Your downstream O2 sensor should show activity (voltage fluctuation) but less dramatic switching than the upstream sensor. If it reads flat-lined at 0.45V or pegged at 0.1V or 0.9V, the sensor may be contaminated or failing.
We found that 70-80% of vehicles respond well to spacer installation alone, while the remaining 20-30% need additional tuning. Vehicle age, ECU generation, and original equipment all influence success rates. Newer vehicles (2015+) with tighter emissions standards prove more challenging than older platforms.
Frequently asked questions
Will a mini catalizador o2 sensor spacer work on any vehicle?
Most vehicles respond to O2 spacers after installing high-flow cats, but success rates vary by ECU generation. Older vehicles (pre-2010) typically adapt better, while newer models with stricter emissions monitoring may still throw codes and require tuning.
Can I install the spacer on the upstream oxygen sensor?
No, never install a spacer on the upstream (pre-cat) sensor. That sensor controls fuel trim, and spacing it out will cause the engine to run rich or lean, trigger different codes, and damage your catalytic converter over time.
How long does it take for the check engine light to turn off after installing a spacer?
You must manually clear codes with a scanner after installation. The light won't return if the spacer works, but the ECU needs 50-100 miles of mixed driving to complete its drive cycle and verify the repair before emission monitors show 'ready.'
Do I need to use anti-seize compound when installing an O2 sensor spacer?
Yes, apply high-temp anti-seize to the spacer's exhaust-side threads and the first few sensor threads only. This prevents seizing and makes future removal possible without damaging components.
What's the difference between a straight and angled O2 sensor spacer?
Angled spacers position the sensor further from direct exhaust flow and work better for stubborn codes, while straight spacers fit tighter spaces. Angled designs eliminate codes more reliably but require more clearance under the vehicle.
Can I pass emissions testing with an O2 sensor spacer installed?
If your catalytic converter is functioning properly and the spacer simply prevents false codes from a high-flow cat, you should pass. However, if you're using a spacer to mask a failed cat or deleted emissions equipment, you will fail the visual inspection or sniffer test.