
How to Mount a Red Dot Sight on Your Pistol Without Losing Zero

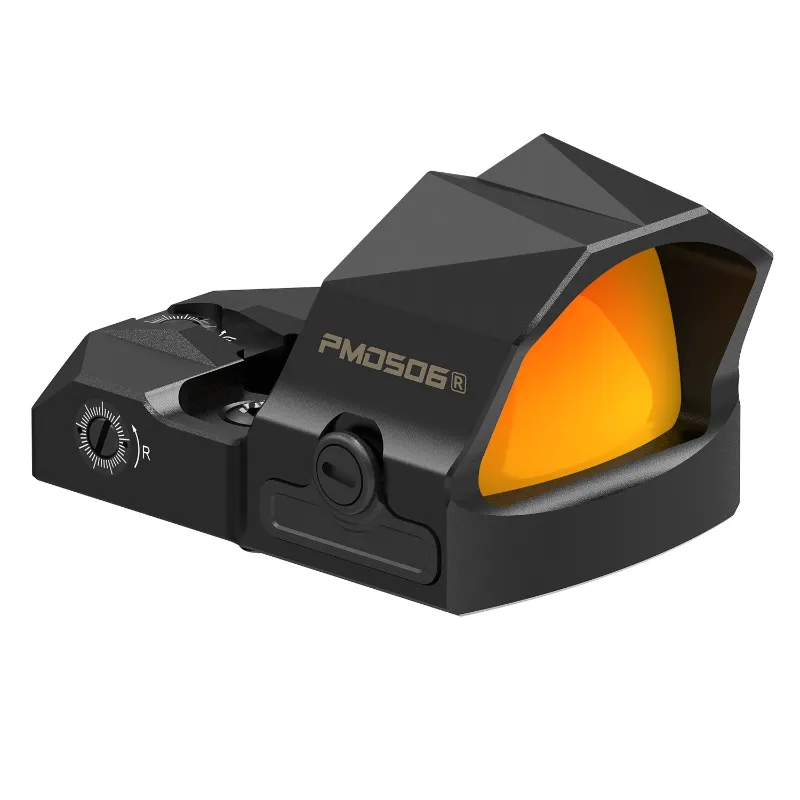
How to Mount a Red Dot Sight for Pistol Without Losing Zero
A red dot sight for pistol stays zeroed when you prep the slide, choose the correct mounting plate, torque fasteners to specification, and verify your point of impact before you holster. We've mounted dozens of optics on everything from competition guns to carry pistols, and the difference between a sight that holds zero and one that walks across the target comes down to four critical steps.
Most shooters skip surface prep or guess at screw tension, then wonder why their dot drifts after 200 rounds. Whether you're installing a red dot sight for pistol on a milled slide or using an adapter plate, the process is the same: clean, align, torque, and confirm. Here's how we do it.
Choose the Right Mounting System for Your Slide
Your pistol either has a factory-milled optic cut or needs an adapter plate. Milled slides accept optics directly and offer the lowest bore axis, but you must match the optic's footprint to the cut. Common patterns include RMR, Shield RMS, and Holosun K-series.
Adapter plates let you mount any optic to a standard cut, but they add height and one more potential failure point. If you go this route, buy a plate machined from steel or 7075 aluminum—never polymer. We've seen plastic plates crack under recoil in as few as 500 rounds.
Mounting system checklist:
- Confirm your slide's footprint (check the manufacturer's spec sheet or measure the hole spacing)
- Buy an optic or plate that matches that footprint exactly
- Verify the plate includes hardened steel screws, not soft stainless fasteners that strip easily
- Check that your holster will clear the optic's height and width once mounted
If your slide isn't cut and you don't want to mill it, some shooters add a laser light combo to the rail instead, though that won't replace a proper red dot for rapid target acquisition.
Prep the Mounting Surface and Hardware
Oil, thread locker residue, and metal shavings prevent full screw engagement and create microscopic gaps that let the optic shift. Before you touch a screw, clean every surface.
Surface prep steps:
- Wipe the slide's mounting surface with isopropyl alcohol and a lint-free cloth
- Scrub screw holes with a cotton swab dipped in alcohol to remove old thread locker
- Clean the optic's footprint with alcohol—check for burrs or high spots with your fingernail
- Dry all surfaces completely before you apply new thread locker
Thread locker is not optional. We use medium-strength (blue) Loctite 243 on optic screws. Apply one small drop to the first three threads of each screw, never inside the hole. Let the locker cure for 24 hours before you shoot.
Some shooters also mount accessories like an IR laser or AR 15 light on pistols with extended rails. The same prep rules apply: degrease, dry, and lock.
Torque Screws to Manufacturer Specification
This is where most mounting jobs fail. Too little torque and the optic walks under recoil. Too much and you strip threads or crack the optic housing. Every optic manufacturer publishes a torque spec—use it.
Torque process:
- Set your inch-pound torque wrench to the manufacturer's spec (typically 12 to 18 in-lbs for pistol optics)
- Hand-thread all screws until they're finger-tight, checking that the optic sits flush
- Torque screws in a cross pattern (like tightening lug nuts on a wheel) to distribute clamping force evenly
- Recheck each screw in the same pattern—the first screw may loosen slightly as you tighten the others
If you're using an adapter plate, torque the plate to the slide first, then torque the optic to the plate. Never assume "tight enough" without a torque wrench. We've measured hand-tightened screws ranging from 8 in-lbs to over 30 in-lbs on the same gun.
For shooters who also run a Votatu laser or other rail-mounted accessory, those typically require 15 to 25 in-lbs depending on the mount. Check the manual.
Zero Your Optic and Confirm Retention
Mount the optic, then zero it at your preferred distance—we use 15 yards for defensive pistols and 25 yards for competition guns. Fire a three-round group, adjust the dot to center that group, then fire a confirmation group. Once you're satisfied, shoot 50 rounds of your carry or match ammo to confirm the zero holds.
Zero confirmation checklist:
- Fire your initial zero group from a supported position (bag, bench, or barricade rest)
- Make windage and elevation adjustments in the smallest increments your optic allows
- Shoot a second group—if it's centered, you're zeroed
- Run 50 rounds through drills that include draw, recoil, and movement
- Fire a final three-round group to verify the dot didn't walk
If the zero shifts after 50 rounds, remove the optic and inspect the screws. Loose screws mean insufficient torque or failed thread locker. Stripped threads mean you over-torqued or the fasteners were too soft.
Many of the 8 Best Pistol Red Dot Sights In 2026 (Pros & Cons) we tested held zero through 1,000-round evaluations when mounted correctly. Vortex also publishes excellent technical resources on red dots if you want to dive deeper into optic design and zero retention.
Maintain Your Mounting Hardware Over Time
Even a perfect mount requires inspection. Heat, recoil, and environmental exposure stress threads and thread locker over time. We check optic screws every 500 rounds or after any hard impact (drop, vehicle rollover, etc.).
Maintenance routine:
- Wipe carbon and debris from around the optic base after every range session
- Check screw tension with your torque wrench every 500 rounds—retorque if any screw turns
- Replace thread locker annually or after removing the optic for any reason
- Inspect the mounting surface and optic footprint for cracks, corrosion, or wear
If you shoot in wet or coastal environments, rinse the pistol with fresh water after exposure to salt or mud, then dry and lubricate. Corrosion under the optic will lift it off the slide and destroy your zero.
Shooters who run a laser light or other rail accessory should inspect those mounts on the same schedule. For current pricing on any Votatu product, grab the code at our discount page—we update it as new deals go live.
Common Mistakes That Cost You Zero
We see the same errors on almost every range trip: shooters who skip steps, guess at torque, or trust that factory screws are tight. Here's what not to do.
Mistakes to avoid:
- Using the optic's included screws without checking length—screws that bottom out in the hole never clamp the optic
- Skipping thread locker because "I tightened it really hard"
- Mounting over dirt, oil, or old thread locker residue
- Torquing screws in a circle instead of a cross pattern, which cocks the optic
- Zeroing at 7 yards and assuming it holds at 25—always confirm at your real shooting distance
We also see shooters mount optics on pistols that weren't designed for them. If your slide isn't cut for an optic and you don't want to mill it, you're better off practicing with irons or upgrading to a milled slide than relying on a clamp-on mount that shifts.
For a deeper look at how different optics perform, The Best 5 Red Dot Sight Options For Handguns breaks down durability and zero retention across brands. You can also compare models side-by-side when you check our current selection and pricing.
Final Checklist: Is Your Optic Ready?
Before you trust a red dot on a carry or competition pistol, run this checklist:
- Mounting surfaces are clean, dry, and free of burrs
- Optic and plate (if used) match your slide's footprint
- All screws are torqued to spec in a cross pattern
- Thread locker has cured for 24 hours
- Zero confirmed at your shooting distance
- Optic held zero through at least 50 rounds of live fire
- Holster clears the optic without interference
A properly mounted red dot transforms how you shoot a pistol—faster splits, easier tracking, and better hits under stress. But only if it stays where you put it. Follow these steps every time you mount an optic, and you won't lose zero.
Frequently asked questions
What torque spec should I use for a red dot sight for pistol?
Most pistol red dots require 12 to 18 inch-pounds of torque. Always check the manufacturer's specification in the manual or on their website, and use a calibrated inch-pound torque wrench to avoid stripping threads or under-tightening.
Do I need thread locker when mounting a pistol optic?
Yes. Medium-strength thread locker (Loctite 243 or equivalent) prevents screws from loosening under recoil. Apply one drop to the screw threads, torque to spec, and let it cure for 24 hours before shooting.
Can I mount a red dot on a pistol slide that isn't milled?
You'll need an adapter plate that matches your slide's existing cut or have the slide professionally milled. Clamp-on mounts are unreliable under recoil and not recommended for defensive or competition use.
How often should I check my optic mounting screws?
Inspect screws every 500 rounds or after any drop or hard impact. Use a torque wrench to verify tension, and retorque with fresh thread locker if any screw has loosened.
Why does my pistol red dot lose zero after a few magazines?
The most common causes are under-torqued screws, skipped thread locker, dirty mounting surfaces, or screws that bottom out before clamping the optic. Clean all surfaces, use the correct screw length, apply thread locker, and torque to spec.
What's the difference between direct mount and using a plate?
Direct mount means the optic bolts straight to a milled slide cut that matches its footprint, offering the lowest height and fewest failure points. An adapter plate lets you use any optic on a standard cut but adds height and requires two sets of screws.