
How to Paint and Weather Military Aircraft Models for Realistic Battle Damage

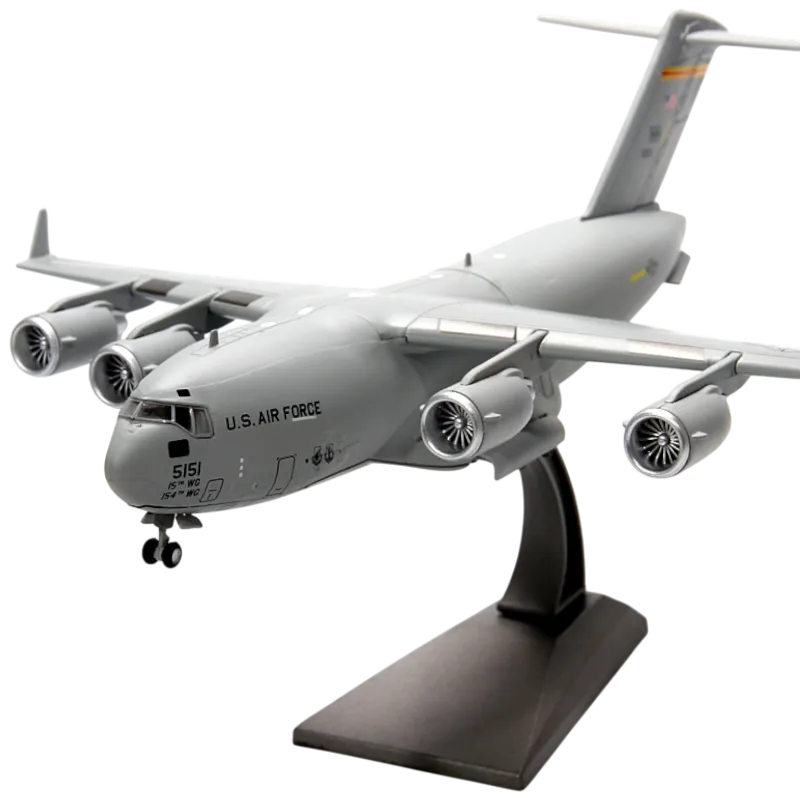
How to Paint and Weather Military Aircraft Models for Realistic Battle Damage
Painting and weathering military aircraft models requires layered techniques that mimic combat wear, panel fading, and metal chipping to transform factory kits into realistic warbirds. Whether you're building an f 22 raptor model, second world war aeroplanes, or modern predator drones, the right weathering approach brings your kit to life with authentic battle scars and operational wear.
We've tested dozens of paints, washes, and weathering products across jet fighters, helicopters, and UAVs to identify the techniques that deliver museum-quality results. This guide walks you through base coating, panel line shading, chipping effects, and battle damage that reflect real military aircraft service environments.
Base Coating Military Aircraft Models
Your foundation coat determines how weathering layers interact with the surface. Start with a neutral gray or white primer to ensure accurate color representation, especially critical for light grays and tactical camouflage schemes common on jets like the mcdonnell douglas f 15a eagle.
Apply your base color in thin, even coats using an airbrush at 15-20 PSI. Modern jets typically wear low-visibility gray schemes, while Vietnam-era aircraft like the a-7e corsair feature tactical camouflage in greens and browns. Helicopters such as the boeing ah-64d apache longbow often display olive drab or desert tan finishes depending on theater.
Key base coating steps:
- Prime with tamiya or vallejo surface primer
- Thin acrylic paints 1:1 with airbrush thinner
- Build color density gradually with 2-3 light passes
- Allow 24 hours curing before weathering layers
- Seal with gloss coat for decal application
Pre-shading beneath panel lines with darker gray or black adds depth that shows through your top coat, creating realistic shadows where panels meet. This technique works exceptionally well on large surfaces like transport aircraft wings.
Panel Line Washing and Fading Techniques
Panel lines define the individual plates and access panels that make up an aircraft's skin. After applying decals and a gloss coat, use enamel washes to flow dark pigment into recessed panel lines. We recommend checking the latest price on quality enamel wash sets before starting.
Mix burnt umber or black enamel paint with mineral spirits at a 1:10 ratio. Apply the wash along panel lines with a fine brush, letting capillary action pull pigment into recesses. After 20 minutes, remove excess with a cotton swab dampened with clean spirits, leaving color only in the grooves.
Panel fading replicates UV exposure and weather wear on operational aircraft. Lighten your base color by 10-15% and lightly spray the center of panels, leaving edges darker. This creates the sun-bleached appearance visible on long-service aircraft like the royal canadian air force c 17.
Fading strategy by aircraft type:
| Aircraft Type | Fade Pattern | Weathering Focus |
|---|---|---|
| Modern jets | Subtle center fading | Panel lines, exhaust stains |
| WWII fighters | Heavy chipping, paint wear | Gun ports, wing roots |
| Helicopters | Rotor wash streaks | Underside, engine area |
| UAVs | Minimal wear | Sensor housings, landing gear |
For predator unmanned aerial vehicle models, weathering should be conservative since these aircraft operate in controlled environments with regular maintenance.
Chipping and Metal Exposure Effects
Chipping reveals bare metal or primer where paint has worn away from friction, impact, or maintenance access. Use a sponge technique for random chip patterns or a fine brush for deliberate damage along panel edges and high-traffic areas.
Load a torn piece of sponge with dark gray or metallic silver paint, dab off excess, and lightly tap high-wear zones: cockpit edges, wing roots, access panels, and leading edges. For second world war aeroplanes, increase chipping density to reflect lower paint quality and combat conditions.
Chipping zones by wear type:
- Maintenance wear: Access panels, canopy frames, boarding steps
- Combat damage: Leading edges, gun ports, shrapnel impacts
- Environmental wear: Wing roots, engine cowlings, tail surfaces
- Ground handling: Landing gear doors, tow points, tie-down locations
Apply hairspray under your top coat for authentic paint flaking. Once the top coat dries, lightly scrub targeted areas with a wet brush to lift paint and expose the darker base layer beneath. This technique perfectly captures the worn appearance of heavily-used aircraft like transport helicopters.
Creating Realistic Battle Damage and Exhaust Staining
Battle damage ranges from small-caliber bullet holes to larger shrapnel impacts and scorching. Drill entry holes with progressively larger bits (0.5mm to 2mm), then paint crater edges with metallic silver to simulate torn aluminum. Add dark brown or black around impacts to represent scorching or hydraulic fluid staining.
Exhaust staining appears as dark streaks aft of jet nozzles and helicopter exhausts. Mix black and burnt umber pigments with mineral spirits and airbrush from the exhaust source backward, fading intensity as you move away. The a 7e attack aircraft shows heavy exhaust staining due to its single-engine configuration and sustained combat operations.
Weathering intensity guide:
- Light: Training aircraft, ceremonial schemes, recently overhauled
- Moderate: Active service jets, rotational deployments
- Heavy: Combat theater, extended deployments, WWII bombers
- Extreme: Derelict aircraft, crash sites, museum restoration projects
Apply pigment powders for dust, dirt, and fuel stains. Tap dry pigment onto the model, then fix with pigment fixer or mineral spirits applied with a brush. Focus dust accumulation in panel line recesses, landing gear wells, and underside surfaces. Grab the code for 10% off weathering supplies and pigment sets.
Advanced Weathering for Modern Military Jets
Modern military aircraft types maintain cleaner finishes than historical warbirds, but subtle weathering still separates display-quality models from toy-like builds. Focus on operational wear rather than combat damage for contemporary jets.
Rain marks appear as vertical streaks from water running over panels during wet operations. Thin white or light gray paint heavily and drag a nearly-dry brush vertically from panel lines and rivet details. This effect works particularly well on dark-gray stealth aircraft where rain deposits leave mineral traces.
Hydraulic and fuel staining create subtle color variation around access panels and refueling ports. Apply thin washes of brown, orange, or purple to suggest fluid leakage and residue. These stains should be minimal on well-maintained aircraft but more pronounced on deployed units.
Modern jet weathering checklist:
- Subtle panel fading on horizontal surfaces
- Light exhaust staining (heavier on afterburner-equipped fighters)
- Minimal chipping on leading edges only
- Rain streaks and mineral deposits
- Tire rubber marks on landing gear doors
- Antenna scuff marks from maintenance ladders
Finish with a semi-matte clear coat to unify weathering layers and protect your work. Pure matte finishes can look dusty, while satin captures the appearance of operational aircraft between wash cycles.
Sealing and Protecting Your Weathered Finish
Once weathering is complete, seal your model with a protective clear coat matched to your desired sheen level. Most operational aircraft display a semi-gloss to satin finish after washing, while neglected or desert-deployed units show matte surfaces from dust accumulation.
Apply your final coat in multiple light passes rather than one heavy application to avoid pooling in recesses or obscuring your weathering work. Vallejo and AK Interactive offer excellent clear coats in spray cans and airbrush-ready bottles.
Allow 48-72 hours full cure time before handling extensively or installing delicate parts like antennas and pitot tubes. Store completed models away from direct sunlight to prevent UV yellowing of clear parts and paint fade.
Whether you're weathering a modern fighter or building a historic warbird collection, these layered techniques deliver results that capture the operational character of real aircraft. The key is building effects gradually and studying reference photos of your specific aircraft type in service conditions.
Frequently asked questions
What type of paint works best for military aircraft models?
Acrylic paints from Tamiya, Vallejo, or AK Interactive work best for military aircraft models because they thin easily for airbrush application, dry quickly, and produce accurate military color matches. Enamel washes over acrylic base coats provide the best panel line definition.
How much weathering should I apply to a modern jet fighter model?
Modern jets require subtle weathering focused on panel fading, light exhaust stains, and minimal chipping on leading edges only. Operational jets are well-maintained, so avoid heavy battle damage unless modeling a specific combat-damaged aircraft.
Can I use the same weathering techniques on WWII aircraft and modern jets?
No, WWII aircraft require heavier chipping, paint wear, and combat damage due to lower paint quality and sustained combat operations, while modern jets need restrained weathering that reflects regular maintenance and advanced coatings. Adjust your technique intensity to match the era.
What creates realistic metal chipping on model aircraft?
A torn sponge loaded with metallic silver or dark gray paint creates the most realistic random chipping patterns. Dab the sponge lightly on high-wear areas like panel edges, wing roots, and access hatches, building up chips gradually rather than all at once.
Should I apply a gloss or matte finish to weathered military aircraft models?
Apply a semi-gloss or satin finish to most military aircraft models, as this matches the appearance of operational aircraft after washing. Use matte only for heavily weathered or desert-deployed aircraft, and reserve gloss for freshly painted ceremonial schemes.
How do I weather helicopter models differently from fixed-wing aircraft?
Helicopter models need rotor wash streaks on the fuselage and underside, heavier engine area weathering, and dust accumulation in panel lines. Focus weathering on high-vibration areas and rotor downwash paths rather than aerodynamic wear patterns used on jets.