

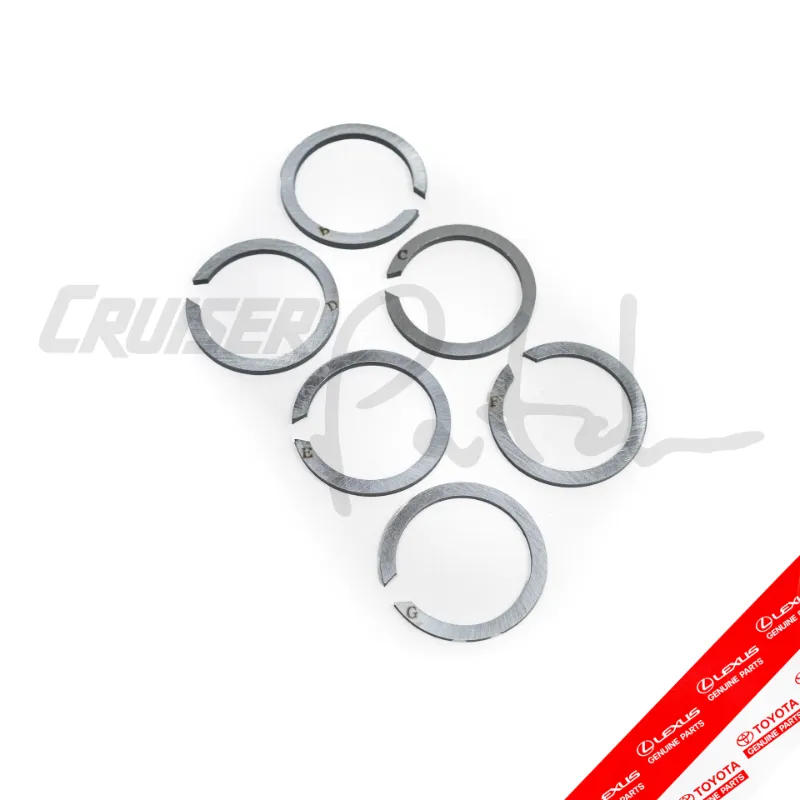
# How to Replace a CV Shaft Snap Ring on Your Land Cruiser or 4Runner
If your Toyota 4WD clunks when you accelerate from a stop, pops under load in 4WD, or shakes like it's got a bad inner joint even though the boots look fine, there's a good chance the culprit isn't the axle itself — it's the cv shaft snap ring. This tiny circlip is what seats the axle shaft into the differential side gear or the transfer case output, and when it wears, breaks, or pops out of its groove, the axle can walk in and out of the housing. That's the clunk you're feeling.
The good news: this is one of the most satisfying DIY jobs on a Land Cruiser, 4Runner, or FJ Cruiser. You can do it in your driveway in a couple of hours with basic tools, and the parts cost almost nothing. Grab a quality replacement cv shaft snap ring before you start — never re-use the old one, because once a snap ring has been popped out of its groove, it loses tension and will fail again.
Here's the complete walkthrough.
What Does the CV Shaft Snap Ring Actually Do?
On Toyota solid-axle and IFS rigs alike, the axle shaft isn't bolted into the diff — it's retained by an internal snap ring seated in a machined groove on the shaft. When everything's healthy, that ring locks the shaft in place while still allowing it to spin. When the ring fatigues, the axle develops free play, hammering the side gears and eventually chewing up the diff internals. Replacing a $5 ring beats rebuilding a third member every day of the week.
Symptoms of a failed or missing cv shaft snap ring:
- Clunking or banging on takeoff, especially when turning
- A "pop" when shifting in and out of 4WD
- Axle shake that doesn't go away with new CV joints
- Visible axle end-play if you grab the shaft and try to move it in/out
Tools and Parts You'll Need
- Replacement cv shaft snap ring (buy two — you'll want a spare)
- Snap ring pliers (internal and external)
- Floor jack and jack stands
- Slide hammer or a long pry bar
- Breaker bar and 35mm socket (hub nut, on IFS rigs)
- Gear oil or fresh fluid to top off if any spills
- Gloves, safety glasses, and patience
If your axle is coming out entirely anyway, it's smart to service supporting components at the same time. A worn 555 ball joint is a common discovery on higher-mileage 4Runners and 100-series Cruisers during axle work — 555 is the OEM supplier for Toyota, so you're not gambling on no-name parts. And if you're draining fluids, top off with genuine toyota red coolant for the cooling system if it's due, or check whether your rig needs toyota ahc fluid — that one's critical if you've got a 100-series with Adaptive Height Control, since AHC systems are extremely picky about fluid spec.
Step 1: Safety First
Park on level ground, chock the rear wheels, and get the front end up on quality jack stands. Never trust a jack alone. If you're working on an IFS 4Runner or GX, loosen the hub nut while the wheel is still on the ground — breaking it free at 200+ ft-lbs is far easier with the tire planted.
Step 2: Remove the Wheel and Access the Axle
Pull the wheel, then depending on your rig:
- IFS (4Runner, FJ, GX470, 120/150-series): Remove the hub nut, brake caliper and rotor, and disconnect the lower ball joint or the tie rod to swing the knuckle outboard so the axle can slide free.
- Solid axle Land Cruiser (80/100/105-series): The front axle pulls out of the diff housing once the hub and knuckle components are off the inboard flange side — the snap ring is at the diff end.
While you're in here inspecting the knuckle, keep an eye on small plastic clips and retainers — they love to crack with age. If a trim or harness clip shatters, a gx470 door clip assortment covers a surprising range of Toyota panel and trim retainers, not just door cards.
Step 3: Pop the Old Snap Ring
Locate the groove on the axle shaft where the old ring should be sitting. If the ring is still intact, use snap ring pliers to expand it and slide it off. If it's broken or missing, you may find fragments inside the diff housing — fish them all out with a magnet on a stick. Leaving a chunk of steel in your differential is how a $10 job becomes a $2,000 job.
Step 4: Seat the New Ring
Slide the new cv shaft snap ring into the groove with the gap positioned so it seats fully and evenly. It should rotate freely in the groove but have zero radial play. A light coat of gear oil on the shaft helps it slide into the side gear when you reinstall.
Step 5: Reinstall the Axle
Push the shaft back into the housing until you feel it bottom against the snap ring, then give it a firm seat — some guys use a soft mallet or a slide hammer in pull mode to make sure the ring has snapped into its groove. Grab the axle and try to pull it out. If it moves more than a couple millimeters, it's not seated. Do not drive on it until it is.
Step 6: Torque Everything and Test
Reassemble in reverse order, torque the hub nut to spec, and pump the brakes before moving. Take a slow test drive and listen for that clunk — it should be gone. If your rig's alignment feels off after the front end work, get it checked.
Bonus: Jobs to Do While You're In There
One of the biggest reasons DIYers love this job is that it opens the door to easy preventive maintenance:
- Ball joints: Replace them proactively with 555 ball joint components while the knuckle is apart.
- Fluids: Refresh driveline fluids — and if you're at it, flush the coolant with toyota red coolant and check AHC levels with toyota ahc fluid if applicable.
- Suspension: Notice a sagging rear end? A set of sumo gear progressive springs or air helper springs transforms how loaded-up Cruisers and 4Runners sit and tow.
- Styling and recovery prep: Once it's back on the ground, check your wheel fitment — if you're shopping rims, make sure they match the 5x150 bolt pattern used on 100-series and LX470 platforms, and browse 5x150 bolt pattern wheels sized right for overland builds. Then add shade to camp with an ironman 4x4 awning, mount it up with brackets from sidetracked offroad, and slap a cruiser sticker on the rear glass to celebrate.
- Tune-up: If she's running rough after sitting, a fresh ktrs 550 fuel treatment or tune-up part is cheap insurance.
How to Save Money on the Parts
Before you check out, head to the Cruiser Patch discount code page — there's currently 5% OFF sitewide, which stacks nicely when you're buying the cv shaft snap ring, ball joints, and fluids in one order. Small parts add up fast on a full front-end service, so that 5% covers a coffee on the drive home.
Final Thoughts
The cv shaft snap ring is the cheapest part on your driveline and one of the few that can imitate a catastrophic failure. Don't let a $5 circlip convince you that you need a whole new axle. Grab your pliers, set aside an afternoon, knock it out, and enjoy the silence on the drive home.
Happy wrenching — and see you on the trail.
 Shopping at Cruiser Patch? See today's verified Cruiser Patch discount code
Frequently asked questions
What are the symptoms of a bad cv shaft snap ring?
Common signs include clunking or banging on acceleration from a stop, popping when engaging 4WD, axle shake that persists after replacing CV joints, and noticeable in-and-out play if you grab the axle shaft.
How much does it cost to replace a cv shaft snap ring on a Land Cruiser or 4Runner?
The snap ring itself is inexpensive, typically under $10, though total job cost depends on whether you also replace ball joints, fluids, or hub components while the axle is out.
Can I reuse a cv shaft snap ring?
No. Once a snap ring has been removed from its groove, it loses its tension and is likely to fail again. Always install a new ring during reassembly.
How long does the job take?
Most DIYers can complete the job in 2 to 4 hours depending on the platform. IFS rigs like the 4Runner and GX470 require hub nut and knuckle work, while solid axle Land Cruisers involve more disassembly at the knuckle.
What happens if I drive with a missing or unseated snap ring?
If the axle isn't fully seated against the ring, it can walk out of the differential under load, causing severe clunking and potentially damaging the side gears. Always verify the axle is locked in before driving.