
How to Set Up and Take Down a Pop Up Canopy with Sides Without Damaging the Frame

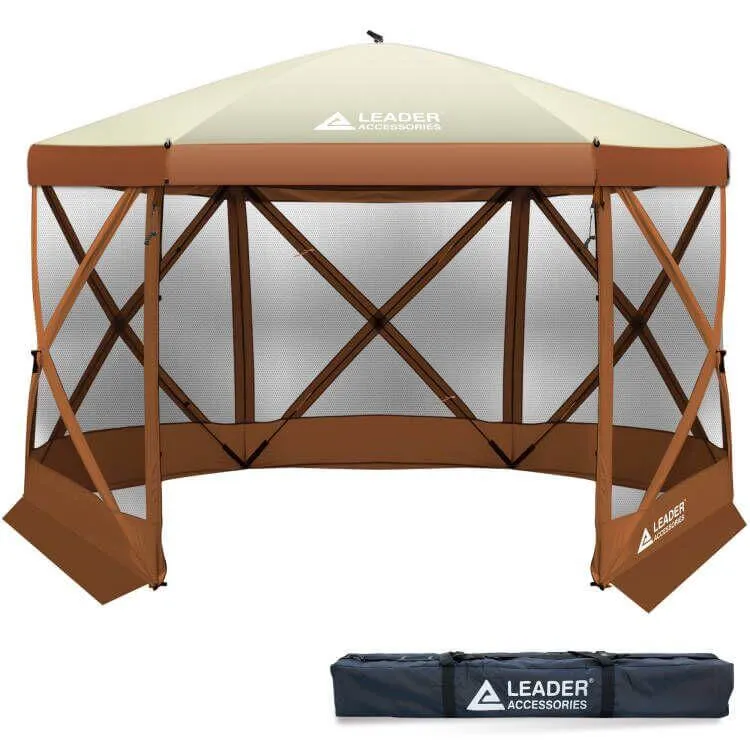
A pop up canopy with sides survives years of tailgates and craft fairs if you respect two rules: never force the frame, and never let the top or walls stay attached while you collapse it. Most bent legs and torn corners we see come from rushing the takedown with the sides still zipped on. Here is the exact sequence we use when testing canopies, so your frame stays straight and your walls stay sewn to their velcro.
What You Need Before You Start
A 10x10 pop up canopy with sides is a two-person job, no matter what the box says. Have on hand:
- A second person (one per side on a 10x20 setup)
- The roller bag or carry bag, unzipped and laid flat
- Weighted legs, sandbags, or stakes already in place if the canopy is standing
- A clean, dry patch of ground to fold the frame on
If you are shopping rather than setting up, our current favorite is this pop up canopy with sides for weekend events, and the heavier canopy with walls option if you need a waterproof pop up canopy with sides for multi-day use. For open-air setups where airflow matters more than privacy, a pop up gazebo with mesh screening is worth a look. Check the latest price before you buy, because our code usually knocks 10% off sitewide.
Setting Up a Pop Up Canopy with Sides: Step by Step
- Unpack and stage the frame. Pull the folded frame out of the bag and stand it on its feet roughly where the canopy will live. Keep the pull-pin side facing outward so you can reach every latch.
- Drape the top while the frame is folded. Slide the top over the partially closed frame and attach the corner velcro or hook-and-loop straps. This is the single biggest mistake people skip: putting the top on a fully opened frame means stretching fabric over your head and yanking corners, which is how corner pockets tear.
- Open one leg at a time. With a partner holding the opposite side, walk backward and extend two legs halfway, then the other two. Never open one side fully while the other stays collapsed; the scissor bars will twist.
- Raise to full height and lock the sliders. Once all four legs are partway up, lift the center peak or use the slider mechanism until the frame is fully extended, then seat every pull pin or slider lock. An unlocked slider is the number one cause of a frame collapsing in a gust.
- Attach the sides. Zip or velcro the walls starting at the back corners, working toward the front. Hook the wall top rail onto the frame first, then fasten down the sides, so the fabric hangs square instead of pulling at one corner.
- Weight every leg. Canopies are wind sails. Use 25 to 40 pounds of ballast per leg, or stake down on grass. Cheap frames plus unweighted legs equal a mangled frame in one storm.
The Takedown Sequence That Protects the Frame
Takedown is setup in reverse, with two extra rules.
- Remove the sides first, while the frame is still standing. Unzip or unclip each wall, fold it into thirds lengthwise, and lay it flat. Pulling walls off a half-collapsed frame drags fabric across the ground and stresses the corner seams.
- Take the top off next if the manufacturer says to. On most Leader Accessories-style frames, the top stays on for folding, but a wet or very loose top should come off first. Unstrap all four corners evenly rather than peeling one side.
- Lower the legs halfway, all four together. One person per side, release the sliders in pairs. Dropping one leg fully before the others racks the scissor arms sideways.
- Fold the frame flat and remove the top. Walk the legs together until the frame is fully closed, then unstrap the top and fold it loosely, printed side in. Never roll the top tight with the frame bag squeezing it; trapped creases bake into permanent wrinkles and weaken the coating.
- Bag it dry. This is the rule that matters most. Packing a damp top or walls into the bag breeds mildew within weeks, and mildew eats waterproof coatings. If you must pack wet, unroll it at home within 24 hours and let everything air dry before storage.
Common Mistakes That Bend Frames and Tear Tops
- One-person setup on a large frame. A 10x20 pop up canopy with sides has real leverage; solo lifting twists the truss bars.
- Forcing a stuck slider. If a pin will not seat, check that the frame legs are square, not half-twisted. Pushing harder bends the channel.
- Winding walls around the frame legs. Fold the walls flat and bag them beside the frame, not wrapped around the struts.
- Dragging the bag by the frame. Carry the bag by its handles or roll it; dragging scuffs the powder coat and exposes bare metal to rust.
- Leaving the canopy up overnight or in wind. Even a heavy duty pop up canopy with sides is rated for breeze, not storms. Drop it if you would not stand under it.
Materials and Care: Make the Frame Last
Most quality canopies use a powder-coated steel or anodized aluminum frame with a polyester or polyethylene top. Aluminum costs more but resists rust, which matters if you store the unit in a garage or shed. Steel is stronger per dollar but needs to stay dry in storage.
Care checklist:
- Hose off bird droppings and sap with mild soap; never scrub the silver underside coating
- Let tops and walls dry fully before bagging
- Touch up frame chips with clear rust-inhibiting spray
- Store the bag flat, not standing on end, so the folded legs do not sag out of square
If your canopy is more screen room than weather shelter, a pop up screen tent uses the same setup discipline but lighter walls, and the same care rules apply.
Which Size and Style Fits Your Event
| Use case | Best fit | Why |
|---|---|---|
| Farmers market or craft booth | 10x10 pop up canopy with sides | One wall as a windbreak, three open for foot traffic |
| Tailgate or camp kitchen | Waterproof pop up canopy with sides, 10x10 to 10x20 | Walls block rain sideways and keep the cook zone dry |
| Backyard bug-free lounging | Pop up screen tent or gazebo tent | Mesh walls breathe while keeping insects out |
| Multi-day festival booth | Heavy duty pop up canopy with sides | Thicker frame gauge handles repeated setups |
Sizing rule of thumb: figure one 8-foot table per 10 feet of width, and add a size if you want people to stand comfortably behind the table. For browsing current designs and prices, the best-selling new releases in outdoor canopies list is a quick read on what sizes are trending, and you can grab the code to take 10% off your Leader Accessories order sitewide.
Treat the frame gently and the fabric dryly, and a mid-range pop up canopy with sides will outlive the party invitations that keep it busy.
Frequently asked questions
Should I take the sides off before folding my pop up canopy?
The safest method is removing the walls while the frame is still standing, lowering all four legs halfway together, then folding the frame flat and taking the top off last, unless the manufacturer says otherwise. Never pull walls off a half-collapsed frame.
Can one person set up a 10x10 pop up canopy with sides?
No, the frame can collapse and pinch you, and sliders can bind or bend. A 10x10 is manageable with two people, and a 10x20 needs one person per side.
What happens if I pack my canopy wet?
Mildew grows quickly on damp fabric and eats the waterproof coating, and trapped creases set into permanent wrinkles. Unroll wet tops or walls within 24 hours and air dry them fully before storage.
What should I look for in a waterproof pop up canopy with sides?
Look for a powder-coated or anodized frame, a top with a waterproof coating, and wall panels that attach with full-length zippers or velcro. Weighted legs or stakes are essential because walls turn the canopy into a wind sail.
What size canopy do I need for a vendor booth?
A 10x10 fits a standard booth table with room to stand behind it. Choose a 10x20 if you need two tables, gear storage, or a covered walkway, and expect to need an extra person or two for setup.
How do I keep my canopy from blowing away?
Use 25 to 40 pounds of ballast per leg such as sandbags or weight plates on hard surfaces, or stake the legs on grass. Never rely on guy ropes alone for a canopy with walls.