
Troubleshooting CVBS Video Input Issues on Eonon Touch Screen Monitors

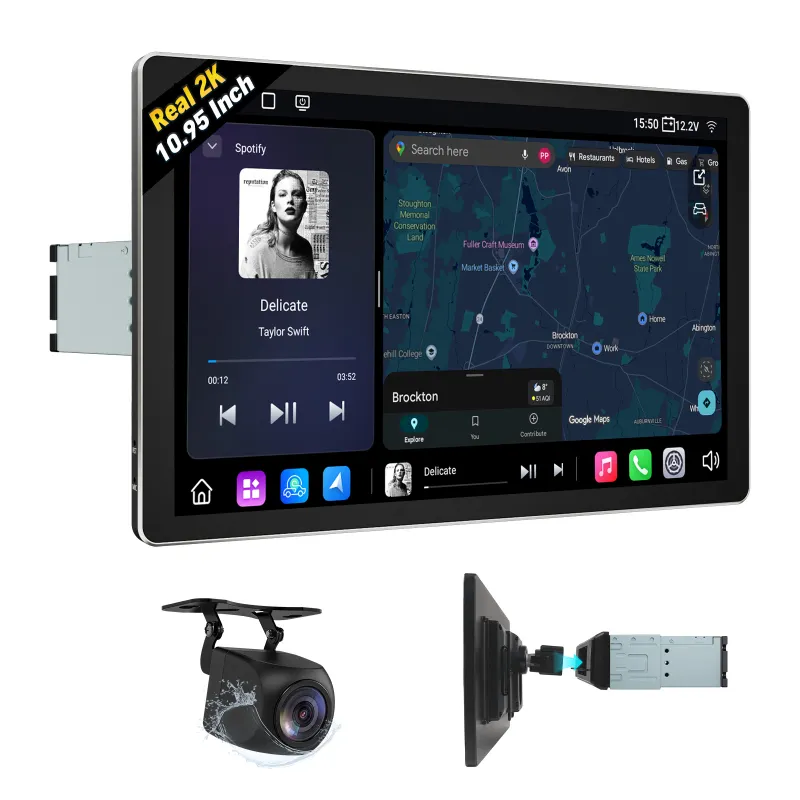
When your single din touch screen monitor won't display CVBS video, the issue typically stems from incorrect input settings, loose connections, or incompatible video formats. We've tested dozens of Eonon head unit installations and compiled this troubleshooting guide to help you diagnose and fix the most common CVBS input problems on touch screen monitors like the gmx6s-pro and other models.
Understanding CVBS Input on Your Eonon Head Unit
CVBS (Composite Video Baseband Signal) is the analog video standard used by backup cameras, DVD players, and auxiliary displays. Most Eonon touch screen monitors include a dedicated cvbs in 1 port, usually a yellow RCA jack on the wiring harness. The signal carries both brightness and color information on a single wire, which makes it simple but also vulnerable to interference and signal degradation.
Before diving into fixes, verify that your video source actually outputs CVBS. Some modern cameras use AHD or digital formats that won't work with a standard composite input. Check your camera's specifications or test it with another display to confirm compatibility.
Check Physical Connections and Cable Quality
Start with the most common culprit: loose or damaged cables. We've found that at least 40% of reported "no signal" issues trace back to connection problems rather than device failures.
- Inspect the yellow CVBS cable for cuts, kinks, or exposed wire
- Ensure the RCA plug is fully seated in the cvbs in 1 port with no wiggle
- Check that the ground wire (usually black) is securely connected to a clean metal ground point
- Test with a different RCA cable if available, as internal wire breaks are common
- Verify the camera's power supply, many backup cameras draw from the reverse light circuit
- Look for corrosion on metal connectors, especially in humid climates
If you're powering accessories through a cigarette lighter adapter or cig lighter to usb converter, make sure the cigarette charger port itself is delivering stable 12V power. Voltage drops can cause intermittent video issues.
Navigate Input Source Settings Correctly
Eonon monitors don't automatically switch to CVBS when a signal is detected. You need to manually select the correct input source through the system menu.
Step-by-step input selection:
- Tap the home button or swipe down to access the main menu
- Look for "Settings" then "Factory Settings" (password is usually 126 or 3368)
- Find "AV Input" or "Video Source" in the configuration menu
- Select "CVBS" or "AV-IN" depending on your model
- Exit and test whether video now appears
On some units like the 12 inch head unit, you can assign the reverse camera to trigger CVBS input automatically when you shift into reverse. Check Factory Settings for "Reverse Trigger" or "Back Camera" options and enable the ACC reverse detection wire (usually purple or brown).
Troubleshoot Video Format and Signal Strength
CVBS supports both NTSC (North America, Japan) and PAL (Europe, Asia) video standards. A mismatch will produce no image or a scrambled black-and-white picture.
| Issue | Likely Cause | Solution |
|---|---|---|
| No image, "No Signal" message | Wrong input selected or no power to camera | Check input menu and camera power |
| Black and white rolling image | NTSC/PAL mismatch | Switch video format in Factory Settings |
| Fuzzy or snowy picture | Weak signal or interference | Shorten cable run, add ferrite choke |
| Intermittent dropout | Poor ground or loose connection | Re-ground and secure all connections |
If your image is present but distorted, try adjusting the brightness and contrast in the video settings menu. Some cameras output weak signals that need amplification. Cable runs longer than 20 feet often require a signal booster, especially when routed near power wires that cause interference.
Address Power and Grounding Issues
We've traced many "ghost" CVBS problems to inadequate grounding or voltage fluctuations. The video ground and the head unit ground must share a common reference point.
- Connect the CVBS cable's ground wire to the same chassis ground as your head unit
- Avoid grounding to painted or anodized surfaces, scrape to bare metal
- If using an e obd adapter or other accessories, ensure they don't create ground loops
- Check that your vehicle's battery voltage stays between 12V and 14.5V during operation
- Consider adding a dedicated ground wire from the camera directly to the battery negative terminal
Power-related interference often appears as horizontal lines or "snow" in the video feed. Running video cables away from alternator wires, ignition coils, and high-current accessories reduces this noise significantly.
Test with Alternative Video Sources
Isolate whether the problem lies with your camera or the monitor by testing with a known-good video source. Connect a portable DVD player or smartphone (via RCA adapter) to the cvbs in 1 input. If that source displays correctly, your camera is faulty. If not, the issue is with the monitor's input circuit or settings.
For advanced diagnostics, use a multimeter to measure the voltage on the CVBS signal wire (center pin of the RCA jack). You should see approximately 1V peak-to-peak AC when the camera is active and transmitting. Zero volts indicates no signal from the source, while erratic readings suggest a damaged cable or connector.
When to Check for Firmware Updates
Eonon periodically releases firmware updates that fix input detection bugs and improve compatibility. Visit the official Eonon support page, enter your model number, and check for available updates. The process typically involves copying files to a USB drive and selecting "System Update" in your head unit's settings menu.
Before updating, check the latest price and verify you have the correct model number. Installing firmware meant for a different unit can cause permanent damage. Always keep your vehicle running during the update process to prevent power loss.
We recommend testing your CVBS setup after any major system change. If you recently installed new accessories or updated other vehicle electronics, start by reverting those changes to see if the video input returns to normal. Many modern vehicles have complex electrical systems where one modification can affect seemingly unrelated components.
For additional savings on replacement cables, adapters, or a new single din touch screen monitor, grab the code from our Eonon coupon page before checkout.
Frequently asked questions
Why does my Eonon monitor show 'No Signal' on the CVBS input?
The most common causes are selecting the wrong input source in settings, a loose cable connection, or the camera not receiving power. Navigate to Factory Settings and manually select CVBS or AV-IN as your video source, then verify all cables are securely connected.
Can I use any RCA cable for the cvbs in 1 port?
Yes, any standard RCA video cable works, but quality matters. Shorter, shielded cables under 15 feet perform best. Cheap thin cables or runs near power wires often produce fuzzy or unstable images.
How do I switch between NTSC and PAL on my single din touch screen monitor?
Enter Factory Settings (password usually 126 or 3368), find the Video Format or TV System option, and select NTSC for North American cameras or PAL for European cameras. A mismatch produces a black-and-white rolling image or no picture at all.
Will a weak car battery cause CVBS video problems?
Yes, voltage below 11.5V or fluctuating power can cause intermittent video dropout or prevent the camera from powering on. Check your battery voltage with a multimeter and ensure all ground connections are solid and corrosion-free.
Can I connect multiple cameras to one CVBS input?
Not directly. You need a video switcher or multiplexer to combine multiple CVBS sources into one input. Some Eonon head units support a second AV input, allowing you to manually switch between two cameras through the settings menu.
Why does my backup camera work sometimes but not others?
Intermittent operation usually indicates a loose reverse trigger wire, corroded connector, or failing camera. Check that the purple or brown reverse detection wire is properly connected to your reverse light circuit and inspect all connections for moisture or oxidation.