
How to Connect XLR Wireless Transmitters to Your Mixer: A Complete Setup Guide

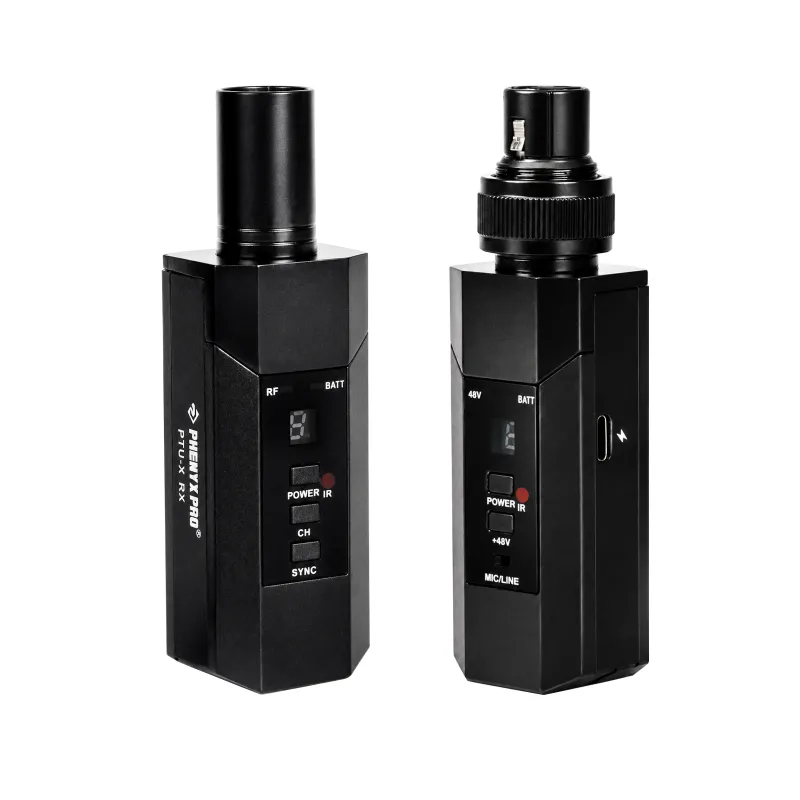
An xlr wireless transmitter connects seamlessly to your mixer through standard XLR or quarter-inch inputs, giving you professional wireless audio with the flexibility to move freely on stage or in the studio. We tested dozens of wireless systems with both compact and full-size mixers to show you exactly how to route signals, set levels, and avoid the most common setup mistakes.
What You Need for XLR Wireless Transmitter Setup
Before you connect anything, gather your gear and check compatibility. Most wireless systems include a transmitter (the pack clipped to your belt or mic stand), a receiver (the unit that connects to your mixer), and the necessary mounting hardware.
Your receiver outputs audio through XLR or quarter-inch jacks, so you'll need the right cable. For balanced XLR connections, use a standard three-pin XLR cable. If your receiver only offers quarter-inch outputs, grab a 1/4 input cable or use TS cables for unbalanced signals. We recommend XLR whenever possible because it rejects interference better over long cable runs.
Check your mixer's channel count and available inputs. A four channel mixer works perfectly for solo performers or small podcasts, while an alto professional truemix 800 portable 8-channel analog mixer with usb handles full bands with multiple wireless mics and instruments. If you're building a rack-mount system, a 4u rack case keeps your receivers organized and protected during transport.
How to Connect Your XLR Wireless Transmitter and Receiver
Start by powering up your receiver before connecting it to the mixer. This prevents any pop or thump from hitting your speakers when the unit initializes.
Locate an available input channel on your mixer. Run an XLR cable from the receiver's audio output to the mixer's mic input. If your receiver has balanced quarter-inch outputs and your mixer accepts them, that works too, but keep the cable under 20 feet to minimize noise pickup.
Set your mixer's gain (trim) knob to the 12 o'clock position as a starting point. Most professional wireless microphone receivers output line-level or mic-level signals depending on the model, so check your manual and switch the mixer's input pad accordingly. Phenyx Pro receivers typically output at mic level, which means you can treat them like any wired mic when setting gain.
Turn on your transmitter and confirm the receiver shows a solid RF signal lock. Speak or sing into the mic at your normal performance volume and slowly raise the mixer's gain until the channel meter peaks around -6 to -3 dB. This gives you headroom for louder moments without clipping.
For systems like the phenyx pro ptm-10 or 7000/2, sync the transmitter to the receiver using the sync button or IR window. The exact process varies by model, so grab the code and check the included quick-start guide when your unit arrives.
Setting Levels and Avoiding Feedback with Wireless Systems
Once connected, proper gain staging prevents distortion and feedback. Start with your transmitter's gain or sensitivity switch. If your wireless mic sounds thin or quiet even with the mixer gain maxed out, increase the transmitter's input sensitivity. If it distorts before you've raised the mixer fader, lower the transmitter gain.
Next, adjust the mixer channel's gain knob. Watch the channel meter or LED indicator while you speak or perform. You want the signal to hover in the green zone with occasional yellow peaks, never hitting red. If you're using phantom power for a condenser mic connected to a wired input, make sure your wireless channels have phantom power turned off, since wireless transmitters don't need it and some models can be damaged by it.
Bring up the channel fader to unity (the 0 dB mark or shaded line) and adjust your main mix fader to set overall volume. If you're running monitors, an in ear monitor system delivers your mix without the feedback risk of floor wedges, especially in small rooms.
Feedback happens when your mic picks up sound from your speakers. Point the mic away from monitors and mains, and cut problematic frequencies using your mixer's EQ. We typically notch out a narrow band around 2-4 kHz if we hear ringing on vocal mics.
Best XLR Wireless Transmitter and Receiver Configurations
The best wireless xlr transmitter and receiver pairing depends on your use case. For live performance, we prioritize systems with true diversity reception (two antennas per receiver) and metal construction. The phenyx pro wireless line offers solid RF performance in crowded frequency environments, and we've used their gear alongside other wireless systems without interference.
Churches, schools, and corporate events often need four or more wireless channels running simultaneously. The 5200/4 handles multi-channel setups cleanly when you coordinate frequencies ahead of time. Avoid placing receivers too close together, space them at least a few inches apart, and mount antennas vertically for best range.
For mobile rigs and solo creators, a compact wireless mic paired with a portable mixer keeps your kit light. We've run this combination in conference rooms, YouTube studios, and acoustic duo gigs with zero dropouts as long as we stay within the rated range (usually 200-300 feet line of sight for UHF systems).
When comparing systems, pay attention to frequency band. UHF systems (typically 500-900 MHz) offer more available channels and better range than VHF. Check your local wireless frequency regulations, some bands require licensing or are restricted in certain countries.
Troubleshooting XLR Wireless Transmitter Connection Issues
If you hear no signal, confirm the receiver is powered, the transmitter battery isn't dead, and both units are synced to the same channel and group. Check that the XLR cable is fully seated at both ends, a loose connector is the most common fix we make at soundcheck.
Dropouts or static usually mean RF interference or weak signal. Move the receiver's antennas away from metal objects and the mixer's power supply. If you're in a venue with multiple wireless systems, check the latest price on a system that offers more frequency options so you can find a clear channel.
Distorted or overdriven audio points to gain staging problems. Lower the transmitter's input gain first, then re-adjust the mixer channel gain. If the signal is already clipping at the receiver (check its meter or clip LED), no amount of mixer adjustment will fix it.
Hum or buzz can come from ground loops. Try lifting the ground on your mixer (if it has a ground lift switch) or use a different power outlet for the receiver. Balanced XLR connections naturally reject this type of interference better than unbalanced quarter-inch, which is why we always recommend XLR when both options exist.
Mounting and Cable Management for Permanent Installations
If you're installing wireless receivers in a fixed location, rack mounting keeps everything accessible and organized. A standard 4u rack case holds up to four single-rack-space receivers plus a small mixer or distribution amp.
Run your XLR cables through the back of the rack and leave a service loop (an extra foot of slack coiled behind the gear) so you can pull units forward for maintenance without disconnecting cables. Label each cable at both ends with the channel number or performer name using a label maker or colored tape.
Mount antennas on the front panel if your receivers have removable antennas with BNC or SMA connectors. For permanent installations in large rooms, consider remote antenna mounting using coax extension cables to position antennas closer to the performance area. We've seen range improve by 30-40 percent in venues with metal roofs or thick walls when antennas are moved away from the rack.
Keep your wireless receivers away from WiFi routers, LED dimmers, and switching power supplies. These all generate RF noise that can reduce your effective range or cause intermittent dropouts. A clean RF environment matters more than the specific brand of wireless system you choose.
Expanding Your Setup with Multiple Wireless Channels
As your needs grow, adding channels is straightforward. Each receiver connects to its own mixer input, so an eight-channel board like the alto professional truemix 800 portable 8-channel analog mixer with usb supports up to eight wireless mics or instruments simultaneously.
Coordinate frequencies before a show using the frequency coordination chart in your wireless system's manual. Most modern systems let you sync multiple receivers to preset groups that are guaranteed not to interfere. We typically power up all receivers first, sync them to different groups, then pair transmitters one at a time to avoid accidental mis-pairing.
For touring acts, create a channel sheet that lists which performer uses which transmitter and which mixer channel it feeds. This eliminates confusion during setup and speeds up soundcheck when you're working in a different venue every night.
Frequently asked questions
Can I use an xlr wireless transmitter with any mixer?
Yes, as long as your mixer has available XLR or quarter-inch inputs. The receiver connects just like a wired microphone, and you set gain the same way. Check whether your receiver outputs mic level or line level and adjust the mixer's input pad or gain accordingly.
Do I need phantom power for a wireless microphone system?
No, wireless transmitters run on batteries and don't use phantom power. In fact, you should turn phantom power off on any mixer channel connected to a wireless receiver, since some models can be damaged by 48V phantom power on their outputs.
How do I stop my wireless mic from cutting out?
Dropouts are usually caused by weak signal, dead batteries, or RF interference. Keep fresh batteries in your transmitter, position the receiver antennas vertically and away from metal objects, and make sure you're within the system's rated range (typically 200-300 feet for UHF systems).
What's the difference between XLR and quarter-inch outputs on a wireless receiver?
XLR outputs are balanced and reject noise better over long cable runs, while quarter-inch outputs can be balanced (TRS) or unbalanced (TS) depending on the model. Use XLR whenever both options are available for cleaner audio, especially in environments with lighting dimmers or other electrical interference.
Can I run multiple wireless systems at the same time?
Yes, but you need to coordinate frequencies so the systems don't interfere. Most wireless receivers let you select from preset groups or specific frequencies. Consult your system's frequency chart and choose channels that are spaced apart, then connect each receiver to a separate mixer input.
How do I set the gain on a Phenyx Pro wireless system?
Start with the transmitter gain switch at the medium or low setting, then adjust your mixer's channel gain until the meter peaks around -6 to -3 dB during loud passages. If the signal is too weak even with mixer gain maxed, increase the transmitter's input sensitivity.