
How to Install a TOSOT Mini Split Without Professional Help

How to Install a TOSOT Mini Split Without Professional Help
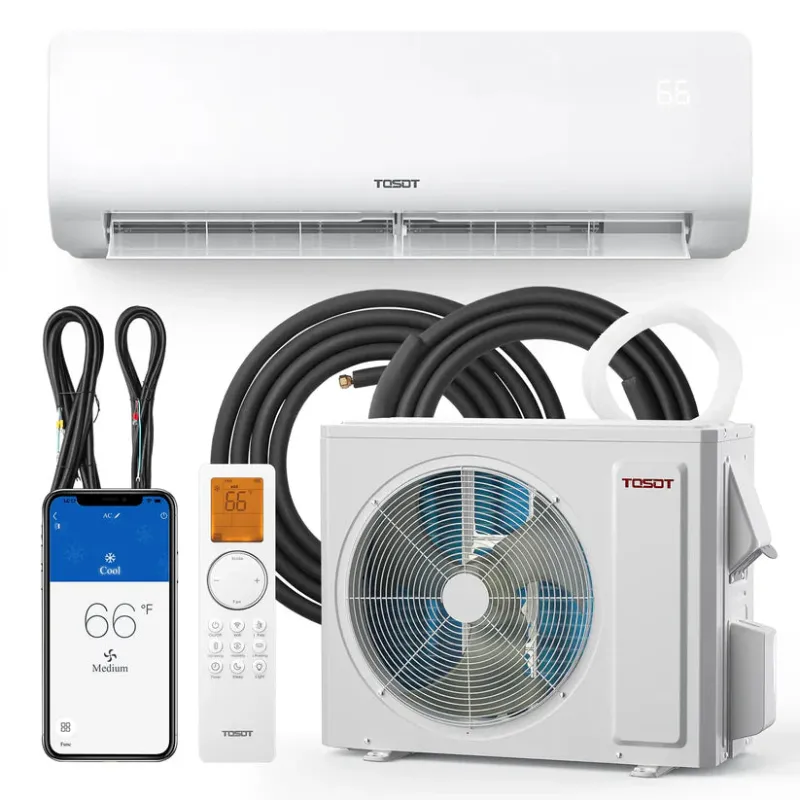
A tosot mini split can be installed by a confident DIYer who has basic electrical skills and the right tools, though you'll still need a licensed HVAC technician to vacuum and charge the refrigerant lines. We've tested multiple ductless systems and found that TOSOT units ship with clear manuals and pre-charged line sets that simplify the process compared to traditional split systems. This guide walks you through mounting, connecting lines, and drainage so you can handle everything except the final refrigerant work.
Before you start, grab the code to save on your unit and any accessories you'll need.
Tools and Materials You'll Need
Gather everything before you begin so you're not making multiple hardware store trips mid-install:
- Power drill with masonry bits (for concrete) or wood bits (for studs)
- Stud finder and level
- Torque wrench for flare connections
- Vacuum pump and manifold gauge set (or hire an HVAC tech for this step)
- Hole saw (typically 3 to 3.5 inches for line set pass-through)
- Pipe insulation and UV-resistant tape
- Condensate drain tubing (usually ¾-inch vinyl)
- Electrical wire matching your unit's voltage (most residential TOSOT models use 230V)
- Circuit breaker and disconnect box
- Optional: lineset cover for a cleaner exterior look
- Optional: mini split condensate pump if gravity drainage isn't feasible
Most 12000 btu mini split and 9000 btu mini split kits include mounting brackets, template paper, and pre-flared line sets, so check your box before buying duplicates.
Mounting the Indoor Head Unit
The indoor evaporator needs wall space at least seven feet off the floor with 6 inches of clearance above and to each side for airflow. Avoid direct sunlight and spots above heat sources.
Step-by-step mounting:
- Use the paper template (included with your tosot mini split) to mark the mounting plate holes on the wall.
- Confirm the bracket will be level—unlevel mounts cause condensate backup.
- Drill pilot holes into studs when possible; use heavy-duty anchors rated for 50+ lbs if mounting to drywall or masonry.
- Secure the bracket with lag bolts, then hang the indoor unit to verify fit before running lines.
- Mark and drill your pass-through hole at a slight downward angle (toward the outside) to prevent water intrusion—aim for 3 to 5 degrees of slope.
The TOSOT mini split manual provides exact measurements for each model, so always cross-reference dimensions before cutting.
Installing the Outdoor Condenser Unit
The condenser must sit on a stable, level surface with at least 12 inches of clearance on the service side and 20 inches in front for airflow. Many installers use a concrete pad or composite mounting brackets.
Placement tips:
- Keep the condenser within the maximum line-set distance specified in your manual (usually 15 to 25 feet for residential models).
- Avoid direct southern sun exposure if possible—it reduces efficiency.
- Secure the unit to prevent vibration noise; rubber isolation pads help.
- If you're mounting on an exterior wall, an air conditioner mount on wall bracket provides sturdy support without ground-level space.
Run the refrigerant lines, drain tube, and control wiring through the pass-through hole, leaving some slack for connection. Seal the hole with putty or foam once everything is routed.
Connecting Refrigerant Lines and Electrical
This is the most critical phase. TOSOT ships pre-flared copper line sets, so you won't need to flare them yourself, but you must tighten connections with a torque wrench to prevent leaks.
Refrigerant line connection:
| Step | Detail |
|---|---|
| Remove caps | Keep the flare nuts clean; debris causes leaks. |
| Hand-tighten first | Thread the nut clockwise until snug by hand. |
| Torque to spec | Check the TOSOT mini split manual for exact foot-pounds (typically 18-25 ft-lbs for ¼-inch and 35-42 ft-lbs for ⅜-inch lines). |
| Insulate lines | Wrap both liquid and suction lines separately with foam insulation, then tape or use a lineset cover outdoors. |
Electrical wiring:
- Run a dedicated circuit from your breaker panel to a disconnect box near the condenser.
- Match wire gauge to your unit's amperage (typically 14 AWG for up to 15A, 12 AWG for 20A).
- Connect low-voltage control wiring between indoor and outdoor units per the wiring diagram—usually four to five color-coded wires.
- Never energize the system until after vacuuming and charging the lines.
For current pricing on a complete TOSOT system, check the latest price with our exclusive discount.
Vacuuming and Charging the System
Stop here if you're not EPA 608-certified. Releasing refrigerant is illegal and environmentally harmful, and improper evacuation will destroy your compressor.
A licensed technician will:
- Connect a vacuum pump to the service ports and pull the system down to 500 microns or lower for at least 30 minutes.
- Hold vacuum for another 30 minutes to verify there are no leaks (pressure should not rise).
- Open the refrigerant valves on the condenser to release the factory charge into the line set.
Some TOSOT models use quick-connect fittings that reduce the need for field charging, but you still need the vacuum step. If the system wasn't pre-charged or you extended the lines beyond the included set, the tech will add R-410A refrigerant by weight.
Condensate Drain Setup and Testing
The indoor unit collects moisture that must drain outside or into a floor drain. Route the drain hose with a continuous downward slope—any sag creates a water trap.
Drainage options:
- Gravity drain: Run ¾-inch vinyl tubing to an exterior wall or basement drain, sloping at least ¼ inch per foot.
- Condensate pump: If the outdoor drain point is higher than the indoor unit, install a mini split condensate pump to lift water up to 15 feet vertically.
After the system is charged and powered, let it run in cooling mode for 15 minutes, then check for water flow from the drain line. No water usually means a clog or improper slope.
Final checks:
- Inspect all electrical connections for tightness.
- Verify the remote responds to temperature and mode changes (consult your TOSOT mini split remote guide if symbols are unclear).
- Listen for unusual noises—a properly installed unit runs quietly.
- Check that supply and return vents blow and draw air evenly.
We've found that most installation issues trace back to unlevel mounts or loose flare fittings, so double-check those two areas if performance seems off.
When to Call a Professional
DIY installation saves money, but some scenarios require expert help:
- You're uncomfortable working with 230V electrical circuits.
- Your home has unusual wall construction (steel studs, dense masonry, log walls).
- You need to extend refrigerant lines beyond the kit length or add a second zone.
- Local codes require permitted work or specific inspector sign-offs.
TOSOT units carry strong warranties, but most are void if an unlicensed installer handles refrigerant connections. TOSOT Comfort HVAC Supply offers installation support and lists certified installers by region if you'd rather hand off the entire job.
For more background on how TOSOT compares to other ductless brands, this independent review covers efficiency ratings and long-term durability.
Whether you're upgrading from a window unit heat pump or adding climate control to a new space, a properly installed 12000 btu mini split delivers quiet, efficient heating and cooling for years. Take your time with each step, and don't skip the vacuum process—it's the difference between a system that lasts two decades and one that fails in two years.
Frequently asked questions
Can I install a TOSOT mini split completely by myself?
You can handle mounting, wiring, and drain setup, but you'll need an EPA-certified HVAC technician to vacuum the lines and open the refrigerant valves. Attempting the refrigerant work without certification is illegal and voids your warranty.
How long does a DIY mini split installation take?
Expect 4 to 6 hours for a single-zone install if you're comfortable with basic electrical and carpentry work. Add another hour for the HVAC tech to vacuum and charge the system.
Do I need a condensate pump for my mini split?
Only if you can't run the drain line with a continuous downward slope to an exit point. Most installations use gravity drainage, but a pump is essential when the outdoor drain is higher than the indoor unit.
What size mini split do I need for a 500 square foot room?
A 9000 to 12000 BTU unit typically covers 300 to 550 square feet, depending on insulation, ceiling height, and sun exposure. Check the TOSOT sizing chart in your manual for precise guidance.
Can I reuse the line set from my old mini split?
It's not recommended unless the lines are the correct diameter, length, and in perfect condition with no contamination. New TOSOT kits include pre-flared, pre-insulated line sets that ensure leak-free connections.
Why is my TOSOT mini split leaking water inside?
The most common causes are an unlevel indoor unit, a clogged drain line, or improper drain hose slope. Check that the mounting bracket is level and the drain tubing has no sags or blockages.