
How to Install an AUTO-VOX Wireless Backup Camera Without Running Wires

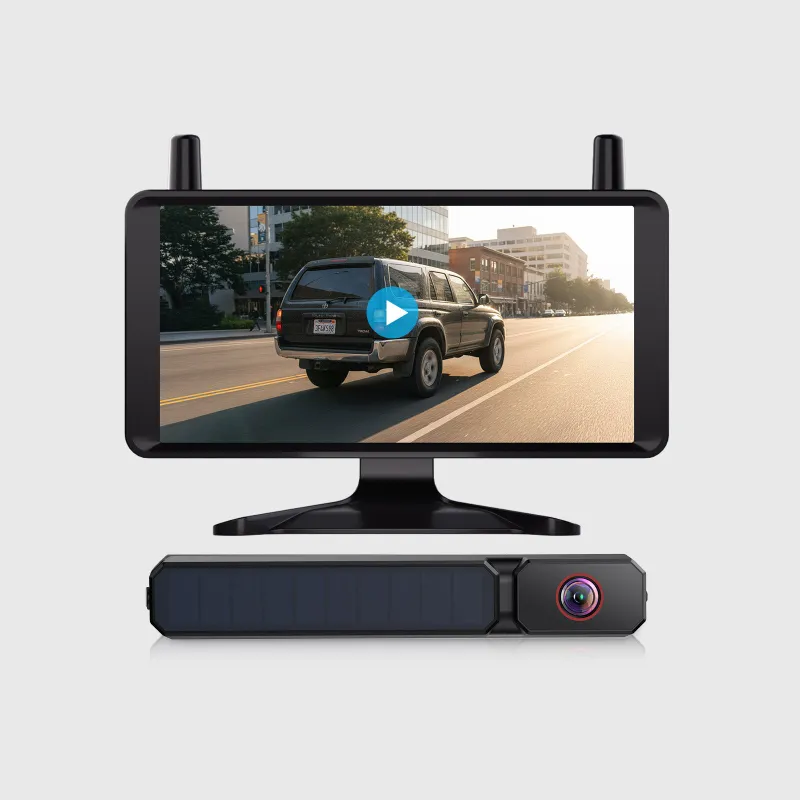
How to Install an AUTO-VOX Wireless Backup Camera Without Running Wires
Installing an auto vox solar wireless backup camera takes less than 30 minutes and requires no wire-running through your vehicle's interior. These solar-powered systems eliminate the traditional hassle of drilling holes and routing cables from your rear bumper to the dashboard, making them ideal for trucks, RVs, and SUVs where conventional wired installations can be complex and expensive.
We've tested multiple AUTO-VOX models including the Solar 3A Plus and Solar 3C, and we'll walk you through the complete installation process that works across their wireless lineup. Before you start, grab our exclusive discount code to save on your purchase.
What Makes Solar Wireless Backup Cameras Different
Traditional backup camera systems require a power wire from your reverse light and a video cable running the entire length of your vehicle. Solar wireless models like the AUTO-VOX series solve both problems at once. The camera mounts to your license plate frame and draws power from its built-in solar panel, storing charge in an internal battery. It transmits video wirelessly to a monitor that replaces or mounts near your rearview mirror.
The auto-vox backup camera lineup uses a dedicated 2.4GHz wireless signal rather than WiFi, which provides stable transmission up to 150 feet without interference from your phone or other devices. The solar panel keeps the camera charged even in cloudy conditions, though some models like the Solar 3A Plus also include a hardwire option if you park indoors for extended periods.
Tools and Prep Work You'll Need
You can complete this installation with basic tools most drivers already own:
- Phillips head screwdriver
- Wire strippers (only if hardwiring the monitor)
- Microfiber cloth and isopropyl alcohol
- Zip ties or adhesive cable clips
- Electrical tape
The AUTO-VOX kit includes the camera unit, monitor, mounting brackets, and all necessary hardware. Check your package to confirm you have the license plate mounting frame, monitor mount, and power cable for the display. Most backup camera wireless systems from AUTO-VOX ship with everything needed, but it's worth verifying before you begin.
Step-by-Step Camera Installation
Mount the camera to your license plate. Remove your existing license plate and position the AUTO-VOX camera bracket behind it. The camera lens should sit centered above the plate. Thread your license plate screws through the plate, then through the bracket holes, and tighten them into your vehicle's existing mounting points. The camera housing should sit flush against your bumper or tailgate.
Adjust the camera angle. Most AUTO-VOX wireless models let you pivot the lens up or down. Start with the camera level, then fine-tune the angle after you've powered on the system and can see the live view. For trucks and lifted vehicles, you may need to angle the lens down slightly to capture the ground directly behind your bumper.
Expose the solar panel to sunlight. Position the camera so its solar panel faces upward and won't be blocked by your tailgate, spare tire, or roof overhang. The rear view camera for truck installations often benefit from a slight upward tilt on the bracket to maximize sun exposure while maintaining a clear rearward view.
Let it charge before first use. Give the camera 4 to 6 hours of direct sunlight to build an initial charge. Some users report that AUTO-VOX models ship with partial charge, but a full solar charge ensures reliable performance from day one.
Monitor Setup and Wireless Pairing
Choose your monitor mounting location. The AUTO-VOX monitor can replace your existing rearview mirror using elastic straps, or mount to your windshield or dashboard with the included suction cup. We recommend the reverse camera mirror strap method for cars and sedans, while truck drivers often prefer a dash-mounted position for better sightlines over high bed rails.
Connect the monitor power. You have two options: plug the included 12V adapter into your cigarette lighter socket for a truly wireless setup, or hardwire the monitor to your reverse light circuit so it powers on automatically when you shift into reverse. For the plug-in method, route the cable along your windshield pillar and tuck it under trim panels to keep it tidy. Check the current pricing and installation accessories available with our exclusive code.
Pair the camera and monitor. Power on both units. They should auto-pair within 10 to 15 seconds. If pairing doesn't happen automatically, press and hold the pairing button on the back of the monitor for 3 seconds, then press the pairing button on the camera (usually located under a rubber cover on the side). A solid connection icon will appear on the monitor screen when pairing succeeds.
According to real-world testing from van conversion experts, the AUTO-VOX Solar 3A Plus pairs reliably even after sitting unused for weeks, and the wireless signal remains stable in urban areas with heavy WiFi traffic.
Optimizing Your Auto-Vox Solar Wireless Backup Camera Setup
Calibrate the parking guidelines. Most AUTO-VOX monitors display overlay lines showing distance zones behind your vehicle. Enter the settings menu and adjust these guidelines to match your vehicle's dimensions. Drive forward until your rear bumper aligns with a known reference point like a garage wall mark, shift to reverse, and adjust the red warning line to sit at that point on the monitor.
Test the night vision range. AUTO-VOX cameras include infrared LEDs for night visibility. After dark, back up in a safe area and confirm you can clearly see obstacles 10 to 15 feet behind you. If the image appears washed out, you may need to wipe the lens or adjust the camera angle slightly downward.
Maintain the solar panel. Wipe the panel monthly with a damp microfiber cloth to remove road film, pollen, and bird droppings that reduce charging efficiency. In winter or during extended indoor parking, some drivers supplement solar charging by briefly connecting the optional hardwire power lead.
For additional installation tips and real-world performance feedback, this detailed AUTO-VOX Solar4B review covers installation challenges specific to RVs and trailers.
Troubleshooting Common Wireless Camera Issues
Monitor shows "No Signal." Verify the camera has sufficient charge by checking for the small LED indicator on the camera housing. If the light is off, give it more sun exposure or use the hardwire option temporarily. Bring the monitor within 10 feet of the camera and attempt pairing again. Interference from metal tailgates or camper shells can weaken the signal; try repositioning the camera a few inches higher if possible.
Image is choppy or pixelated. This usually indicates distance or obstruction issues. The reversing camera for truck installations with long beds or camper shells may need the camera mounted higher on the tailgate or cab to maintain clear line-of-sight to the dash-mounted monitor. Remove any metallic tinting or aftermarket accessories between the camera and monitor that could block the 2.4GHz signal.
Camera won't hold charge. If your vehicle sits in a garage or covered parking for days at a time, the solar panel won't maintain battery charge. AUTO-VOX includes a hardwire power lead with most kits; splice this into your reverse light circuit so the camera draws power directly when you're parked long-term.
The car backup camera models we've tested all include weatherproof ratings of IP68 or higher, so moisture and temperature extremes typically aren't the culprit. Battery degradation after 2 to 3 years is normal; AUTO-VOX sells replacement camera units separately if your solar battery eventually fails.
Who Benefits Most From Wire-Free Installation
Wireless solar backup cameras shine in scenarios where running cables is impractical or impossible. Truck owners with long beds, RV drivers, and anyone towing trailers avoid the 15-plus feet of cable routing required for traditional systems. Renters and lease drivers appreciate the non-permanent installation that won't affect vehicle return conditions.
We especially recommend the mirror dash cam style monitors for vehicles where dashboard space is limited. The mirror-replacement design consolidates your rearview mirror and backup display into one unit, keeping your windshield clear and your sightlines open. Pairing a solar wireless camera with this type of monitor creates a completely wire-free cabin experience, with only a single 12V plug running to your power socket if you choose not to hardwire.
Frequently asked questions
How long does the AUTO-VOX solar wireless backup camera battery last on a full charge?
On a full solar charge, AUTO-VOX wireless cameras typically run for 7 to 10 days of normal use without additional sunlight. Models like the Solar 3A Plus include battery-saving modes that extend this further when the vehicle is parked.
Can I install an AUTO-VOX wireless camera on a vehicle with a metal tailgate?
Yes, but metal tailgates can interfere with the wireless signal. Mount the camera as high as possible on the tailgate or license plate area, and position the monitor with clear line-of-sight. Most users report reliable performance even on full metal trucks.
Do I need to remove the camera in winter or when it snows?
No. AUTO-VOX cameras are weatherproof and rated for extreme temperatures. However, snow covering the solar panel will prevent charging, so you may need to brush it off or use the optional hardwire power during prolonged winter weather.
Will the wireless camera work if I'm towing a trailer?
The camera must have line-of-sight to the monitor. If your trailer blocks the signal between the camera and cab, you'll need to mount the camera on the trailer itself or use a wired system instead.
How do I pair a replacement camera to my existing AUTO-VOX monitor?
Power on both units, then press and hold the pairing button on the monitor for 3 seconds. Press the pairing button on the new camera within 30 seconds. The devices will connect automatically and display a solid signal icon when successful.
Can the solar panel keep the camera charged if I park in a covered garage?
No. Without direct or indirect sunlight, the solar panel cannot recharge the battery. For garage-parked vehicles, use the included hardwire power lead to connect the camera to your reverse light circuit for continuous power.