
Why Is My Shower Mixing Valve Leaking and How to Fix It

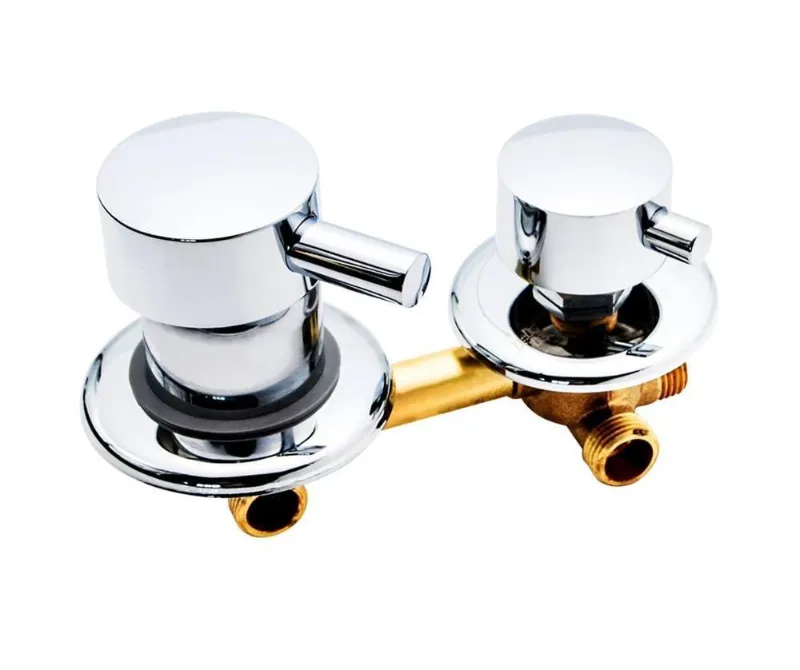
A leaking shower mixing valve usually stems from a worn-out cartridge, damaged O-ring, corroded valve seat, or loose connection behind the wall. We've tested dozens of shower components and repaired countless leaking valves, so we'll walk you through the diagnosis and repair process step by step.
Common Causes of a Leaking Shower Mixing Valve
Understanding why your valve leaks helps you fix it faster and avoid repeat repairs.
Worn or damaged cartridge - The cartridge controls water flow and temperature. Over time, mineral deposits and wear cause it to fail, leading to drips from the rain shower head or leaks around the trim. Shower mixing valve cartridge failure is the single most common cause we see.
Deteriorated O-rings and seals - Rubber O-rings create watertight seals between valve components. Heat, chemical exposure, and age cause them to crack and shrink, allowing water to escape around the valve body or handle.
Corroded valve seat - The valve seat is the connection point between the faucet and spout. Hard water deposits pit and corrode this brass or ceramic surface, preventing a tight seal even when the valve is closed.
Loose connections - Vibration and thermal expansion can loosen threaded connections behind the wall. A loose valve body or supply line fitting will leak into the wall cavity before you see water at the fixture.
Incorrect installation or adjustment - If someone recently worked on your shower or installed a new bathtub faucet, improper torque, misaligned cartridges, or wrong-size parts can cause immediate leaks.
How to Diagnose Where Your Valve Is Leaking
Before you tear into the wall, pinpoint the leak source to avoid unnecessary work.
Check for dripping from the showerhead - Turn off the water completely. If the rain shower head continues dripping for more than a few seconds, the cartridge isn't sealing properly.
Inspect around the trim plate and handle - Water seeping from behind the escutcheon plate or pooling around the handle indicates O-ring failure or a loose valve body connection.
Look for water damage on the wall - Soft drywall, peeling paint, or mold below the valve suggests a leak inside the wall from supply line connections or a cracked valve body.
Test temperature consistency - If your shower suddenly runs too hot or too cold and leaks, the thermostatic element in your mixing valve has likely failed and needs replacement.
To check the latest pricing on repair parts and tools, visit the Index Bath store where we maintain current discount codes.
Step-by-Step Shower Mixing Valve Replacement and Repair
Most homeowners can complete this repair in one to three hours with basic tools.
What You'll Need
- Adjustable wrench and pliers
- Screwdrivers (flathead and Phillips)
- Cartridge puller (for stubborn cartridges)
- Replacement cartridge or O-ring kit
- Plumber's grease
- Towels and bucket
Repair Process
1. Shut off the water supply - Locate the shower isolation valves or turn off your home's main water supply. Open the shower to release pressure.
2. Remove the handle and trim - Unscrew the handle set screw (usually hidden under a cap), pull off the handle, then remove the escutcheon plate to expose the valve body.
3. Extract the cartridge - Note the cartridge orientation before removal. Pull straight out using a cartridge puller if it's stuck from mineral buildup. This is the core of your shower mixing valve replacement.
4. Inspect and clean - Check the valve seat for pitting or deposits. Clean with vinegar or replace if damaged. Examine all O-rings and gaskets.
5. Install new parts - Coat the new cartridge and O-rings with plumber's grease. Insert the cartridge in the exact same orientation as the old one, or your hot and cold will be reversed.
6. Reassemble and test - Replace the trim, handle, and escutcheon. Turn water back on slowly and check for leaks. Test temperature adjustment to confirm proper shower mixing valve adjustment.
If you're upgrading your entire shower experience while you have the valve open, consider pairing your repair with a new rain shower head for better water distribution.
Shower Mixing Valve Types and Replacement Options
Different valve types require different repair approaches.
| Valve Type | Best For | Replacement Difficulty |
|---|---|---|
| Pressure-balance | Temperature stability and safety | Moderate - cartridge swap |
| Thermostatic | Precise temperature control | Moderate to difficult - complex cartridge |
| Manual mixing | Budget installations | Easy - simple washer or cartridge |
Pressure-balance valves - These prevent scalding by maintaining consistent pressure between hot and cold lines. Brands like Moen and Delta dominate this category. Look for a single cartridge with multiple seals.
Thermostatic valves - Higher-end valves sense water temperature directly and adjust flow to maintain your set temperature within one degree. They use complex cartridges that cost more but last longer.
Manual mixing valves - Two-handle or basic single-handle designs without anti-scald protection. Simpler internal components make DIY shower mixing valve replacement straightforward.
Most shower mixing valve kits from hardware retailers include the cartridge, O-rings, and installation instructions specific to your valve model. Grab the Index Bath discount code before ordering parts to save on your repair.
When to Call a Plumber vs DIY Repair
Some situations require professional help to avoid costly damage.
DIY-friendly repairs include cartridge replacement on accessible valves, O-ring swaps, handle and trim fixes, and simple shower mixing valve adjustment when you can identify your valve model and find parts.
Call a plumber when you discover leaks inside the wall requiring drywall removal, can't identify your valve model or find replacement parts, need to relocate or upgrade the entire valve assembly, or notice signs of pipe corrosion or water damage that suggest larger plumbing issues.
Professional repairs typically cost more upfront but include warranties on labor. We balance this against DIY savings and the risk of complications when we test and review bathroom products.
Preventing Future Shower Valve Leaks
Regular maintenance extends valve life and prevents emergency repairs.
- Flush sediment annually by removing the showerhead and running water for 30 seconds
- Clean aerators and showerheads to reduce backpressure on valve seals
- Install a water softener if you have hard water causing rapid mineral buildup
- Test temperature settings quarterly to catch cartridge wear early
- Inspect visible plumbing behind access panels for corrosion and loose fittings
While you're maintaining your shower, check other fixtures like your bathtub faucet and sink faucets for early signs of wear. Coordinated maintenance prevents multiple fixtures from failing simultaneously.
Upgrading your bathroom fixtures together often makes economic sense. Pair your valve repair with practical additions like a soap dispenser or corner shelf to maximize the value of your time and effort. For current pricing on any bathroom upgrade, visit the Index Bath store where we keep our discount codes updated.
Frequently asked questions
How do I know if my shower mixing valve needs replacement or just a new cartridge?
If water leaks only from the showerhead when off or the temperature is inconsistent, replace the cartridge first. If you see cracks in the valve body, corrosion on threaded connections, or leaks persist after cartridge replacement, you need a full valve replacement.
Can I replace a shower valve cartridge without shutting off the main water supply?
Only if your shower has dedicated isolation valves behind an access panel. Most homes require shutting off the main supply or the hot water heater supply line to work safely on the valve.
Why does my shower still drip after I replaced the cartridge?
The new cartridge may be installed backward, the valve seat could be corroded or damaged, or you might need a different cartridge model. Verify you have the correct replacement part for your specific valve brand and model.
How long does a typical shower mixing valve cartridge last?
Most cartridges last five to ten years with normal use. Hard water, high water pressure above 80 psi, and frequent temperature adjustments shorten cartridge life significantly.
Do I need special tools to remove a stuck shower valve cartridge?
A cartridge puller designed for your valve brand makes removal much easier, especially when mineral deposits have locked the cartridge in place. You can rent these tools at most hardware stores if you don't want to buy one.
Will fixing my leaking shower valve reduce my water bill?
Yes. A steady drip from a faulty valve can waste hundreds of gallons per month. Even a slow leak that only drips once every few seconds adds up to significant water and energy costs over time.