
How to Rebuild a 6R140 Valve Body: Step-by-Step Guide for DIY Mechanics

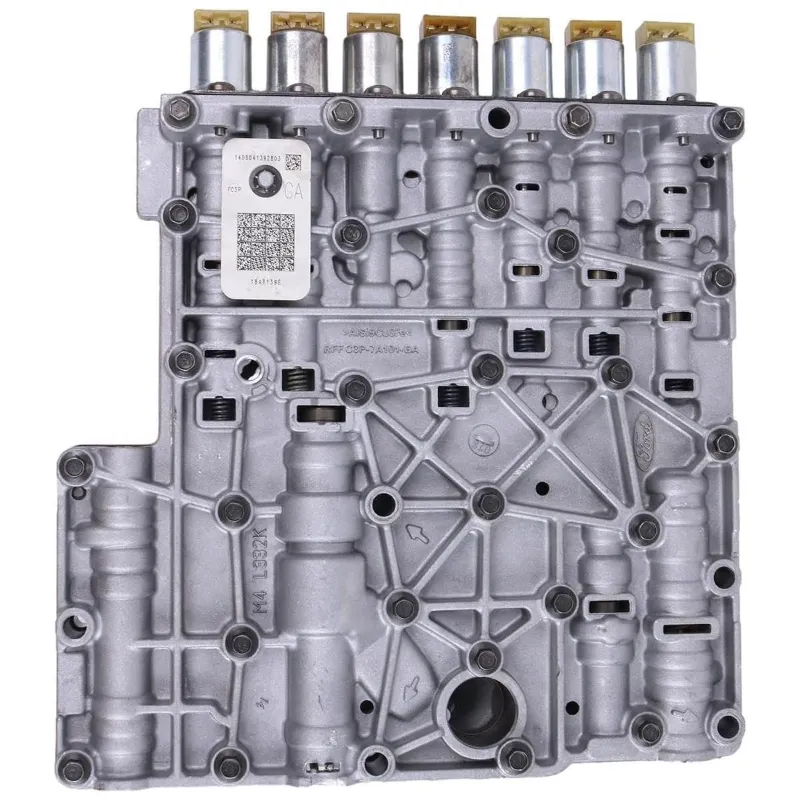
A 6r140 valve body rebuild restores shifting performance and fixes many transmission issues without a full rebuild. The Ford 6R140 transmission powers Super Duty trucks from 2011 onward, and the valve body controls hydraulic pressure to each clutch pack. When you experience harsh shifts, delayed engagement, or slipping gears, the valve body is often the culprit. We'll walk you through the complete rebuild process so you can tackle this job in your own garage.
Tools and Supplies You Need for a 6R140 Valve Body Rebuild
Before you start, gather the right tools to avoid mid-job delays. You'll need a torque wrench, a craftsman low profile ratchet cmmt86722 for tight spaces, a valve body separator plate tool, clean lint-free shop towels, brake cleaner or transmission-specific solvent, and a magnetic pickup tool for dropped springs or check balls.
For the rebuild itself, source a complete 6R140 valve body rebuild kit that includes new solenoids, gaskets, separator plates, and check balls. OEM Motorcraft kits ensure proper fit, though aftermarket upgrade kits are available for heavy-duty applications. Grab the code to save on your rebuild kit and related parts. A clean, well-lit workbench is critical because you'll be handling dozens of small components that must go back in exact order.
Removing and Disassembling the Valve Body
Start by dropping the transmission pan with the vehicle on jack stands or a lift. Drain the fluid into a catch pan and remove all pan bolts evenly to avoid warping. Once the pan is off, you'll see the valve body secured by multiple bolts of varying lengths. Take photos at every stage or use a bolt tray with labeled compartments so you remember where each fastener goes.
Disconnect the internal wiring harness from the solenoids before unbolting the valve body. The 6r140 uses electronic solenoids that are fragile, so support the valve body with one hand as you remove the final bolts. Lower it carefully and transfer it to your workbench.
Flip the valve body over and remove the separator plate bolts, again documenting their positions. Lift the separator plate and note the location of every check ball and spring. A misplaced check ball will cause catastrophic shifting problems. Lay out each component on clean shop towels in the order you remove them.
Inspecting and Replacing 6R140 Valve Body Solenoids
The 6R140 valve body solenoids are common failure points, especially after 100,000 miles or in trucks used for towing. Inspect each solenoid for burnt coils, damaged O-rings, or carbon buildup on the plunger tips. Replace any solenoid that shows wear or tests outside the manufacturer's resistance spec with a multimeter.
Common 6R140 valve body symptoms include erratic shifting, limp mode activation, and delayed reverse engagement. These issues often trace back to failed pressure control solenoids or shift solenoids. If you're replacing solenoids individually rather than using a full rebuild kit, ensure you match OEM part numbers exactly. Check the latest price on replacement solenoids before you order to compare options.
Clean the solenoid bores in the valve body with brake cleaner and compressed air. Any debris left behind will damage new solenoids within days. Install new O-rings on each solenoid and lubricate them with clean ATF before pressing them into place.
Cleaning and Reassembling the Valve Body Components
Soak all metal valve body components in a parts washer or spray them thoroughly with brake cleaner. Compressed air is your best friend here; blow out every oil passage and ensure no residue remains. Inspect the valve body casting for cracks or scoring in the valve bores. Minor scoring can sometimes be polished out, but deep grooves require valve body replacement.
Reinstall check balls and springs in their documented positions, referring to your photos and the rebuild kit diagram. The separator plate gaskets must align perfectly with the valve body and transmission case oil passages. Misalignment by even a millimeter will cause pressure loss and shifting failures.
Torque all separator plate bolts in a crisscross pattern to the spec in your service manual, typically 80 to 105 inch-pounds. Over-torquing will warp the plate and cause leaks. Install the valve body back into the transmission case, reconnect the solenoid harness, and torque the valve body bolts to spec in the sequence shown in the Ford 6R140 technical documentation.
Programming and Testing After 6R140 Valve Body Replacement
A 6R140 valve body replacement often requires adaptive learning resets using a scan tool or Forscan software. The transmission control module stores shift tables based on the old valve body's wear patterns, and failing to reset them can cause harsh or delayed shifts even with a fresh valve body.
After reinstalling the pan with a new gasket and filter, fill the transmission with the correct Mercon LV fluid quantity. Start the engine, cycle through all gears with your foot on the brake, and check for leaks around the pan and cooler lines. Many DIY mechanics report that the first few shifts feel odd until the adaptive tables relearn, so plan for 20 to 30 miles of mixed driving before final evaluation.
Monitor transmission temperature during your test drive and watch for any warning lights. If you experience continued issues, double-check solenoid connector pins and verify that all check balls are seated. A successful rebuild will restore crisp shifts and eliminate slipping or flaring between gears.
When to Rebuild vs. Replace Your 6R140 Valve Body
A complete 6R140 valve body replacement cost at a shop ranges significantly depending on labor rates and whether you choose OEM or aftermarket parts. Rebuilding your existing valve body saves hundreds compared to buying a remanufactured unit, and you gain the confidence of knowing exactly what went into the job.
However, if your valve body casting is cracked, severely scored, or contaminated with metal shavings from internal transmission damage, replacement is the smarter path. Inspect the fluid you drained for metallic debris; if you find glitter or chunks, the transmission has deeper issues that a valve body rebuild won't fix. For less severe wear patterns, a rebuild kit and careful attention to detail will deliver years of reliable service.
The valve body 4l60e transmission follows a similar rebuild process if you work on GM trucks, though the 6R140's electronic complexity requires more attention to solenoid health and programming. Whichever transmission you're servicing, methodical documentation and cleanliness are your keys to success.
Frequently asked questions
How long does it take to rebuild a 6R140 valve body?
Expect 4 to 6 hours for a complete rebuild if you're working methodically and documenting each step. First-timers may need 8 hours, while experienced techs can finish in 3 hours.
Can I reuse the old solenoids when rebuilding the valve body?
We recommend replacing all solenoids during a rebuild because worn solenoids are a common cause of shifting problems. Reusing old solenoids often leads to repeat failures within months.
What causes 6R140 valve body failure?
Heat, contaminated fluid, and wear on solenoid seals are the primary causes. Towing heavy loads without adequate cooling accelerates wear, and skipped fluid changes allow debris to damage valve bores.
Do I need special tools to rebuild a valve body?
A torque wrench, magnetic pickup tool, and clean workspace are essential. A low-profile ratchet helps in tight spaces, and a scan tool is needed for adaptive resets after reassembly.
Will a valve body rebuild fix my transmission slipping?
If the slipping is caused by solenoid failure or valve body wear, a rebuild will fix it. However, if clutch packs are burned or the torque converter is failing, you'll need a full transmission rebuild.
Where can I find a complete rebuild kit with a discount?
Check our KuduParts discount code page for current offers on rebuild kits and transmission components. Quality OEM kits ensure proper fit and long-term reliability.