
How to Refinish a Bathtub Without Replacing It: DIY Kit Guide

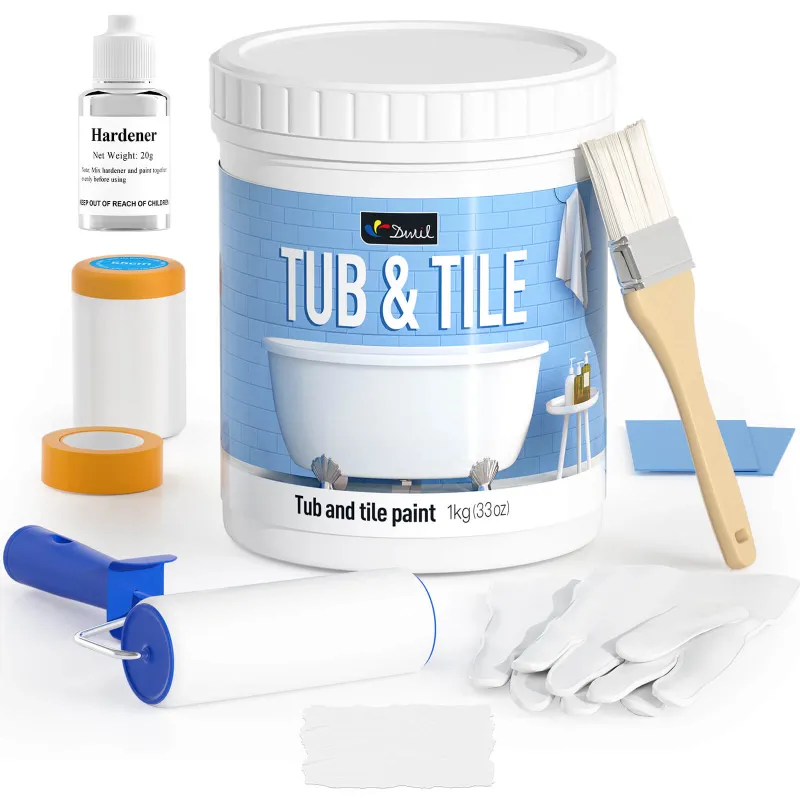
A diy bathtub refinishing kit restores chipped, stained, or discolored tubs in one weekend without the expense and disruption of replacement. These kits contain specialized coatings that bond to porcelain, fiberglass, or acrylic surfaces, creating a smooth, durable finish that looks factory-new. We tested multiple formulations to identify which products deliver professional results for home application.
What's Inside a DIY Bathtub Refinishing Kit
Most kits include a two-part epoxy or acrylic coating, surface cleaner, etching solution, applicator tools, and protective gloves. The tub refinishing kit from DWIL Paint bundles everything needed for a standard five-foot tub, including detailed instructions calibrated for first-time users.
The core difference between budget and premium options lies in the coating chemistry. Epoxy-based formulations cure harder and resist abrasion better than single-component acrylic paints, though they require more precise mixing and faster application. Tub and tile paint works well for light cosmetic refreshes, while epoxy systems handle high-traffic family bathrooms where durability matters most.
You'll also need supplies the kit may not include: respirator mask rated for organic vapors, box fan for ventilation, painter's tape, and drop cloths. Surface preparation accounts for 70% of the final result, so budget time for thorough cleaning and sanding before you open the coating.
Choosing Between Epoxy and Acrylic Coatings
Epoxy bathtub refinishing kit formulations dominate the professional market because they chemically bond to the substrate rather than just adhering mechanically. This creates a finish that withstands daily scrubbing and hot water exposure for five to seven years. Tub paint using epoxy resin typically requires 24 to 48 hours of cure time before you can use the tub, and the fumes demand aggressive ventilation during application.
Acrylic coatings dry faster and emit fewer volatile compounds, making them easier to apply in poorly ventilated spaces. The trade-off shows up in longevity: acrylic finishes may start to yellow or peel at the drain area within two to three years under heavy use. Bathtub tile paint extends the color refresh to surrounding wall tile, creating a cohesive look when you're updating an entire enclosure.
| Coating Type | Cure Time | Durability | VOC Level |
|---|---|---|---|
| Epoxy | 48 hours | 5-7 years | High |
| Acrylic | 24 hours | 2-3 years | Moderate |
For fiberglass bathtub refinishing kit projects, acrylic formulas often adhere better because fiberglass flexes slightly under weight, and rigid epoxy coatings can microcrack over time. Match your chemistry to your substrate and usage pattern rather than defaulting to "strongest."
Step-by-Step Application Process
Surface prep begins with removing all caulk, then scrubbing the tub with the kit's cleaner to strip soap scum and oils. Most kits include an etching acid or abrasive powder that microscopically roughens the glaze so the new coating can grip. Sand any rust spots or chips down to bare metal or substrate, feathering the edges so the repair blends invisibly.
Mask everything you don't want coated: faucet hardware, overflow plate, drain, and the surrounding tile or wall. Tape a plastic drop sheet to the floor and ensure your respirator fits snugly. Open windows, position a box fan to exhaust air outdoors, and close the bathroom door to contain fumes in adjacent rooms.
Mix two-part epoxy according to the instructions, then apply with a foam roller in thin, even coats. The best bathtub refinishing kit options include specialty rollers that minimize bubbles and brush marks. Work quickly: most epoxy formulations remain workable for only 20 to 30 minutes after mixing. Apply a second coat within the recoat window specified on the label, usually two to four hours.
Maintain ventilation and keep the bathroom off-limits for the full cure period. Rushing this step leads to soft spots that scratch easily or yellow prematurely. Check the latest price and current formulations before you commit, since manufacturers periodically update cure chemistry to reduce odor or improve adhesion.
When to Choose Spray vs Brush-On Kits
Bathtub refinishing kit spray systems deliver the smoothest finish because atomized droplets self-level as they land, eliminating roller stipple. These kits include aerosol cans or HVLP spray equipment and work best for users comfortable with spray technique. Overspray control is critical: you'll need to mask a larger area and accept that some mist will settle on nearby surfaces despite your best efforts.
Brush-on and roller kits give you more control over film thickness and reduce the risk of drips on vertical surfaces. The tub and tile paint formulation we tested flowed well enough to hide roller texture when applied in two thin coats rather than one heavy pass. For first-time refinishers, brush-on systems reduce variables and let you pause mid-project if needed.
Spray kits shine when you're also refinishing the surrounding tile or wall panels. Coordinating bathtub tile paint in a spray format lets you coat 50 square feet in the time it would take to roll 10, and the uniform finish looks factory-applied. Grab the code for 20% off if you're tackling a full bathroom enclosure.
Maintenance and Longevity Expectations
A properly applied refinishing coating lasts three to seven years depending on chemistry, surface prep quality, and daily wear. Avoid abrasive cleaners: use liquid dish soap or dedicated tub cleaners that don't contain bleach or ammonia. These chemicals can soften or discolor the coating over time, especially in the first 30 days before the finish fully cures.
Reapply furniture wax every six months to the horizontal tub bottom to add a sacrificial layer that resists scratches from dropped shampoo bottles. The wax buffs out minor scuffs and makes water bead rather than sheet, which reduces standing water and soap buildup.
Chips or scratches that penetrate to the substrate need immediate touch-up to prevent moisture intrusion and rust. Keep leftover coating sealed in a glass jar for spot repairs. Sand the damaged area lightly, clean with alcohol, and apply a thin dab of coating with a small artist's brush. Most damage occurs at the drain flange and faucet base where metal hardware contacts the coating, so inspect these zones monthly.
Professional bathtub refinishing kits can extend tub life by a decade or more, but realistic expectations for DIY results hover around five years with attentive care. After that, you can strip and recoat or finally commit to replacement. The cost savings still favor refinishing: a typical kit runs $75 to $150 versus $1,200 to $3,000 for tub replacement and installation.
Who Should Use a DIY Kit vs Hiring Out
Refinishing makes sense for structurally sound tubs with cosmetic issues: stains, scratches, outdated color, or worn glaze. If your tub flexes underfoot, leaks, or has rust holes, replacement is the only durable fix. Check current pricing on kits to compare against local reglazing quotes, which typically start at $400 for professional application.
DIY suits patient homeowners comfortable with multi-step chemical processes and willing to vacate the bathroom for 48 hours. Rental properties and flip projects are ideal candidates because the cost per unit stays low and you can schedule work between tenants. If you're sensitive to fumes or can't ventilate adequately, hire a pro with industrial respirators and exhaust equipment.
The best diy bathtub refinishing kit for your project depends on substrate, desired longevity, and ventilation constraints. Epoxy systems deliver maximum durability on porcelain and cast iron, while acrylic formulations suit fiberglass and quick-turnaround scenarios. Either way, meticulous surface prep and patience during cure determine whether your tub looks refreshed for two years or ten.
Frequently asked questions
How long does a diy bathtub refinishing kit last?
Most DIY kits last three to seven years depending on the coating chemistry and surface prep quality. Epoxy-based formulations typically outlast acrylic by two to three years under the same usage conditions.
Can I use a refinishing kit on a fiberglass tub?
Yes, but choose an acrylic-based coating rather than rigid epoxy. Fiberglass flexes slightly under weight, and acrylic formulations remain flexible enough to move with the substrate without cracking.
Do I need special ventilation when applying tub paint?
Absolutely. Epoxy coatings release high levels of volatile organic compounds that require a respirator mask rated for organic vapors, open windows, and an exhaust fan. Maintain ventilation for the full cure period, typically 48 hours.
What's the difference between spray and brush-on refinishing kits?
Spray kits deliver the smoothest, most professional finish but require careful masking to control overspray. Brush-on and roller kits give you more control and work better for first-time users, though they may show slight texture.
Can I refinish the tile around my tub at the same time?
Yes. Bathtub tile paint or tub and tile paint formulations are designed to coat both the tub and surrounding ceramic surfaces in a single project, creating a cohesive updated look.
How soon can I use my tub after refinishing?
Wait the full cure time specified on your kit, typically 24 hours for acrylic and 48 hours for epoxy. Using the tub early can leave soft spots that scratch or yellow prematurely.