

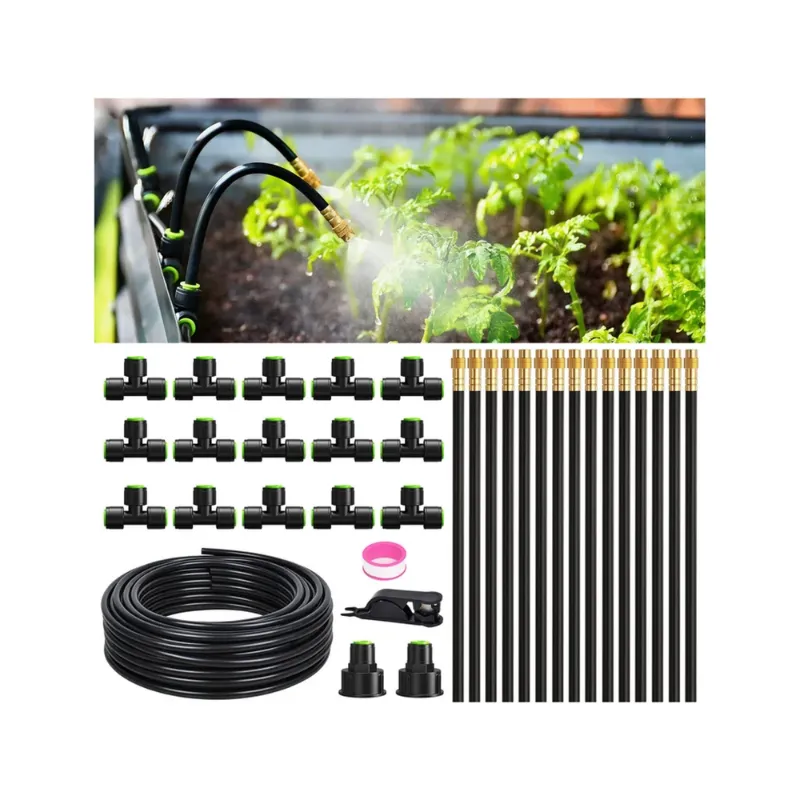
A garden drip irrigation system delivers water directly to plant roots, eliminating waste and guesswork from your watering routine. Whether you're growing vegetables, flowers, or maintaining a landscape, drip irrigation works harder and smarter than traditional sprinklers. This guide walks you through every step to get your system running in an afternoon.
Why Install a Garden Drip Irrigation System
Drip irrigation cuts water usage by up to 50% compared to overhead watering because water reaches roots instead of evaporating from leaves and soil surfaces. Plants get consistent moisture without the stress of flooding or drying out between waterings. Your garden thrives while you reclaim weekend time normally spent dragging hoses around.
The garden drip irrigation system approach also reduces disease pressure since leaves stay dry, and it works on slopes and uneven terrain where sprinklers fail. Once installed, automation handles the heavy lifting—especially when paired with a water timer.
Gather Your Materials
Before you dig, collect these essentials:
- Garden drip irrigation system main kit (includes main line, drip tubing, and emitters)
- Sprinkler hose for flexible, adjustable coverage
- Water timer to automate watering schedules
- Soil moisture sensor to monitor soil hydration in real time
- Connectors, end plugs, and stakes (usually included in kits)
- Shovel or dig bar for trenching (optional; surface laying works fine)
Many growers add a rainpoint wifi water timer for remote control and scheduling via smartphone, especially if your garden is large or you travel frequently.
Plan Your Layout Before Installation
Sketch your garden beds on paper and identify which zones need irrigation. Mark plant spacing, identify high and low spots, and note sun exposure—shadier areas dry slower and need less frequent watering.
Group plants with similar water needs together. Heavy drinkers like tomatoes and peppers go on one line; drought-tolerant herbs and succulents on another. This lets you run separate garden watering system schedules and avoid overwatering sensitive plants.
Measure the total distance from your water source to the farthest plant. Add 10 feet for turns and adjustments. Most kits cover 25 to 50 linear feet; larger gardens may need multiple garden irrigation kits connected together.
Install the Main Line and Emitters
Start at your faucet or existing water line. Attach the main supply line and run it along the edge of your garden bed. You can lay it on the soil surface or bury it 3 to 4 inches deep for a cleaner look (surface laying is easier to adjust and repair).
Punch or snap emitters into the drip tubing every 12 to 24 inches, depending on plant spacing and soil type. Sandy soils drain fast and need closer emitters; clay soils need wider spacing. Position emitters 2 to 3 inches from plant stems to avoid rot at the crown.
Connect sprinkler hose sections using push-fit connectors—no tools needed. Secure the line with landscape stakes every 3 to 4 feet to prevent kinks and drift. End each line with a plug to stop water flow.
| System Component | Purpose | Best For |
|---|---|---|
| Main supply line | Delivers water to all zones | All gardens |
| Drip tubing & emitters | Releases water at plant roots | Rows and beds |
| Sprinkler hose | Flexible, adjustable coverage | Odd-shaped areas |
| Water timer | Automates watering schedule | Hands-free operation |
Add Sensors for Smart Watering
A soil moisture sensor takes the guesswork out of watering. Insert the soil moisture probe into the soil 4 to 6 inches deep near your plants' root zone. The sensor reads moisture content and can trigger your timer only when soil dries to your target level, cutting water use by another 20 to 30%.
For maximum control, use a rainpoint wifi water timer paired with a soil humidity sensor. Check and adjust watering remotely from your phone, and the moisture detector prevents overwatering during rainy periods. Grab the code for 10% off smart-watering gear.
Connect Your Water Timer
Screw the water timer onto your faucet, then attach the main supply line to the timer outlet. Set it to run early morning—6 to 8 a.m.—when plants absorb water most efficiently and wind is calm. Most gardens need 1 to 2 inches of water per week in one or two sessions rather than daily short bursts.
Start with 20 to 30 minutes per session and adjust based on soil feel and plant appearance. Wet soil should be moist, not soggy. Leaves should stay crisp and green without wilting.
Maintenance and Troubleshooting
Check your garden drip irrigation system weekly during hot months. Look for leaks, kinks, or clogs at emitters. Clean drip tubing ends periodically—sediment can block water flow. Flushed or pale leaves may signal too much water; brown, drooping leaves mean you're underwatering.
In winter, drain all lines in cold climates to prevent freeze damage. Store tubing indoors or cover it. In spring, flush the system before reconnecting indoor plant watering system setups or restarting garden zones.
Replace emitters every 2 to 3 years as they degrade from UV exposure. Check the latest price on replacement parts and timers when you're ready to expand.
Who Should Use Drip Irrigation
Any gardener saves time and water with drip systems. Container gardeners benefit from indoor plant watering system versions that keep potted herbs and vegetables hydrated while you're away. Raised beds, vegetable patches, and landscape borders all thrive on drip-fed routines. Even if you have just a few potted plants on a patio, a small garden watering system setup cuts hand-watering by 80%.
 Shopping at RainPoint US? See today's verified RainPoint US discount code
Frequently asked questions
How deep should I bury the main line of a garden drip irrigation system?
You don't need to bury it at all—laying the main line on the soil surface works fine and makes repairs easier. If you prefer a cleaner look, bury it 3 to 4 inches deep in the root zone, but avoid burying drip tubing itself, which can clog with sediment.
Can I use a soil moisture sensor to automate my watering schedule?
Yes. A [soil moisture probe](/go/p/13991) inserted 4 to 6 inches into the soil triggers your [water timer](/go/p/13989) only when moisture drops below your target level, cutting water use and preventing overwatering.
How often should I water with a garden drip irrigation system?
Most gardens need 1 to 2 inches of water per week delivered in one or two sessions early in the morning. Adjust based on soil type, plant needs, and rainfall. Use a [moisture sensor](/go/p/13990) to monitor soil hydration and fine-tune timing.
What's the difference between a water timer and a rainpoint wifi water timer?
A basic [water timer](/go/p/13989) runs on a preset schedule at your faucet. A [rainpoint wifi water timer](/go/p/13995) connects to your smartphone, lets you adjust watering remotely, and can pair with sensors to skip watering on rainy days.
Can I use a garden drip irrigation system for indoor plants?
Yes. An [indoor plant watering system](/go/p/13994) uses the same drip tubing and emitters scaled down for pots, hanging planters, and shelves. Pair it with a [rainpoint wifi water timer](/go/p/13995) to water houseplants while you're traveling.
How do I prevent clogs in my drip irrigation system?
Use filtered water if your source is sediment-heavy, flush lines before connecting emitters, and clean or replace drip tubing ends every season. A [soil humidity sensor](/go/p/13992) helps prevent overwatering, which can trigger algae growth inside tubing.