
How to Use a Laser Level for Perfect Tile Installation

Why Use a Cross Line Laser Level for Tile Work
A cross line laser level projects bright horizontal and vertical reference lines across your wall or floor, eliminating guesswork and keeping every tile perfectly aligned. We rely on cross line laser level tools for backsplashes, bathroom walls, and large-format floor tile because they save hours of measuring and deliver professional results on the first pass.
Traditional chalk lines fade, smudge, and require constant snapping. A self-leveling cross-line laser locks into position within seconds and holds the reference plane as long as you need it. For outdoor patios or sunlit spaces, an outdoor laser level with green or pulse mode cuts through ambient light so you can see the line clearly.
Choosing the Right Laser Level for Tile Installation
| Feature | Best For | Example Use |
|---|---|---|
| Self-leveling cross-line | Walls, backsplashes | Kitchen tile, shower surrounds |
| Grid or multi-line | Floors, large-format tile | 12×24″ porcelain, open floor plans |
| Green beam or receiver | Bright rooms, outdoor tile | Patio pavers, sunroom floors |
We recommend a self-leveling cross line laser level for most residential tile jobs. The pendulum mechanism levels itself within ±4° and alerts you if the base is too far out of plumb. A grid laser level adds extra vertical and horizontal lines that turn your surface into a visible grid, perfect for 12×12″ or larger format tile where you need to check alignment across multiple rows at once.
For projects in direct sunlight or over long distances, a laser level with receiver extends your working range to 100 feet or more. The receiver beeps when it crosses the laser plane, so you can mark layout lines outdoors or across a large basement slab. Pair it with a laser level and pole to hold the receiver at the exact height of your grout line.
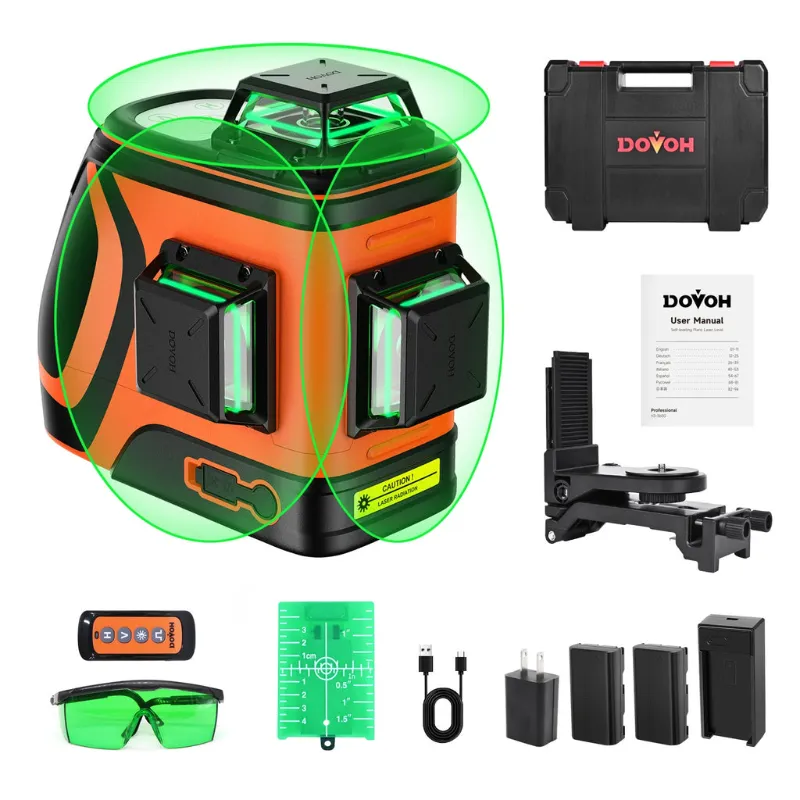
Models from Laser Levels at Ace Hardware and Grainger's dot and plane laser selection show the range of self-leveling, cross-line, and grid options available. The dovoh laser level we tested delivers bright red cross-lines, magnetic mounting, and a hard case for under the price of comparable Bosch or DeWalt models when you grab the code.
Step-by-Step Setup for Tile Layout
1. Position the laser at the starting corner Place your laser level on a tripod or mount it to the wall with the magnetic bracket. For floor tile, set it near the center of the room so both axes sweep across your work area. For wall tile, mount it at the height of your first course or at the midpoint of the backsplash.
2. Let the pendulum self-level Most cross line laser level self leveling units lock the pendulum during transport. Unlock it, wait two to three seconds, and confirm the leveling LED turns solid green. If the base is tilted beyond the compensator range, the laser will blink or shut off—adjust the tripod feet until it locks.
3. Align the vertical line to your layout mark Rotate the laser body (not the tripod) so the vertical beam passes through your starting plumb mark or the edge of your tile field. Some models include a fine-tune knob; others rely on the tripod head. Once aligned, lock the rotation collar.
4. Mark tile edges and grout joints The horizontal line shows the top edge of your first row. The vertical line marks the edge of your first column. Use a pencil to tick the intersections every few feet, or work directly to the laser line. For running-bond or offset patterns, measure your offset distance from the vertical beam.
5. Check alignment as you go After setting each tile, glance at the laser line to confirm the top edge or side edge matches the reference. Adjust the tile in the thinset before it skins over. This real-time feedback catches drift before you've installed an entire row.
Tips for Walls, Floors, and Backsplashes
Backsplashes and subway tile Mount the laser 18 inches above the counter and align the horizontal line to the top edge of your second course (the first course sits on the counter and may be cut to fit outlets). The vertical line helps you keep stacked or offset joints plumb, especially around inside corners where walls may not be perfectly square.
Shower walls and large-format tile A best cross line laser level with a bright beam is essential in the low light of a bathroom. Start the horizontal line at the top of your first full course above the tub or pan, and use the vertical line to check that your bullnose or edge trim stays plumb as you work up the wall.
Floor tile and open layouts For 12×24″ or larger planks, a grid laser level projects four or more lines that divide the floor into quadrants. Snap the laser to the center of the room, align one axis to your longest sight line, and tile outward. The intersecting lines let you check both edges of a plank at once, which is faster than moving a single cross-line back and forth.
Outdoor patios and pavers Sunlight washes out red beams. Use an outdoor laser level with green-beam technology or a pulse mode that works with a handheld receiver. Mount the laser on a stable tripod (the laser level and pole kit includes a five-foot extension and receiver clamp), then sweep the receiver along your screed rails or edge forms to confirm they match the laser plane. Check the latest price for bundles that include both the laser and receiver.
Common Mistakes and How to Avoid Them
Forgetting to unlock the pendulum The self-leveling mechanism ships locked to protect the gimbal. If your laser won't project a line or the beam spins wildly, check for a transport lock switch on the side or bottom.
Setting the laser on an unstable surface Vibration from foot traffic, a washing machine, or subfloor movement will cause the pendulum to sway and the line to drift. Always use a tripod with a center hook or locking legs, or mount the laser to a wall stud with the magnetic base.
Ignoring the compensator range Most cross line laser level self leveling tools compensate ±3° to ±4°. If your floor or tripod is tilted beyond that, the laser will blink or shut off. Level the tripod roughly with the bubble vial before you unlock the pendulum.
Working in direct sunlight without a receiver A standard red-beam laser disappears in bright sun beyond five or six feet. If you can't see the line, either shade the work area, switch to a green-beam model, or add a receiver that beeps when it crosses the plane.
Running out of battery mid-job Continuous cross-line projection drains alkaline batteries in three to four hours. Carry a spare set or upgrade to a rechargeable pack like the fl 260 battery that powers Dovoh and many cross line laser level Bosch or cross line laser level DeWalt compatible tools for eight-plus hours.
Who Should Invest in a Laser Level for Tile
DIYers tackling a kitchen or bathroom remodel If you're installing 50 square feet or more of tile, a cross line laser level pays for itself in time saved and cuts wasted on misaligned rows. Entry-level self-leveling models start under the cost of hiring a pro for layout, and you'll use the tool again for hanging cabinets, chair rail, or wainscoting.
Contractors running multiple tile jobs per month A cross line laser level Milwaukee or cross line laser level with tripod system delivers the durability and accuracy you need on job sites where chalk lines smudge and pencil marks disappear under dust. Look for IP54 or better dust and water resistance, a hard carry case, and at least a one-year warranty.
Renovators working in older homes Walls and floors in century homes are rarely plumb or level. A laser gives you a true reference plane independent of the structure, so you can shim your tile layout and avoid the tapered look that comes from following an out-of-square corner.
Anyone who values speed and precision Laser layout cuts setup time from twenty minutes of snapping and checking to under two minutes of self-leveling and alignment. You'll tile faster, waste less material, and finish with grout lines that look machine-straight. Pair your laser with a digital laser angle finder to measure and transfer angles for diagonal insets or herringbone borders, and grab our exclusive discount to save 15% on the full Dovoh lineup.
Frequently asked questions
Can I use a cross line laser level for floor tile as well as walls?
Yes. Mount the laser on a tripod at the height where you want your reference plane—usually flush with the finished tile surface or the top of your first course. The horizontal line marks your height plane, and the vertical line helps align edges and grout joints across the room.
Do I need a green beam laser for indoor tile work?
Not unless your room has large windows or bright LED work lights. Red-beam lasers work well indoors up to 30 feet. Green beams or models with a receiver are worth the upgrade for sunlit bathrooms, outdoor patios, or basement floors where you need visibility beyond 40 feet.
How do I know if my laser level is self-leveling?
Self-leveling models have a pendulum compensator and a lock switch for transport. When you unlock it, the laser automatically finds level within a few seconds and projects steady lines. Manual lasers require you to adjust bubble vials by hand and do not auto-correct if bumped.
What is the difference between a cross-line and a grid laser level?
A cross-line projects one horizontal and one vertical beam that intersect at 90 degrees. A grid laser adds extra lines—often four verticals and four horizontals—that divide your surface into a grid, making it faster to align large-format tile or check multiple joints at once.
Can I mount a laser level directly to the wall?
Many models include a magnetic base or bracket that clamps to a stud, metal track, or tripod. Wall mounting works well for backsplashes and shower walls where floor space is tight, as long as the surface is stable and within the laser's self-leveling range.
How long do batteries last during a tile job?
Alkaline batteries typically power a cross-line laser for three to five hours of continuous use. Rechargeable lithium packs last eight hours or more and are worth the investment if you're tiling a full kitchen or bathroom in one session.