
Viking Press Setup: Common Mistakes and How to Fix Them

Viking Press Setup: Common Mistakes and How to Fix Them
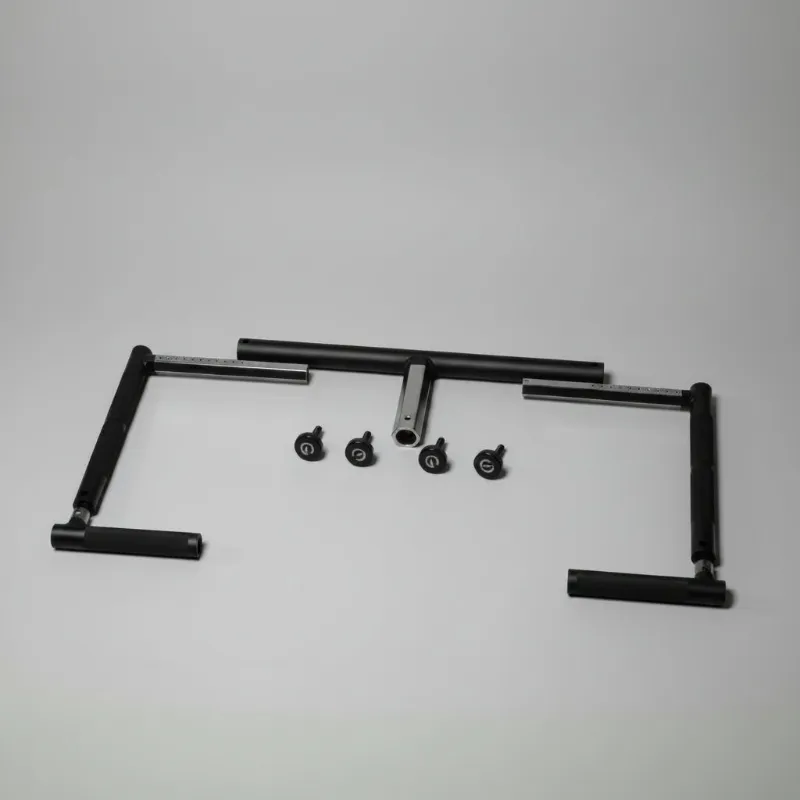
The viking press is one of the most effective overhead movements for building deltoid mass and lockout strength, but incorrect setup robs you of stability, range of motion, and muscle recruitment. We tested multiple attachment styles and spoke with lifters who struggled with wobble, uneven loading, and shoulder discomfort—all traced back to preventable setup errors. This guide walks you through the most common viking press mistakes and exactly how to fix them so you get maximum tension on the target muscles every rep.
What the Viking Press Machine Targets and Why Setup Matters
The viking press is a landmine-style overhead press that loads the shoulders through a natural arc rather than a strict vertical path. According to research on overhead pressing mechanics, the movement emphasizes the anterior and lateral deltoids, upper chest, and triceps while reducing lumbar stress compared to traditional barbell presses. But those benefits only show up when the attachment sits square, the load path stays centered, and your body position matches the arc of the handles.
When setup is off—collar loose, barbell unbalanced, or stance too narrow—the press drifts forward or twists mid-rep, forcing stabilizers to compensate instead of prime movers doing the work. The result is wasted effort, inconsistent progressive overload, and a higher risk of impingement or strain.
Common Viking Press Attachment Mistakes
Loose or Missing Collar on the Barbell Sleeve The most frequent issue we see is lifters skipping the collar or using a worn spring clip that lets the viking press attachment slide during the set. Even a few millimeters of drift changes the load angle and creates a rocking sensation at lockout.
- Always use a secure locking collar—Olympic or lever-style—on the barbell sleeve before you load plates.
- Check that the attachment sits flush against the collar with zero play.
- If you hear rattling or feel the handles shift, stop and re-tighten.
Barbell Anchored Too High or Too Low Many gyms anchor the landmine sleeve at mid-shin, which works for rows but forces an awkward start position for overhead work. If the pivot is too low, you lose the first few inches of range; too high and the handles begin above shoulder level, shortening the press.
- Position the landmine or barbell corner at roughly knee height for most lifters.
- The handles should start near collarbone level when you stand upright.
- Test the arc unloaded—your hands should trace a smooth path from chest to overhead without jamming into your chin or hyperextending your wrists at the top.
Uneven Weight Distribution on Cambered Handles Some viking press attachments feature cambered or angled handles that let you press with a neutral grip. If you load plates unevenly or one side of the attachment sits higher on the sleeve, the camber amplifies the imbalance and one shoulder works harder than the other.
- Load both sides of the barbell evenly and verify the attachment is centered.
- If your gym also uses a cambered bar for bench pressing, the same balance principles apply—uneven load creates uneven muscle activation.
- Mark the center of your barbell sleeve with tape to double-check alignment session to session.
Stance and Body Position Errors
Standing Too Close to the Pivot Crowding the landmine base forces you to press at an exaggerated forward angle, turning the movement into a hybrid incline press that misses peak deltoid contraction. You also risk kicking the base or tripping over the barbell.
- Stand far enough back that the handles begin in front of your chest, not directly above it.
- A good rule: when your elbows are bent at ninety degrees, the attachment should be roughly one fist-width in front of your sternum.
- This distance lets you press through the natural arc without leaning forward or back.
Feet Too Narrow or Uneven A narrow stance limits hip and core stability, so any lateral wobble in the attachment translates into side-to-side sway. We also see lifters stagger their feet without reason, which twists the torso and unevenly loads the shoulders.
- Use a shoulder-width stance with toes pointed slightly out, the same base you'd adopt for a military press.
- Keep both feet flat and evenly weighted—no heel lift or rocking.
- Brace your core before each rep to lock your ribcage in place and prevent the arch from collapsing.
Grip Width Mismatch Most viking press attachments offer multiple hand positions. Grabbing too wide flares the elbows and increases impingement risk; too narrow shifts load to the triceps and reduces deltoid stretch.
- Start with the inner or middle grip position so your forearms remain roughly vertical at the bottom.
- Your elbows should track in line with your wrists throughout the press, not flare out past your hands.
- If shoulder discomfort persists, try the next grip in and film a side view to check elbow path.
Loading and Progression Mistakes
Jumping Weight Without Testing the Arc Because the viking press feels easier off the chest than a strict barbell press, lifters often overload too soon. The unique arc means peak tension hits mid-rep, not at lockout, so poor setup magnifies under heavy loads.
- Test your setup with an empty attachment for three to five smooth reps before adding plates.
- Add weight in small jumps—2.5 to 5 lb per side—especially if you've adjusted stance or grip width.
- Check the latest price and grab the code before ordering plates or accessories to complete your landmine setup at home.
Ignoring Attachment Compatibility Not every viking press attachment fits every barbell diameter. Standard one-inch sleeves and Olympic two-inch sleeves require different collars and often different attachment designs. Forcing a mismatched fit leaves the attachment wobbling no matter how carefully you set up.
- Verify your barbell sleeve diameter before ordering a viking press attachment.
- Look for attachments with adjustable or adapter-friendly collars if you use multiple barbells.
- If you're building a garage gym with landmine work, also consider a kettlebell rack and calf raise block to round out your unilateral and stability training.
Quick Setup Checklist
Follow this sequence every session to avoid the mistakes above:
- Anchor the barbell at knee height in a landmine or corner.
- Slide the attachment onto the sleeve and secure it with a locking collar flush against the base.
- Load plates evenly and double-check the attachment is centered.
- Stand shoulder-width apart, one to two feet back from the pivot, with the handles in front of your chest.
- Grip the handles at a width that keeps forearms vertical and elbows tracking in line with wrists.
- Brace your core and press through the arc, finishing with the handles overhead and slightly in front of your face.
- Film a set from the side to verify the load path stays smooth and your torso remains upright.
For a deep dive into which muscles the movement targets and programming tips, read this guide on pressing mechanics. And if you want to compare the setup to other overhead variations, our cambered barbell review covers similar stability and grip considerations for bench pressing.
Who Benefits Most from Proper Setup
Dialing in your setup pays off for every lifting goal. Strongman competitors use the viking press for event-specific lockout strength, and the correct stance and load path translate directly to log press and axle work. Bodybuilders chasing deltoid hypertrophy need consistent tension and range of motion—setup mistakes leak both. And if you're rehabbing a shoulder or working around lower-back sensitivity, the landmine arc already reduces strain, but only if the attachment stays stable and your posture stays neutral.
Before your next session, walk through the checklist above and test each adjustment with light weight. The difference between a wobbly, frustrating press and a smooth, powerful one often comes down to a single collar, an extra six inches of stance width, or shifting back one step from the pivot. Grab the discount code to save on a quality attachment, and your setup will stay dialed for years of shoulder gains.
Frequently asked questions
What muscles does the viking press work?
The viking press primarily targets the anterior and lateral deltoids, upper chest, and triceps. Because the landmine arc follows a natural pressing path, it also recruits core stabilizers while reducing lumbar stress compared to strict overhead barbell presses.
Can I use a viking press attachment on a standard barbell?
Most attachments are designed for Olympic two-inch barbell sleeves. If you have a standard one-inch barbell, verify the attachment includes an adapter or adjustable collar. Forcing a mismatched fit creates dangerous wobble and uneven loading.
How far should I stand from the landmine pivot?
Stand far enough back that the handles begin in front of your chest, not directly above it. A good test is to bend your elbows to ninety degrees—the attachment should sit roughly one fist-width in front of your sternum at the start position.
Why does my viking press feel uneven on each side?
Uneven feel usually comes from asymmetric plate loading, a loose collar letting the attachment slide, or an off-center stance. Check that both sides of the barbell carry equal weight, re-tighten the collar, and verify your feet are shoulder-width and evenly planted.
What grip width should I use on a viking press machine?
Start with the inner or middle grip so your forearms stay vertical at the bottom of the press. Your elbows should track in line with your wrists throughout the movement. If you experience shoulder discomfort, try a narrower grip and film your set from the side to check elbow path.
Do I need a special landmine attachment or can I use a corner?
You can press from a barbell wedged in a corner, but a dedicated landmine sleeve offers more stability and protects walls and floors. If you train at home, a landmine attachment is worth the investment for consistent setup and safety across multiple exercises.