
How to Keep Warm in a Hammock: Do You Really Need an Underquilt?

Why Your Back Gets Cold in a Hammock
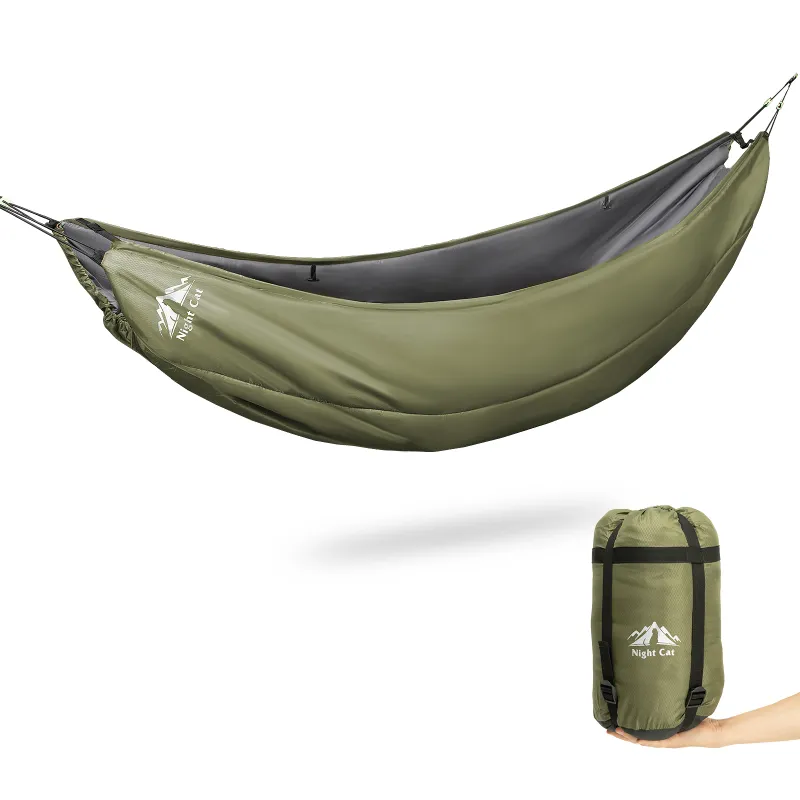
A hammock underquilt solves the biggest problem hammock campers face: cold-back syndrome. When you lie in a hammock, your body weight compresses any insulation beneath you—whether that's a sleeping bag or pad—eliminating its ability to trap warm air. The result is a chilly, uncomfortable night even when the temperature seems mild.
An underquilt hangs beneath your hammock and creates a protective cocoon of loft that doesn't compress. This design maintains continuous insulation between you and the cold air flowing underneath. If you plan to hammock camp in temperatures below 70°F, you need dedicated bottom insulation.
When You Actually Need an Underquilt
The answer depends on your camping season and location. We've tested hammock setups in conditions ranging from summer overnights to near-freezing spring trips, and the difference is stark.
You need an underquilt when:
- Nighttime temps drop below 65-70°F
- You're camping in spring, fall, or winter
- Wind chill is a factor (moving air strips heat rapidly)
- You're spending multiple nights out and comfort matters
You can skip it when:
- Summer camping with lows above 75°F
- You're using a hammock tent with integrated insulation
- Quick afternoon naps in warm weather
- You're willing to test a DIY insulation alternative first
Most hammock campers discover they need bottom insulation sooner than expected. Even a mild 60°F night can leave you shivering by 3 AM when the temperature bottoms out.
Hammock Underquilt vs Sleeping Pad: What Works Better
We compare both options because many campers already own a sleeping pad and wonder if it's enough.
| Method | Pros | Cons |
|---|---|---|
| Underquilt | No compression, stays in place, full coverage, easy to adjust ventilation | Higher cost, bulkier to pack, requires suspension setup |
| Sleeping Pad | Dual-use for tent camping, familiar, lightweight options available | Slides around, creates pressure points, tricky to position, partial coverage |
A pad inside your hammock will shift as you move, bunching up or sliding to one side. You'll spend half the night repositing it. An underquilt stays put because it's suspended independently from the hammock fabric.
That said, ultralight backpackers sometimes pair a three-quarter-length pad with a 2 person sleeping bag to save weight and cost. If you switch between a hammock and a 1 person tent on the same trip, a pad offers versatility an underquilt can't match.
Choosing the Right Temperature Rating
Underquilts use the same temperature rating system as sleeping bags, but your choice should account for hammock-specific factors.
Match your rating to the coldest night you expect, then subtract 10°F as a buffer. Hammocks expose you to airflow on all sides, so they sleep colder than ground shelter. A 20-degree underquilt is comfortable down to about 30°F for most sleepers.
Common ratings and their seasons:
- 40-degree: Three-season use, lows to 50°F
- 20-degree: Extended three-season, lows to 30°F
- 0-degree: Winter camping, lows to 10°F with proper layering
We recommend a 20-degree underquilt as the best starting point for most buyers. It covers spring through fall and pairs well with a sleeping double sleeping bag or top quilt for shoulder-season trips. Check the latest price before you buy, since seasonal discounts can make a warmer rating affordable.
For serious weight-watchers chasing an ultralight setup, look for models made with treated down or high-loft synthetic fill. These materials deliver warmth without bulk, especially important if you're already carrying an internal frame backpack loaded with multi-day gear.
Underquilt and Top Quilt: Do You Need Both?
Yes, if you want a complete hammock sleep system. An underquilt handles insulation below you, while a top quilt or sleeping bag covers you from above. Think of them as a two-piece sleeping bag designed specifically for hammock geometry.
Top quilts drape over you without a compressed back panel, so every inch of insulation works as intended. Many hammock campers prefer a quilt system over a traditional sleeping bag because it's lighter, more packable, and easier to vent when temps rise.
That said, you can absolutely use a standard sleeping bag as your top layer if you already own one. Just unzip it partially on warmer nights to prevent overheating. The underquilt remains the non-negotiable piece for cold-weather hammocking.
DIY Hammock Underquilt: Is It Worth the Effort?
A DIY underquilt appeals to budget-conscious campers and those who enjoy gear projects. The most common approach involves repurposing an old sleeping bag or sewing a simple quilt from insulation batt and ripstop fabric.
DIY pros:
- Costs $30-60 in materials vs $100-300 for a commercial model
- Fully customizable length and width
- Good learning project if you sew
DIY cons:
- Time-intensive (8-15 hours for a first build)
- Requires sewing skills and a machine that handles nylon
- Often heavier and bulkier than purpose-built gear
- Suspension attachment points need careful reinforcement
We've tested a handful of DIY underquilts from the hammock community, and the results vary widely. A well-made homemade version performs nearly as well as a commercial product, but poorly placed baffles or weak stitching can create cold spots that ruin a night out.
If you're handy and have the time, try it. If you'd rather grab proven gear and hit the trail, grab the code and invest in a factory model. The weight savings and reliability justify the cost for anyone who hammocks more than a few times per season.
Alternatives When You're Not Ready to Buy
Not ready to commit to an underquilt? We've tried these workarounds on short trips when testing budget setups.
Layered clothing and emergency blankets: Wear your puffy jacket and pants to bed, then drape an emergency blanket under the hammock. This adds maybe 10-15°F of warmth—enough for an unexpected cool night but not a long-term solution.
Closed-cell foam pad: A basic foam pad like a Z-Lite stays put better than an inflatable and costs under $30. Cut it to three-quarter length to save weight. It won't match a real underquilt, but it beats shivering.
Switch to a tent: If you're camping in cold conditions and don't have bottom insulation, a pop up camping tent or ultralight 2 person tent keeps you off the ground and blocks wind. You'll sleep warmer with less gear.
Hybrid setups: Some hammock campers use a lay flat hammock with a bed cot frame for car camping, then add blankets underneath for insulation. It's heavy and not backpack-friendly, but comfortable for drive-up sites.
For serious hammock camping, though, none of these replacements match the performance of a dedicated underquilt. If you plan to make hammocking a regular part of your outdoor routine, budget for one sooner rather than later.
Getting the Most From Your Underquilt
Proper setup makes a huge difference. Hang your underquilt so it contacts the entire bottom of your hammock with no gaps at the edges. Most models use shockcord and toggles that let you adjust tension—snug enough to eliminate dead air space, but not so tight that you compress the insulation.
Setup tips we've learned:
- Position the underquilt slightly asymmetrically to match how you lie in the hammock
- On cold nights, cinch the end panels to seal in warmth
- In milder weather, loosen the tension to increase ventilation and prevent overheating
- Pair with a mosquito tent or bug net to protect from insects without blocking airflow
Store your underquilt loosely in a large stuff sack or hang it in a closet. Compressed insulation loses loft over time, shortening its effective lifespan. After wet trips, air it out completely before packing to prevent mildew.
The best options for 2026 include models with adjustable baffles, water-resistant shells, and clever suspension systems that work with any hammock width. Browse a few options and match the features to your typical camping style—weekend warriors need different gear than thru-hikers chasing every ounce of weight savings.
Staying warm in a hammock isn't complicated once you understand the physics. Your back needs insulation that doesn't compress, and an underquilt delivers exactly that. Whether you buy, build, or improvise, don't skip bottom insulation if you're heading out in anything cooler than a summer evening.
Frequently asked questions
Can you use a sleeping bag instead of an underquilt for hammock camping?
You can, but a sleeping bag compresses beneath you and loses most of its insulating ability. A dedicated underquilt hangs below the hammock and maintains full loft, keeping you much warmer. Many campers start with a sleeping bag and switch to an underquilt after a few cold nights.
What temperature rating underquilt do I need for three-season camping?
A 20-degree underquilt works well for most three-season camping, handling temps down to about 30°F comfortably. If you camp primarily in summer, a 40-degree model may suffice. Always choose a rating 10°F colder than your expected low to account for hammock exposure.
Do I need both an underquilt and a top quilt?
Yes, for a complete insulation system. The underquilt insulates below you while a top quilt or sleeping bag covers you from above. You can use a regular sleeping bag on top, but the underquilt is essential for preventing cold-back syndrome in temperatures below 70°F.
Is a DIY hammock underquilt as warm as a store-bought one?
A well-made DIY underquilt can perform nearly as well as a commercial model, but it requires good sewing skills and careful attention to baffle placement. DIY versions are often heavier and bulkier. If you're experienced with gear-making, it's worth trying; otherwise, a factory underquilt offers better performance and reliability.
Can I use a sleeping pad in my hammock instead of an underquilt?
A sleeping pad works in a pinch but tends to slide around as you move, creating gaps and pressure points. It's also tricky to keep positioned through the night. An underquilt stays in place and provides consistent coverage, making it far more comfortable for regular hammock camping.
How do I know if my underquilt is hung correctly?
Your underquilt should contact the entire bottom of your hammock with no gaps at the edges or ends. Adjust the shockcords so the fabric is snug but not compressed. You should feel even warmth across your back with no cold spots. On warmer nights, loosen the tension slightly to increase ventilation.