
Internal Frame Backpack Setup: How to Pack for Multi-Day Camping Trips

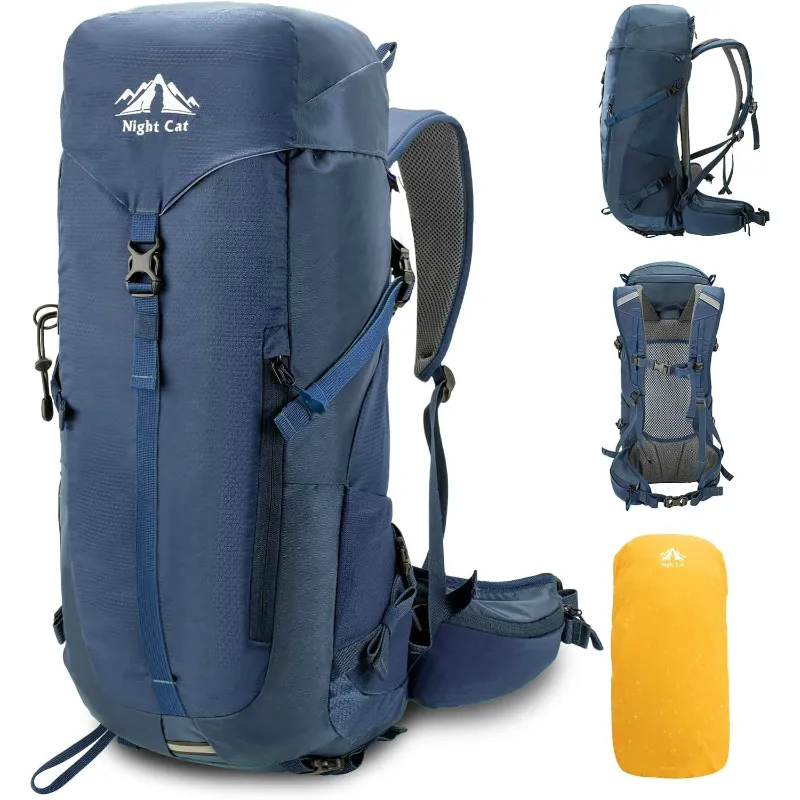
An internal frame backpack works best for multi-day trips when you pack heavy items close to your spine and organize gear by access priority. The frame sits inside the pack body and molds to your back, making it more stable on rough trails than bulkier external designs.
We've tested dozens of camping setups, and packing strategy matters as much as the pack itself. Load placement directly affects comfort over long distances, especially when you're carrying shelter, sleep systems, and several days of supplies.
Why Choose an Internal Frame Backpack Over External
Internal frame designs dominate modern backpacking because they hug your center of gravity. The frame stays hidden inside the pack, usually made from aluminum stays or a molded plastic sheet that transfers weight to your hips. This keeps the load stable when you scramble over rocks or navigate narrow trails.
External frame backpacks sit away from your body and work better for heavy, awkward loads on flat terrain. We prefer internal frames for varied topography and active movement. The tradeoff is learning to pack efficiently, since internal packs don't offer the same open access as external shelf designs.
Most internal frame backpacks range from 50 to 75 liters for multi-day trips. That capacity handles a tent, sleeping system, clothing layers, food, and water filtration without overloading.
Packing Zones: How to Distribute Weight in Your Backpack
We organize every pack using three vertical zones. This method keeps your center of gravity high and close to your spine, reducing strain on your lower back and shoulders.
Bottom zone (sleeping bag compartment):
- Sleeping bag or 2 person sleeping bag if camping with a partner
- Extra clothing layers you won't need until camp
- Hammock underquilt for hammock campers
- Anything lightweight and compressible
Core zone (against your back, mid-pack):
- Heaviest items: food bags, water reservoir, cook system
- Ultralight 2 person tent body (pack poles separately)
- Bear canister if required
- This is your load-bearing zone, keep dense weight here
Top zone (lid and upper compartment):
- Rain gear and insulating jacket for quick access
- First aid kit and navigation tools
- Snacks and water filter
- Headlamp and camp essentials
Outer pockets and lash points:
- Tent poles strapped vertically along the side
- Water bottles in side pockets
- 1 person tent stakes in an external pocket
- Trekking poles (if not in use)
For current pricing on a quality internal frame backpack that fits this system, check our Night Cat discount code for 10% off.
Step-by-Step: Loading Your Pack for Multi-Day Trips
Start with everything laid out so you can see your full kit. We pack in reverse order of what we'll need on the trail.
- Stuff the sleeping bag first. Push it all the way to the bottom, using a compression sack only if the bag won't fit otherwise. If you're carrying a sleeping double sleeping bag, compress it tightly since dual bags take more space.
- Build the core load. Place your heaviest items vertically against the internal frame, between your shoulder blades when worn. Food bags go here, along with the water reservoir in its sleeve. Nestle your pop up camping tent or other shelter around the sides if it fits the shape.
- Fill gaps with soft items. Clothing, a fleece, or a hammock tent stuff sack can fill voids. Empty space lets gear shift and throws off your balance.
- Add the top layer. Rain shell, puffy jacket, and tonight's dinner go on top for easy access. The brain pocket or lid holds maps, sunscreen, and repair kit.
- Strap external gear. Lash tent poles vertically along a side compression strap. Some packs have dedicated pole sleeves. A bed cot won't fit inside most packs, so if you're car camping nearby, leave bulky furniture at the trailhead.
- Adjust compression straps. Cinch side straps to stabilize the load and prevent sway. Top straps pull weight forward, closer to your back.
Before you hit the trail, grab our code to save on shelter and sleep systems that pack efficiently.
Fitting and Adjusting Your Internal Frame Backpack
Even perfectly packed gear feels heavy in a poorly fitted pack. We adjust in this order every time.
Loosen all straps before putting the pack on. Hip belt, shoulder straps, and load lifters should be slack. Lift the pack onto one knee, then swing it onto your back by one shoulder strap.
Fasten the hip belt first. It sits on your hip bones (iliac crest), not your waist. The belt carries 80% of the weight, so position it correctly before touching other straps. Tighten until snug but not restrictive.
Snug the shoulder straps. Pull them just tight enough that the pack sits stable. They guide the load, they don't carry it. If your shoulders ache after an hour, you're over-tightening here and under-tightening the hip belt.
Engage load-lifter straps. These small straps connect the top of the shoulder harness to the upper pack body, angled about 45 degrees. Pull them to bring the top of the pack closer to your shoulders. This keeps weight from pulling you backward.
Adjust the sternum strap. Clip it across your chest at a comfortable height, usually just below your collarbones. It stabilizes the shoulder straps but shouldn't restrict breathing.
Walk around with full weight before committing to the trail. The pack should feel like an extension of your torso, not a separate object pulling you off-balance.
Waterproofing and Protecting Your Gear
Internal frame packs rarely come fully waterproof. Most use water-resistant fabrics that handle light rain but fail in prolonged downpours.
We line the interior with a trash compactor bag or a dedicated pack liner before loading gear. This single layer protects everything if you're caught in a storm or need to set the pack down in wet grass. A pack cover handles exterior rain but won't stop water from seeping through zippers or the top opening.
Double-bag critical items. Electronics, maps, and extra clothing go into their own dry bags or ziplock bags even inside the liner. We've seen too many trips derailed by a soaked sleeping bag.
If you're using a mosquito tent or lay flat hammock setup, their stuff sacks usually aren't waterproof either. Add them to your liner or use a separate dry bag for sleep and shelter systems.
Shelter and Sleep System Choices for Internal Frame Packs
Your shelter choice changes how you pack. Traditional 4x3x3 tents with poles and stakes fill more space than minimalist shelters, but they offer better weather protection and don't require trees.
For weight-conscious backpackers, an ultralight 2 person tent balances space and packability. We split the load with a partner: one person carries the tent body in their core zone, the other takes poles and stakes on the outside.
Hammock campers save interior pack space since a hammock tent compresses smaller than a pole tent. Add a hammock underquilt for insulation underneath, and you've got a sleep system that weighs less than most tent-and-pad combinations. The downside is needing trees, which limits campsite options above tree line or in desert environments.
Sleep systems matter just as much as shelter. A 2 person sleeping bag or sleeping double sleeping bag works for couples who want to share warmth, but solo bags pack tighter and weigh less per person for most trips.
Common Packing Mistakes We See on the Trail
Bottom-loading heavy items. Putting your cook system or food at the pack bottom creates a pendulum effect. Every step pulls you backward. Keep weight high and centered.
Overpacking the top. A lumpy, overstuffed top compartment raises your center of gravity too far and makes the pack tippy on uneven ground.
Ignoring compression straps. Loose straps let gear shift. A wandering load throws off your balance and creates hot spots where the pack rubs.
External gear overload. Lashing too many items outside the pack catches on branches and increases wind resistance. If it doesn't fit inside, you probably packed too much.
Skipping a shakedown hike. Walking around your block fully loaded reveals pressure points and poorly placed gear before you're miles from the trailhead.
We recommend a test pack and short day hike with your full multi-day load. Adjust strap positions and reprioritize gear placement based on what works for your body and your specific internal frame backpack model.
For the full range of compatible camping gear and current deals, visit our Night Cat store page before your next trip.
Frequently asked questions
What is the difference between an internal frame backpack and an external frame backpack?
An internal frame backpack has stays or panels hidden inside the pack body that sit close to your back, offering better stability and balance on uneven trails. External frame backpacks position the frame outside, away from your body, which provides better ventilation and easier access but less stability during active movement.
Where should I put the heaviest items in my backpack?
Place your heaviest items in the core zone, vertically against your spine between your shoulder blades. This keeps weight close to your center of gravity and prevents the pack from pulling you backward. Food, water, and cook systems belong in this middle section.
How do I know if my internal frame backpack fits correctly?
Your hip belt should rest on your hip bones and carry about 80% of the weight, while shoulder straps guide the load without digging in. Load-lifter straps should angle about 45 degrees from the pack to your shoulders. If your shoulders ache quickly or the pack sways, readjust the hip belt first.
Can I fit a 2 person sleeping bag in a 50 liter internal frame backpack?
A double sleeping bag typically requires a 60 to 75 liter pack for multi-day trips when combined with other gear. A 50 liter pack works for solo bags and minimalist setups, but two-person bags need more space unless you're doing overnight trips with very little other equipment.
Do I need a waterproof internal frame backpack for camping?
Most internal frame packs use water-resistant fabric, not fully waterproof construction. Line the interior with a trash compactor bag or pack liner to protect gear during heavy rain. A rain cover helps but won't seal out water completely, so internal liners work better for true waterproofing.
Should I pack my tent inside or outside my backpack?
Pack the tent body inside your core zone for weight distribution and weather protection. Strap tent poles vertically along the outside using side compression straps or dedicated pole sleeves. Stakes can go in an external pocket or small stuff sack tucked inside.