
How to Set Up HDMI eARC with a TESmart HDMI Switch Without Losing Audio Features

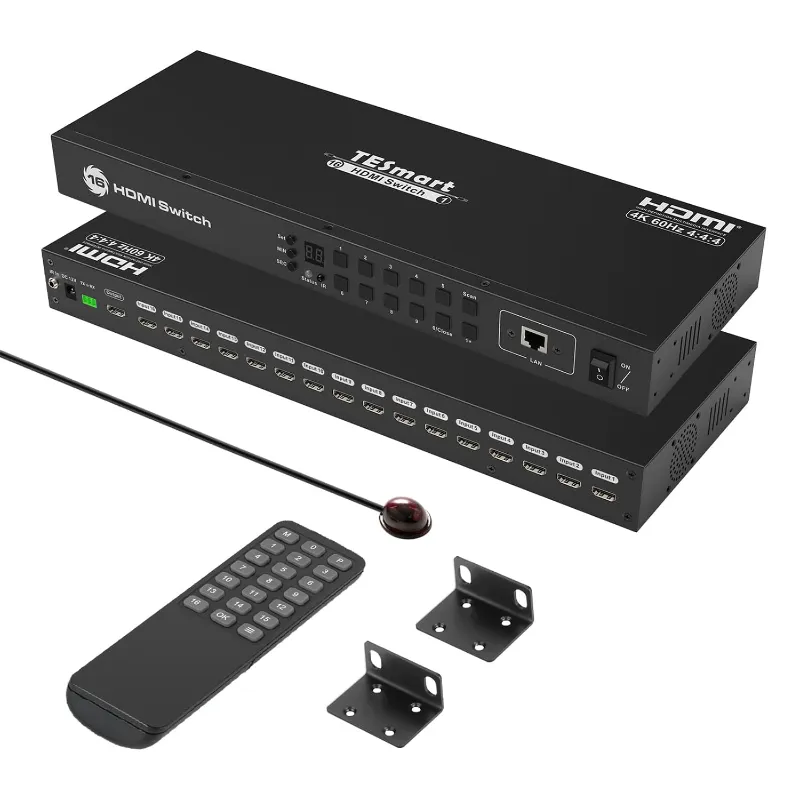
A kvm switch switch can work with HDMI eARC, but only if the TV, soundbar or AVR, source devices, and TESmart switching hardware are connected in the right signal path. For most buyers, the safest setup is to keep eARC between the TV and audio device, then use a TESmart HDMI switch or KVM to manage the video sources feeding the TV or monitor. We’ll show the clean routing, what to check before buying, and how to avoid losing audio formats, CEC control, USB access, or high-resolution display support.
The Best kvm switch switch Layout for HDMI eARC
The key rule is simple: HDMI eARC should stay on the dedicated eARC connection between your TV and your soundbar or AV receiver. A switch may pass video perfectly but still interrupt eARC handshakes, CEC commands, or audio return behavior if it sits in the wrong place.
Use this layout first:
- Connect the TV’s HDMI eARC port to the soundbar or AVR’s eARC port.
- Connect your game console, streaming box, laptop dock, or media PC into the hdmi switch or TESmart input side.
- Connect the switch output to a normal HDMI input on the TV, not the TV’s eARC-only audio return path unless the product specifically supports that role.
- Use the TV audio menu to send sound back to the soundbar or AVR over eARC.
- Enable CEC only where you need power and volume control, then disable it on problem devices if switching becomes unreliable.
This arrangement keeps the audio return channel simple. It also makes troubleshooting easier because the TV remains the central point for video selection, audio format negotiation, and eARC output.
If you are comparing TESmart options, start with the product page for the exact TESmart kvm or HDMI model you plan to use, then check the latest price before ordering. Specifications can vary by model, especially around resolution, refresh rate, USB version, EDID behavior, and audio support.
HDMI eARC, HDMI ARC, and Switching: What Actually Matters
HDMI eARC is not just “audio over HDMI.” It is the return path that lets a TV send sound from apps and connected sources back to a soundbar or receiver, often with better bandwidth than older ARC. If you want the background on how KVM devices differ from basic video switches, this overview of what is a KVM switch? is a useful primer.
The practical buyer points are:
- eARC path: Keep it direct between TV and sound system whenever possible.
- Video path: Route computers, consoles, and players through the TESmart switch or KVM into the display.
- USB path: Route keyboard, mouse, webcam, DAC, or storage through the KVM only if the model supports the USB speed you need.
- Control path: CEC can be convenient, but too many devices trying to control each other can cause input jumping or missed volume commands.
- EDID path: A good switch preserves display information so sources know what resolution and audio formats are available.
A hdmi earc accessory or cable run should be treated as part of the audio chain, not as a place to add unnecessary switching. Shorter, certified, correctly rated cables are usually easier to stabilize than long chains of adapters.
TESmart HDMI Switch vs TESmart KVM for TVs, Desks, and Consoles
A TESmart HDMI switch and a TESmart KVM solve related but different problems. The right choice depends on whether you only need to change video sources or also want one keyboard, mouse, and USB setup shared across multiple computers.
| Setup Need | Better Fit | Why It Matters |
|---|---|---|
| TV plus soundbar with several HDMI sources | HDMI switch | Simpler video switching while eARC stays direct to the audio device |
| Two or more computers sharing one display | TESmart KVM | Shares display plus keyboard, mouse, and USB peripherals |
| Gaming PC plus work laptop on one monitor | TESmart KVM | Reduces cable swapping and keeps desk controls centralized |
| Streaming boxes and consoles only | HDMI switch | USB sharing is usually unnecessary |
Choose a KVM when you need control, not just video. For example, a desk with a work laptop, gaming PC, webcam, keyboard, mouse, and an external display is a stronger fit for a kvm switch switch than a basic HDMI selector. A living-room setup with a console, streaming player, and Blu-ray player usually benefits more from a straightforward HDMI switch.
If a current coupon is available, grab the code before you check out. We do not recommend choosing a model based on discount alone, but a code can make the better-matched unit easier to justify.
USB 3.0, USB 3, USB 2.0, RS232, and Thunderbolt Port Checks
HDMI and eARC get most of the attention, but USB support is where many KVM setups either feel smooth or frustrating. Before buying, list every USB device you expect to share.
Use these checks:
- Keyboard and mouse: Usually fine on usb 2.0, but gaming peripherals and special software features may be picky.
- Webcam and capture devices: More likely to need usb 3.0 or usb 3 bandwidth.
- External drives: Use faster USB paths only if the KVM and cables support them end to end.
- Audio interfaces and DACs: Test for pops, dropouts, or reconnect delays after switching.
- Serial control: If you use automation, signage, or AV control gear, confirm rs232 support on the exact model.
- Laptop docks: A thunderbolt port can carry display, data, and power on compatible systems, but that does not mean every HDMI KVM will handle a docked laptop the same way.
The important distinction is that USB speed labels are not interchangeable in real use. A device that works on usb 2.0 may still reconnect slowly. A webcam that needs usb 3.0 may fall back to lower quality or fail if the path is limited. If you are building a professional desk, match the KVM to the highest-bandwidth peripheral you rely on daily.
8K Monitor and 8K Resolution Setup Notes
If you plan to use an 8k monitor or 8k resolution source, treat the display chain as a system. The source, switch, cable, display input, and selected display mode all need to support the same signal requirements. One weak link can force a lower resolution, lower refresh rate, or reduced color format.
For an 8K-focused setup:
- Confirm the TESmart model lists the resolution and refresh rate you actually want.
- Use HDMI cables rated for the bandwidth required by your display mode.
- Avoid unnecessary adapters between the source and display.
- Keep firmware updated on the TV, monitor, GPU, console, and audio device.
- If the display flickers, test the source directly into the screen before blaming the switch.
The eARC connection should still remain between TV and audio device. Your high-resolution sources can run through the switch into the display, while the TV sends audio back over eARC. That separation keeps the kvm switch switch from becoming responsible for both high-bandwidth video and audio return behavior at the same time.
Step-by-Step Setup and Troubleshooting
Follow this order when wiring a TESmart HDMI or KVM setup. It helps isolate problems before the cable bundle becomes hard to read.
- Update firmware first. Check the TV, soundbar or AVR, computer, console, and dock.
- Connect eARC directly. TV eARC port to soundbar or AVR eARC port.
- Test TV audio apps. Open a built-in TV app and confirm sound reaches the audio system.
- Add one source to the switch. Connect a console or computer through the TESmart device to the TV or monitor.
- Confirm video mode. Check resolution, refresh rate, HDR, and color settings on the source and display.
- Confirm audio output. Set the TV to pass audio to the eARC device, then test stereo and surround content you already own.
- Add USB devices last. Keyboard, mouse, webcam, storage, or audio interfaces should be added one at a time.
- Label cables. Mark source, display, USB, and eARC cables so future troubleshooting is quick.
If something breaks after switching inputs, try these fixes:
- Power-cycle the display and switch after all cables are connected.
- Turn CEC off on one source at a time to find the device causing control conflicts.
- Set a fixed display resolution instead of auto-detect while testing.
- Swap in a shorter HDMI cable for the longest run.
- Test each source directly into the TV or monitor.
- Remove USB hubs until the core keyboard and mouse path is stable.
For a broader background on what these devices do, the KVM switch entry is helpful, but always trust the product specifications for the exact TESmart model you are buying.
Who This TESmart Setup Suits Best
A TESmart HDMI or KVM setup is a strong fit if you want fewer cables, faster source changes, and one clean control point. It is especially useful for hybrid work desks, gaming rooms, creator setups, and TV areas where several HDMI devices compete for limited display inputs.
It suits you if:
- You use one monitor for a work laptop and personal desktop.
- You want keyboard and mouse sharing without unplugging cables.
- You have multiple HDMI sources feeding a TV or monitor.
- You want to keep HDMI eARC working through a TV and soundbar or AVR.
- You care about stable EDID, resolution, and peripheral behavior.
It may not be necessary if:
- You only have one HDMI source.
- Your TV already has enough inputs and you do not share USB devices.
- Your main goal is audio extraction rather than source switching.
- You need a niche feature that is not listed on the exact product page.
Before buying, compare the product specs against your real devices, then use the TESmart discount page for the current code and store pricing. The best setup is not the most complicated one. It is the one that keeps HDMI eARC direct, switches only what needs switching, and gives every device the bandwidth and control path it actually needs.
Frequently asked questions
Can a TESmart HDMI switch pass HDMI eARC audio?
Some HDMI devices handle audio features differently, so check the exact TESmart model specifications before buying. In most setups, we recommend keeping eARC directly between the TV and soundbar or AVR, then using the switch for source video.
Do I need a TESmart kvm or a basic HDMI switch for a living-room setup?
Choose a basic HDMI switch if you only need to change between consoles, streamers, or media players. Choose a TESmart kvm if you also want to share a keyboard, mouse, USB devices, or computer control.
Will a kvm switch switch reduce my 8K resolution?
It can if any part of the chain does not support the display mode you select. Confirm the source, cables, switch, and display all support the same 8K resolution and refresh settings.
Is usb 3.0 necessary for a TESmart KVM setup?
It depends on your peripherals. Keyboard and mouse devices often work on usb 2.0, while webcams, capture devices, and external drives may need usb 3.0 or usb 3 bandwidth.
Why does HDMI CEC stop working after I add a switch?
CEC can become unreliable when several devices try to control power, volume, and inputs at the same time. Disable CEC on one source at a time, then keep it enabled only where it adds real convenience.