

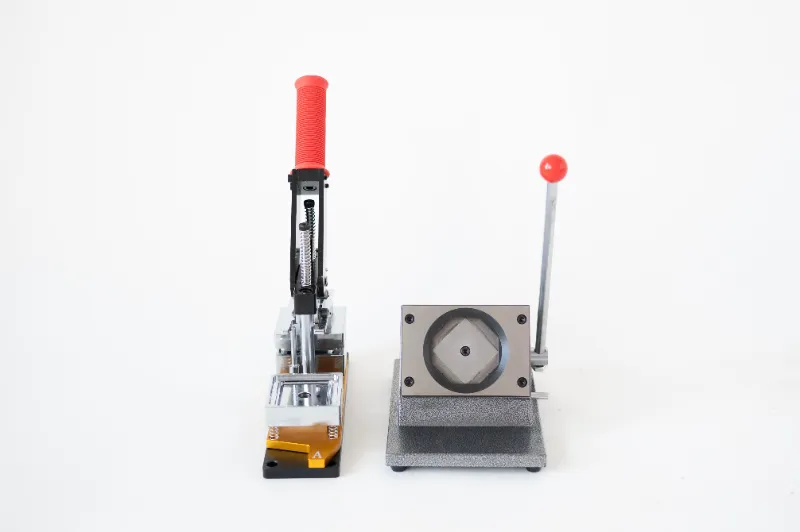
A photo magnet maker machine lets you turn phone photos into durable photo fridge magnets at home, usually in under five minutes per print once the machine is set up. You pick a photo, size it to the magnet format, and the machine bonds the image to a magnetic backing so it survives kitchen humidity and daily handling. Below is the honest version of how that works, what to check before you buy, and how to get prints that look like something you would pay for.
How magnet makers work and what the machine actually does
Magnet makers are not inkjet printers in the usual sense. They are heat and pressure units, sometimes paired with a small printer, that fuse a printed photo to a magnetic sheet. The image side is a laminated or coated finish, the back is a flexible magnetic layer that grips a steel fridge door.
Most home units run in one of three ways:
- Print-and-fuse: you print the photo on the supplied paper, then feed it through the machine with a magnetic backing sheet. Heat activates the adhesive and seals the edge.
- All-in-one: the machine handles image transfer onto a magnetic sheet in a single pass.
- Kit-based: a magnet making kit gives you the machine plus a starter set of photo sheets, magnetic backing, and a trimming tool, so you are not hunting for consumables mid-project.
The practical difference between models is mostly about throughput and edge quality. Cheaper units need you to trim by hand after fusing. Better ones cut cleanly and seal the border, which is what stops a magnet from delaminating after a few months of grabbing it with wet fingers.
Before buying anything, know your volume. If you are making 10 magnets for grandparents, a compact unit is fine. If you are making 100 for a wedding favor, you want the fastest model you can justify and a spare pack of magnetic photo prints on hand.
Setup and first print: what to expect
Setup is the part most reviews skip, and it is where beginners get frustrated. A first print usually takes 20 to 30 minutes because you are calibrating, not because the machine is slow.
- Read the photo size compatibility chart first. Magnet formats are rarely the same aspect ratio as a phone photo, so you will crop. If your machine maxes out at a small square and your photos are tall portraits, you will lose heads. Check this before purchase.
- Load the sheets the right way up. Coated side faces the image. Getting this backwards is the single most common first-print failure.
- Run one test print with a low-stakes photo. Use a shot you do not care about to confirm color density and crop before you commit to the good ones.
- Trim after fusing, not before. Trimming before heat-set can cause the magnetic layer to shift during fusing.
- Let prints cool flat. Piling warm magnets on top of each other can leave a slight curl.
Our advice: buy one extra pack of magnetic photo prints with your machine. You will use them during calibration, and running out mid-project is the fastest way to stall a gift-making session.
Photo size compatibility: match the magnet to the photo
This is the spec that decides whether you are happy with your machine. Photo size compatibility is not just about maximum dimensions, it is about which of your real photos will fit without awkward cropping.
A quick way to think about it:
| Magnet format | Best for | Watch out for |
|---|---|---|
| Square | Phone photos, group shots, framed portraits | Wide landscapes lose the edges |
| Portrait rectangle | Standard phone shots, single-subject portraits | Tight crops on faces if you center badly |
| Wide rectangle | Landscapes, travel shots, two-person photos | Tall portraits need heavy cropping |
Two practical rules:
- Shoot for the crop. When you take a photo you intend to use, leave a little breathing room around the subject so you have slack when you crop to the magnet shape.
- Keep the subject centered. Off-center subjects in a square frame often lose an arm or the top of a head once trimmed.
If most of your photos are vertical phone shots, favor a portrait or square format machine rather than a wide one. This sounds obvious and people still get it wrong.
Print quality tips that actually change the result
Print quality on a magnet maker comes down to four things: source resolution, color profile, paper, and heat settings.
- Use the full-resolution original. Screenshots and messaging-app copies are compressed and will look soft when printed at magnet size. Pull the original from your camera roll or cloud backup.
- Do not over-brighten. Screens look brighter than print. Lift exposure slightly, but resist heavy filters, which tend to band on coated magnetic sheets.
- Stick to the brand's sheets. Third-party paper can have a different coating thickness, which changes how the heat fuses the image. If you want refills, use the supplies and refills sold for your model.
- Clean the platen. A dusty or smudged surface shows up as streaks. Wipe it between batches.
- Batch by brightness. Print similar-toned photos together so you are not repeatedly adjusting settings mid-session.
The finish matters more than people expect. Glossy magnetic photo prints pop on a fridge but show fingerprints. Matte hides smudges and looks better in a mixed set of photos. Many buyers end up ordering a magnet photo set in one finish just to compare before committing.
Kit contents explained: what you actually need
Retail pages list six to twelve items in a box, and not all of them are useful. Here is what generally matters.
- The machine itself. Heat and pressure consistency is the quality differentiator.
- Starter photo sheets. Expect enough for a dozen or so prints, not a hundred.
- Magnetic backing sheets. These are the consumable you will reorder most.
- Trimming tool or cutter. A clean edge is the difference between homemade and handmade.
- Cropping guides or templates. Underrated. They avoid wasted sheets.
- Carry case or storage tray. Nice, not essential.
What is often missing and worth buying separately: extra magnetic backing, a lint-free cloth, and a second pack of photo sheets. A magnet maker machine with a small starter pack is the right call only if you plan to make fewer than about twenty magnets.
If you want the version of this that covers preparation and use in one purchase, a kit-built photo magnet maker machine is the simpler path. You can also check the current offer before adding consumables, since the running promotion applies to orders broadly.
Product comparison: which option fits your project
People search for a magnet maker and usually mean one of three different things. This table separates them.
| Option | Best for | Trade-off |
|---|---|---|
| magnet maker (basic unit) | Occasional gifts, small batches | You buy sheets and backing separately |
| magnet maker machine (full unit) | Regular use, larger batches, sharper edges | Higher upfront cost |
| magnet making kit | First-timers who want everything in one box | Starter consumables run out fast |
| photo fridge magnets (pre-made prints) | No machine, gifting only | No customization of your own photos |
A note on the last row: if you only need a handful of finished magnets, ordering ready-made photo fridge magnets beats buying equipment. Buy the machine when you want to keep making them.
Two more buying checks:
- Refill availability. Confirm the magnetic sheets and photo sheets are stocked, and roughly what they cost per print. Consumables decide your real cost per magnet.
- Shipping and delivery. Print supplies are bulky and sometimes ship separately from the machine. If you have a date to hit, say a birthday, order with margin.
- Returns and warranty. Ask whether opened consumables are returnable. Most stores say no, which is another argument for buying a small starter pack first.
- Customer support options. A support line that answers questions about heat settings is worth more than a bigger box.
For current pricing and the running discount, grab the code here before you order. It is one of the few levers that meaningfully changes the math on a first machine.
Care, mistakes, and who this suits
Finished magnets need almost no maintenance. Wipe with a damp cloth, avoid soaking, and keep them off surfaces hotter than a normal kitchen (a radiator or the top of a stove will warp the magnetic layer). Do not stack them face to face for long storage, since the coated surface can scuff.
The mistakes we see most often:
- Cropping after printing instead of before
- Using compressed images from chat apps
- Over-brightening photos before print
- Trimming before fusing
- Running out of backing sheets halfway through a gift batch
Who it suits: families making grandparent gifts, wedding and party favor makers, small craft sellers, and anyone with a photo library they have never printed. Who it does not suit: someone who wants five magnets once. In that case, order magnetic photo prints already made and skip the equipment entirely.
If you are ready to buy, look at the magnet maker as a starter and the photo magnet machine if you expect volume. Either way, check the latest price and offer first so you know what you are actually paying before you commit.
 Shopping at Memory Magnets Co.? See today's verified Memory Magnets Co. discount code
Frequently asked questions
How long does a photo magnet maker machine take per print?
Most home units take a minute or two per magnet once they are warmed up, plus trimming time. Plan on 20 to 30 minutes for your very first print, which is mostly setup and calibration rather than machine speed.
What photo sizes work with a magnet maker?
It depends on the model's maximum format and aspect ratio. Square and portrait formats suit phone photos best, while wide formats suit landscapes. Check the compatibility chart before buying if most of your photos are vertical.
Do I need a magnet making kit or just the machine?
A kit makes sense for a first purchase because it includes photo sheets, magnetic backing, and a trimming tool. If you already know your volume and format, buying the machine plus a separate pack of supplies is usually cheaper per magnet.
Can I use any paper or backing sheets with a magnet maker machine?
Use the supplies and refills made for your model where possible. Coating thickness affects how the heat fuses the image, and mismatched sheets are a common cause of delaminating edges.
Why do my magnetic photo prints look soft or washed out?
Usually the source file is compressed, such as a copy pulled from a messaging app, or the image was over-brightened before printing. Use the original full-resolution photo and keep edits light.
How should I store and clean photo fridge magnets?
Wipe with a damp cloth and avoid soaking them or leaving them near strong heat. Store finished magnets flat rather than stacked face to face so the coated surface does not scuff.