
How to Properly Install Vents in a Shipping Container for Ventilation

How to Properly Install Vents in a Shipping Container for Ventilation
Shipping container vents create the cross-flow ventilation needed to prevent condensation, mold, and heat buildup inside steel boxes that were designed to be watertight. Proper installation requires cutting precise openings in corrugated steel, sealing against leaks, and positioning vents to maximize natural airflow. Whether you're converting a container into a workshop or setting up a 20ft 1-trip conex shipping container for storage, ventilation keeps your investment dry and functional.
We've tested passive louvers, turbine vents, and solar-powered fans across dozens of container projects. This guide walks you through the entire installation process, from choosing the right vent type to avoiding the common mistakes that cause rust and leaks.
Why Shipping Container Ventilation Matters
Steel containers trap heat and moisture. A sealed box sitting in direct sun can hit 120°F inside, while temperature swings create condensation that drips onto walls and cargo. We've seen unventilated containers develop surface rust within six months.
Proper ventilation solves three problems:
- Moisture control – Cross-flow pushes humid air out before it condenses on cold steel
- Temperature regulation – Hot air escapes through high vents while cooler air enters low openings
- Air quality – Fresh air dilutes VOCs from paint, insulation, or stored materials
For shipping container homes, ventilation also meets building codes that require minimum air changes per hour. Passive vents work for storage; living spaces usually need powered fans or HVAC integration.
Choosing the Best Shipping Container Vents for Your Project
Different vent types suit different applications. We match vent style to container use, not just budget.
Passive Louver Vents
Stamped aluminum or stainless louvers with insect screens cost $20 to $60 per vent. They require no power and last decades, making them ideal for storage containers and workshops. Install at least two (one low on each end) to create cross-flow. Shipping container vents in this category are the most common choice for basic climate control.
Turbine and Whirlybird Vents
Wind-driven turbines mount on the shipping container roof and spin to pull hot air out. They work well in open yards with consistent breeze but add roof penetrations that must be sealed carefully. Expect to pay $40 to $100 per unit.
Solar-Powered Exhaust Fans
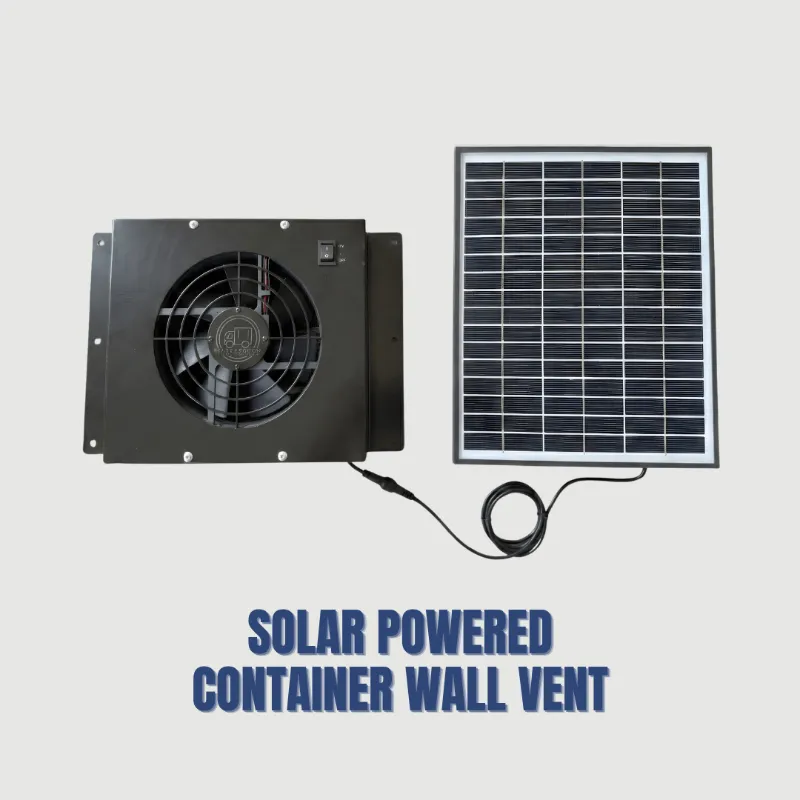
A shipping container ventilation fan with a built-in solar panel runs $150 to $400 but moves 10 to 20 times more air than passive vents. We install these in containers used as mobile offices, grow rooms, or equipment sheds where active cooling matters. Pair solar fans with indoor solar lights for a completely off-grid interior setup.
Shipping Container Vent Kits
Pre-packaged kits include matched intake and exhaust vents, fasteners, and sealant. A complete shipping container vent kit costs $80 to $200 and simplifies ordering, though you'll pay a premium over buying components separately.
Step-by-Step Installation Process
We follow this sequence on every container project to ensure watertight, effective ventilation.
1. Plan Vent Placement
Position intake vents low (12 to 18 inches from the floor) on the prevailing-wind side. Place exhaust vents high (12 inches below the roofline) on the opposite end. This vertical and horizontal offset creates a thermal siphon that moves air even on calm days.
Wall vents are easier to install than roof vents and less prone to leaks. If you must penetrate the roof, place vents along the high ridges of corrugation rather than in valleys where water pools.
2. Cut the Opening
Mark the vent outline with a marker, staying inside the corrugation ridges for structural support. We use:
- Angle grinder with cut-off wheel – Fast but throws sparks; wear safety glasses and clear flammable materials
- Jigsaw with metal blade – Slower but more controlled for precise curves
- Hole saw – Best for small circular vents under 4 inches
Drill pilot holes at corners, then cut along your marks. Deburr all edges with a file or flap disc to prevent cuts and improve gasket seal. For containers destined to become shipping container homes, measure twice—building inspectors will check that penetrations don't compromise structural members.
3. Prep and Prime Exposed Steel
Bare steel rusts within hours in humid climates. Immediately after cutting:
- Wire-brush or sand the cut edges to bright metal
- Wipe with acetone or denatured alcohol
- Apply cold-galvanizing compound or rust-inhibiting primer within 30 minutes
This three-minute step prevents the rust creep that eventually lifts paint and breaks sealant bonds.
4. Install the Vent
Most vents mount with self-tapping sheet-metal screws through pre-drilled flange holes. Before you drive screws:
- Run a bead of polyurethane or butyl sealant around the opening perimeter
- Press the vent flange into the sealant, squeezing out air pockets
- Secure screws in a star pattern to distribute clamping force evenly
- Smooth excess sealant with a putty knife
For roof-mounted turbine vents, add a second bead of lap sealant over the flange edge after installation. Check current pricing and grab our discount code before ordering vent hardware and sealant supplies.
5. Test for Leaks
Spray the perimeter with a hose for five minutes while someone inside watches for drips. Fix leaks immediately—sealant bonds poorly to wet or rusty steel. Retest after 24 hours of cure time.
Common Mistakes to Avoid
We've repaired dozens of botched vent installs. Here's what goes wrong most often:
- Single vent only – One opening creates no airflow; you need intake and exhaust
- Vents on the same wall – Air short-circuits without traveling through the container
- Oversized openings – Cutting away too much corrugation weakens the structure; follow vent manufacturer templates
- Skipping primer – Exposed steel will rust and stain the exterior within weeks
- Silicone caulk – It doesn't bond to oily steel; use polyurethane or butyl products instead
For containers with a shipping container roof kit installed, coordinate vent placement with roof panel seams to avoid cutting through new waterproofing.
Enhancing Ventilation in Extreme Climates
Passive vents may not suffice in very hot or humid regions. We've added these upgrades in challenging environments:
| Climate | Solution | Cost Range |
|---|---|---|
| Hot desert | Solar exhaust fan + reflective roof coating | $200–$500 |
| Humid coastal | Dehumidifier + louvered vents on all four walls | $300–$700 |
| Cold winter | Insulated vent covers + condensation drip pans | $100–$250 |
In freezing climates, closeable vents let you throttle airflow to prevent pipes from freezing. Container covers also insulate the roof, reducing the temperature swings that drive condensation.
Maintenance and Long-Term Care
Inspect vents twice a year:
- Clear insect screens with a stiff brush or compressed air
- Check sealant for cracks; reapply if you see gaps or peeling
- Verify that louver blades move freely (they can bind with dust or corrosion)
- Tighten screws if the vent rattles in wind
Solar fan motors last five to eight years. When performance drops, compare current models and pricing before replacing—efficiency improves every generation.
For mobile containers on shipping container wheels, check vent fasteners after every move. Road vibration can loosen screws over time.
Who Should Install Their Own Vents
DIY installation makes sense if you:
- Own an angle grinder or jigsaw and feel comfortable cutting steel
- Have the container on your property (not at a depot or job site with restrictions)
- Need basic passive ventilation rather than integrated HVAC
Hire a professional if your project involves:
- Code-compliant ventilation for permitted shipping container homes
- Roof penetrations on a container under warranty
- Integration with existing electrical or climate systems
A typical pro install runs $150 to $300 per vent including labor, which is reasonable for complex or high-consequence projects. For straightforward storage containers, the best shipping container vents are ones you install yourself with patience and the right sealant.
Frequently asked questions
How many vents does a shipping container need?
Install at least two vents—one low for intake and one high for exhaust—on opposite ends of the container. Larger containers (40ft) or those in hot climates benefit from four vents to create stronger cross-flow.
Can I install shipping container vents without cutting the walls?
No, effective ventilation requires openings in the steel shell. Pre-cut vent panels exist for some container models, but most installations require cutting and sealing new openings.
What size hole do I cut for a standard container vent?
Most passive louver vents need a 6-inch by 10-inch rectangular opening, but always follow the template provided by your specific vent manufacturer. Cutting oversized holes weakens the structure and creates gaps that are hard to seal.
Do I need powered fans or will passive vents work?
Passive vents work well for storage and workshops in moderate climates. Living spaces, hot climates above 90°F, or containers holding moisture-sensitive goods usually need solar or electric exhaust fans to move enough air.
How do I stop my container vents from leaking?
Use polyurethane or butyl sealant (never silicone) under the vent flange, prime all cut steel edges immediately, and install vents on vertical walls rather than the roof whenever possible. Test with a hose and reseal any leaks before they cause rust.
Where can I buy shipping container vents for sale at a discount?
We stock a range of passive and solar-powered vents with our current 10% off sitewide offer. Check our USA Containers discount code page for the latest pricing and free shipping thresholds.