

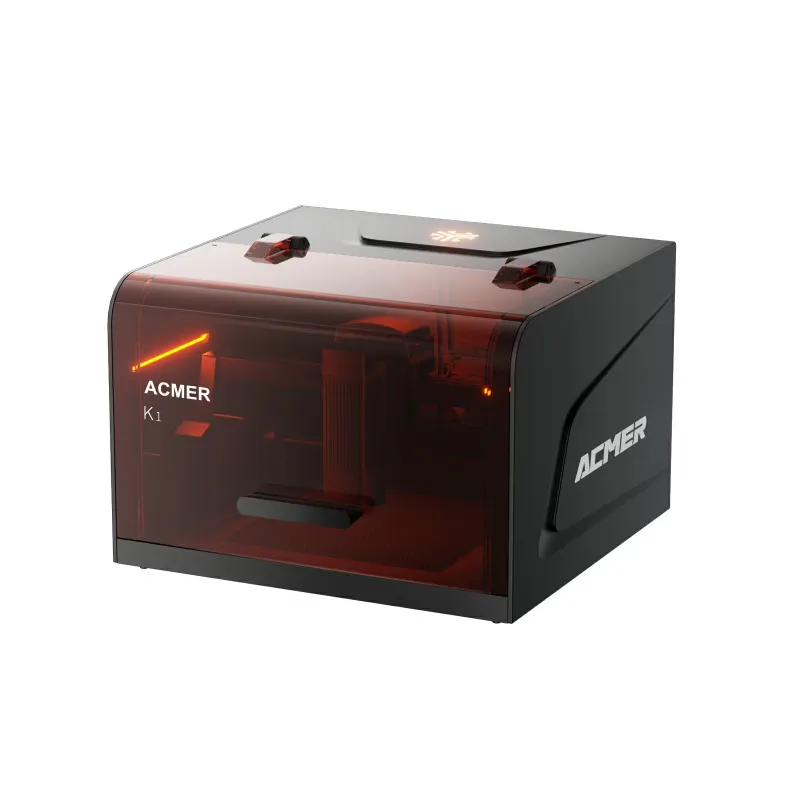
Getting Your Acmer K1 Laser Engraver Ready to Work
The acmer k1 laser engraver delivers reliable diode laser performance once you complete a proper initial setup. We tested the full assembly and calibration process to identify the steps that matter most for accurate engraving and cutting results. This guide walks you through unpacking, mechanical assembly, software installation, and the calibration routines that prevent wasted material and misaligned burns.
Unboxing and Physical Assembly
Start by inspecting all components against the packing list. The K1 ships with the laser head assembly, frame rails, controller board, power supply, protective cover, and hardware kit. Check for shipping damage before you begin assembly.
- Attach the vertical gantry posts to the base frame using the included hex bolts and ensure each corner sits flush
- Slide the X-axis rail onto the gantry uprights and tighten the mounting brackets evenly
- Install the laser head carriage onto the rail system and verify smooth horizontal movement
- Connect the stepper motor cables to the labeled ports on the controller board
- Route the laser driver cable along the cable chain and secure it with the provided clips
- Mount the controller enclosure to the side bracket and connect the power supply
Before powering on, confirm all cable connections are seated fully and no wiring touches moving parts. The assembly typically takes 30 to 45 minutes when you follow the printed manual.
Installing Software and Connecting Your Machine
The acmer k1 laser engraver works with LightBurn, LaserGRBL, and the manufacturer's own software. We recommend LightBurn for its intuitive interface and advanced features. Download the trial or full version, then install the Acmer K1 device profile from the manufacturer's support page.
Connect the K1 to your computer using the USB cable. Power on the machine and wait for the controller board to initialize. In your software, select the correct COM port and confirm the connection by sending a simple status query. The console should display firmware version and machine dimensions.
Configure these essential settings in your software workspace:
- Work area dimensions to match the K1's build volume
- Laser power range and PWM frequency per the manual
- Homing direction and axis orientation
- Steps per millimeter for X and Y axes
Save the configuration as a profile so you can quickly reload it if you switch machines or reinstall software. Grab the code if you are adding accessories or upgrading to the acmer p2 laser engraver for a larger work area.
Mechanical Calibration for Precision
Accurate engraving depends on square frames and tight belts. Start with mechanical calibration before running your first job.
Frame Squareness: Measure diagonals from corner to corner across the work area. Both measurements should match within 2 mm. If they differ, loosen the gantry mounts and shift the frame until diagonals equalize, then retighten.
Belt Tension: Press the center of each belt. Proper tension allows 5 to 8 mm of deflection under firm pressure. Over-tensioned belts strain motors and bearings, while loose belts cause backlash and wavy cuts. Adjust the tensioners on each axis until deflection feels consistent.
Laser Head Alignment: The laser beam must strike perpendicular to the work surface. Place a small square of masking tape on the bed and fire a low-power pulse. Raise the Z-height and fire again. If the two marks do not align vertically, adjust the laser module tilt screws until the beam travels straight down at all heights.
Focus Distance and Height Calibration
The K1 uses a fixed-focus lens that requires precise standoff distance. The included acrylic focus gauge shows the correct gap between lens and material.
- Place the focus gauge on your material
- Lower the laser head until the gauge slides snugly between lens and surface
- Lock the Z-axis carriage in place
- Remove the gauge and confirm clearance with a visual check
For materials of varying thickness, we recommend adding a Z-axis probe or adjustable bed. The acmer p3 48w laser cutter includes motorized auto-focus if you plan to work with thick wood, acrylic blocks, or stacked materials.
Test your focus by engraving a small square at different power levels. The sharpest line edges and deepest cut indicate optimal focus. If the beam appears wider than expected, recheck the standoff distance and clean the lens with a microfiber cloth and isopropyl alcohol.
Software Calibration and Test Patterns
After mechanical setup, run software-based calibration to fine-tune motion accuracy.
Axis Scaling: Draw a 100 mm square in your design software and engrave it onto cardboard. Measure the finished square with calipers. If dimensions are off, calculate the correction factor and adjust the steps-per-mm value in firmware or software settings. Repeat until your test square measures within 0.5 mm of the target.
Acceleration and Speed Tuning: The K1 ships with conservative acceleration values. Gradually increase max speed and acceleration in 10 percent increments while engraving a test grid. Watch for ringing, layer shifts, or rounded corners. Back off to the last stable setting.
Power Calibration: Create a power scale test with horizontal bars ranging from 10 percent to 100 percent laser output. Engrave on medium-density fiberboard or basswood. This reference card shows you which power levels produce visible marking versus cutting for different materials. Keep the card near your workspace.
Check the latest price to compare the K1 with the acmer mopa fiber laser auto-focus marking machine if you need to mark metals or anodized aluminum.
First Project and Ongoing Maintenance
Run a simple test engraving on scrap material to confirm all calibration steps. A 50 mm circle and a text block at 300 mm/min will reveal any remaining motion issues or focus problems.
Once your acmer k1 laser engraver produces clean results, document your final settings. Save software profiles, photograph belt tension and frame measurements, and note optimal focus distances for your most-used materials. These references make troubleshooting faster if settings drift over time.
Clean the lens and mirrors every 10 to 20 hours of operation. Inspect belts and wheels monthly for wear. Re-check frame squareness if you move the machine or notice alignment drift. Proper calibration turns the K1 into a dependable tool for both hobby projects and small-batch production work.
 Shopping at Ru Acmer? See today's verified Ru Acmer discount code
Frequently asked questions
How long does it take to calibrate the Acmer K1 laser engraver?
Mechanical calibration takes 20 to 30 minutes, including frame squaring and belt tensioning. Software calibration adds another 15 minutes for axis scaling and power tests. Budget about an hour for a thorough first-time setup.
Do I need to recalibrate after moving the machine?
Yes, transport can shift the frame and loosen belts. Check frame squareness and belt tension after any move, and re-run a dimensional test square to verify axis scaling remains accurate.
Can I use the K1 without LightBurn software?
The K1 works with LaserGRBL and the manufacturer's software, though LightBurn offers the most complete toolset. Free alternatives handle basic engraving but lack advanced features like camera alignment and variable power control.
What materials work best for calibration test cuts?
Cardboard and basswood provide clear burn lines for dimensional checks. Medium-density fiberboard shows power levels well. Avoid reflective or transparent materials during initial calibration.
How often should I clean the laser lens?
Clean the lens every 10 to 20 hours of cutting or whenever you notice reduced power or wider burn lines. Use isopropyl alcohol and a microfiber cloth, wiping from center outward in a spiral motion.
Does the Acmer K1 require different focus for engraving versus cutting?
The fixed-focus lens uses the same standoff distance for both. However, cutting thick material benefits from raising the focus point slightly into the material rather than at the surface.